Settings in the console
This page gathers what you set only from the console, because it belongs to the venue's network and devices: testing the printers, the orders screen, the Coordinator key and the password.
The other settings are the same in the console and in the panel: the floor, the kitchen, the bill rules, tips, the name, the language of the papers, the shifts. You change them anywhere, and the change reaches everywhere. They are explained in Floor and settings.
Where to find it: the Coordinator console → Floor and kitchen, Venue and Advanced
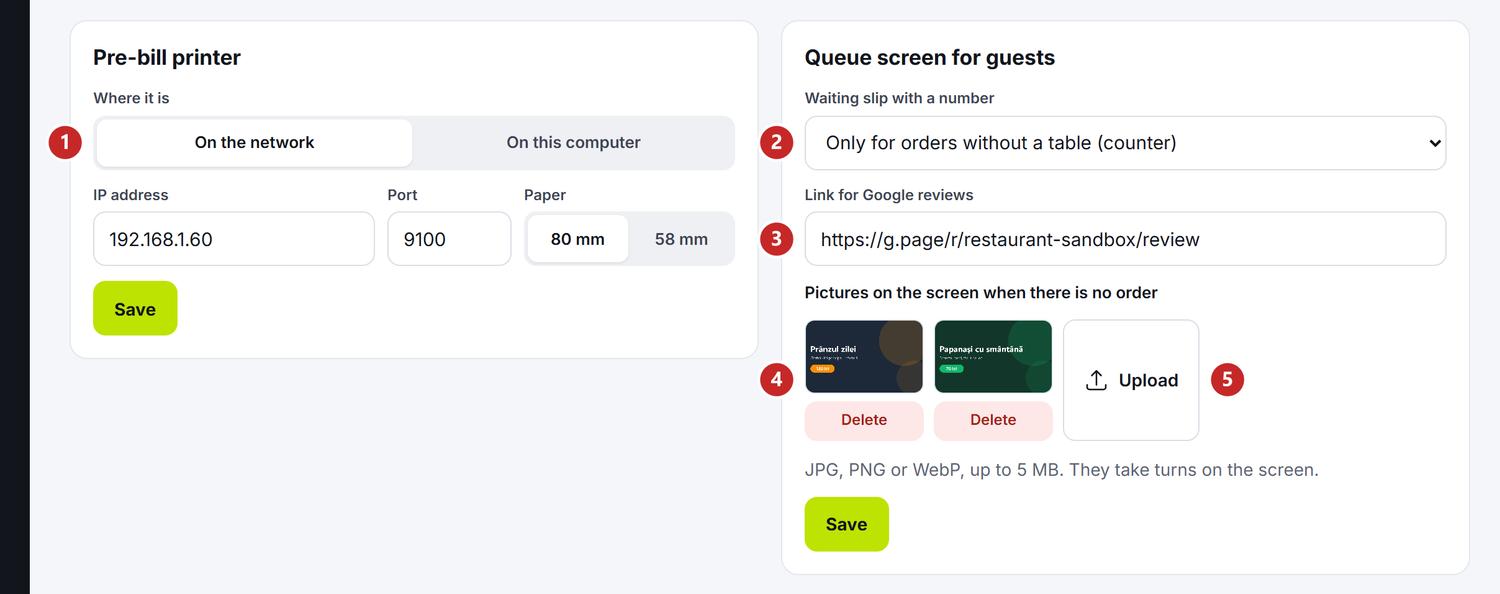
1 where the pre-bill printer is · 2 the waiting slip with a number · 3 the link for Google reviews · 4 the pictures on the screen · 5 Upload
To find and test a station's printer
The printer can be searched for on the venue's network from the panel too. The test print, before you save, is done only from the console.
- Floor and kitchen → Kitchen stations → Edit, on the station that prints.
- Under Station printer, Where it is → On the network.
- Press Find printers on the network. The Coordinator shows the printers on the venue's network that answer on port 9100.
- Press the right printer: the address and the port fill in by themselves.
- Test print prints a test page with what the form says now. If it came out, press Save.
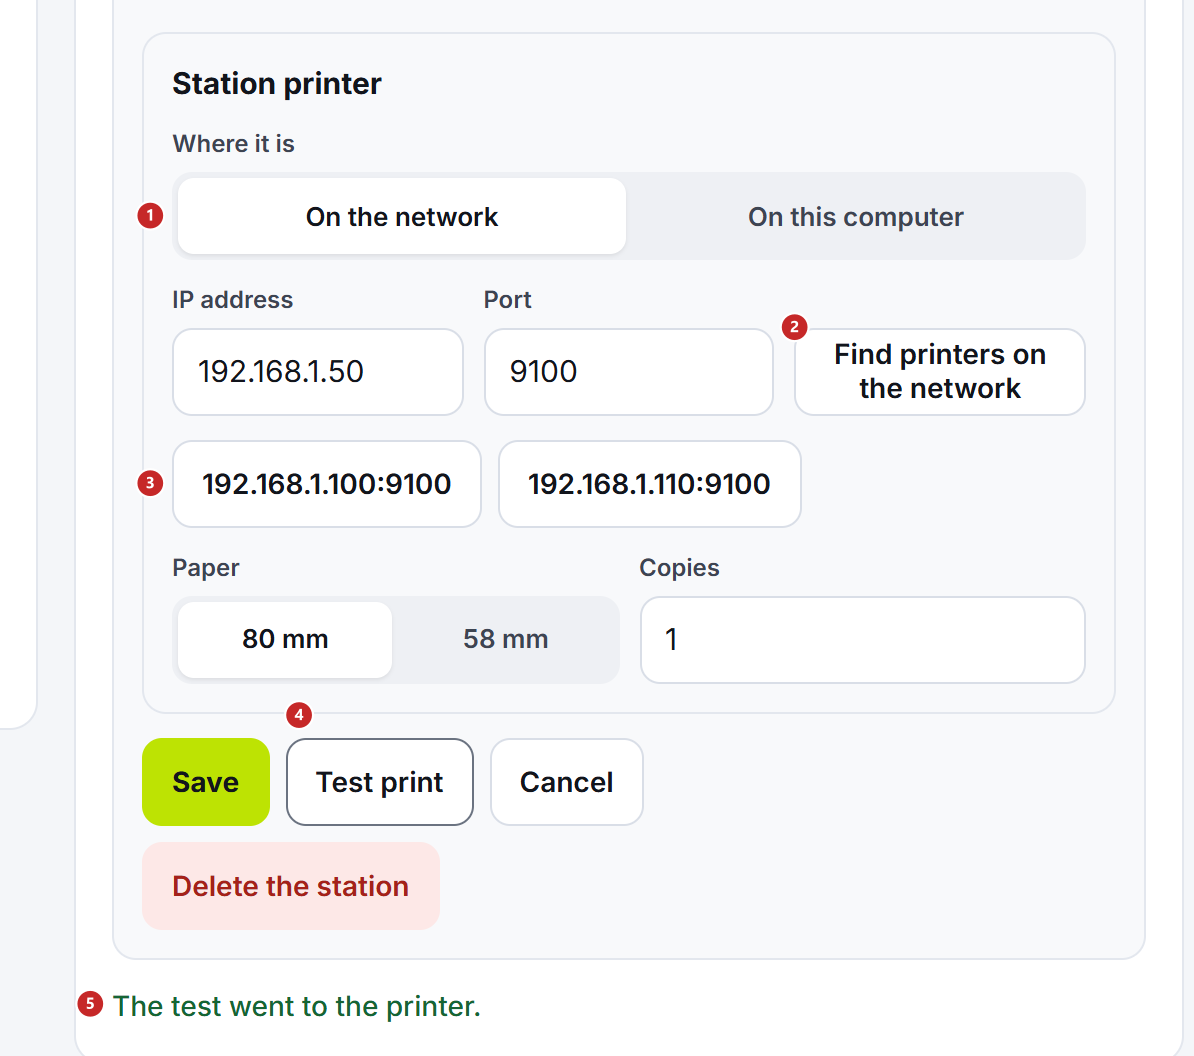
1 where the printer is · 2 Find printers on the network · 3 the printers found · 4 Test print · 5 the test went to the printer
A printer connected directly to the main register's computer is chosen under On this computer, from the list of printers installed in Windows.
The Pre-bill printer, on the Venue page, is chosen the same way, On the network or On this computer, but without search or test: type the address and the port, choose the paper and press Save.
The orders screen: the slip, the reviews, the pictures
On the Venue page, the Queue screen for guests card says what the counter guest gets.
The Waiting slip with a number is printed on the pre-bill printer, with the order number and a QR code to the “My order” page:
- Not printed — counter orders still get a number, on the orders screen, but no slip;
- Only for orders without a table (counter) — the slip comes out only for orders without a table;
- For every order — table orders get a number and a slip too, and the orders screen shows them as well.
The Link for Google reviews is the address of the venue's review page and starts with https://. A guest who gives 4 or 5 stars on “My order” gets the “Leave a Google review” button. Without the link, every guest writes their feedback only for the venue.
The Pictures on the screen when there is no order rotate on the orders screen while nobody is waiting: the menu of the day, an offer. Upload adds a JPG, PNG or WebP picture of up to 5 MB on the spot, and Delete removes it. Save keeps the slip and the review link.
What the guest sees — in The orders screen.
Advanced
The Advanced page has settings that are rarely needed: the main register sets them by itself. Change them only when support guides you.
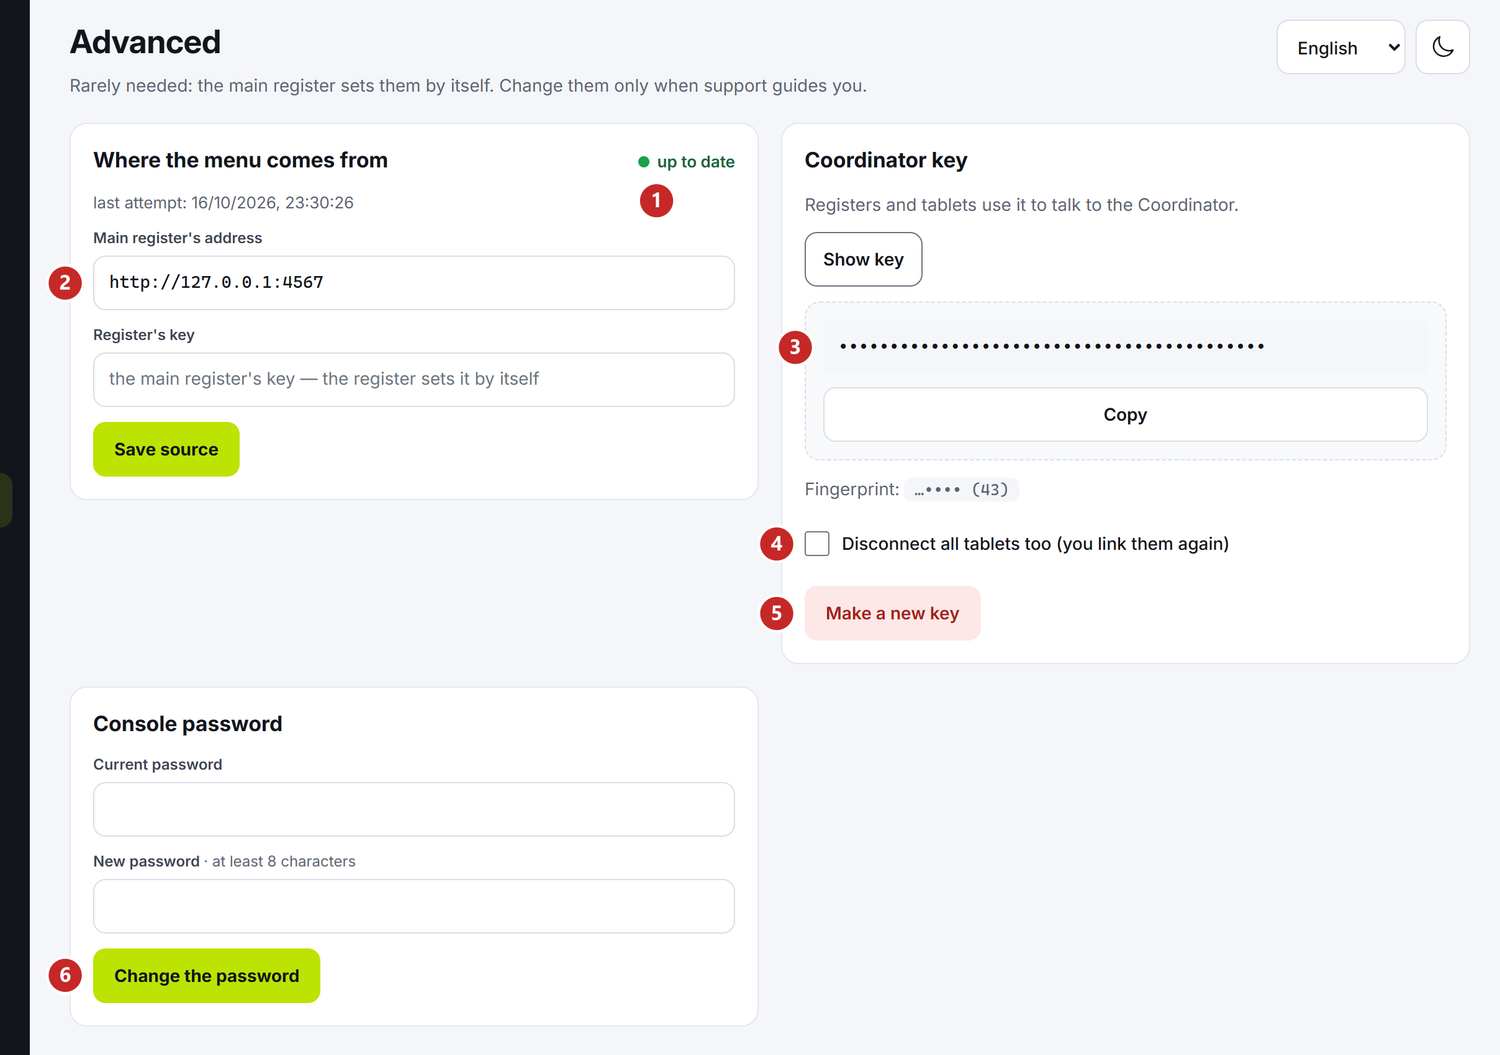
1 whether the menu is up to date · 2 where the menu comes from · 3 the Coordinator key (hidden in the screenshot) · 4 disconnect the tablets too · 5 Make a new key · 6 Change the password
Where the menu comes from — the Coordinator takes the menu from the main register, at the address and with the key the register gives it. The badge says whether the menu is up to date, coming now, not coming, out of date or not yet there. The fields are changed only with support, and Save source keeps them.
Coordinator key — registers and tablets use it to talk to the Coordinator. Show key displays it, and Copy copies it. The Fingerprint shows the last characters, so you can compare the key without revealing it.
Make a new key changes the key. Use it when you think the key reached someone it shouldn't. The main register links again by itself, and you link the other registers again with a PIN, from Registers, tablets and screens.
| Switch | What changes when you tick it | If you leave it unticked |
|---|---|---|
| Disconnect all tablets too (you link them again) | Together with the new key, the waiters' tablets disconnect too and have to be linked again | The tablets stay linked: they have their own keys |
Console password — type the Current password and the New password, of at least 8 characters, then Change the password. The console signs you out and you sign in with the new password.
What can confuse you
“No printer found on port 9100.” — the printer is off or not on the main register's network. Turn it on, check its cable or Wi-Fi and search again.
“The printer didn't answer: check the address, the port and that it's on.” — the test didn't reach the printer. Check the address and the port, then try again.
“The review link must start with https://.” — copy the whole link from the venue's page on Google.
“File too large (up to 5 MB).” — make the picture smaller and upload it again.
“The key can't be shown for this installation. Use “Make a new key”.” — a Coordinator installed with an old version didn't keep the key. Make a new one, then link the registers again.
Related pages
- Floor and settings — the rest of the venue settings, from the panel
- Registers, tablets and screens — how to link a register again after a new key
- The orders screen — the waiting slip and “My order”, as the guest sees them