Catalog and Product Management
The Manage Catalog module is the control center for your inventory, allowing administration of the product list, category hierarchy, and VAT rate associations directly from the Android terminal.
Accessing the Catalog
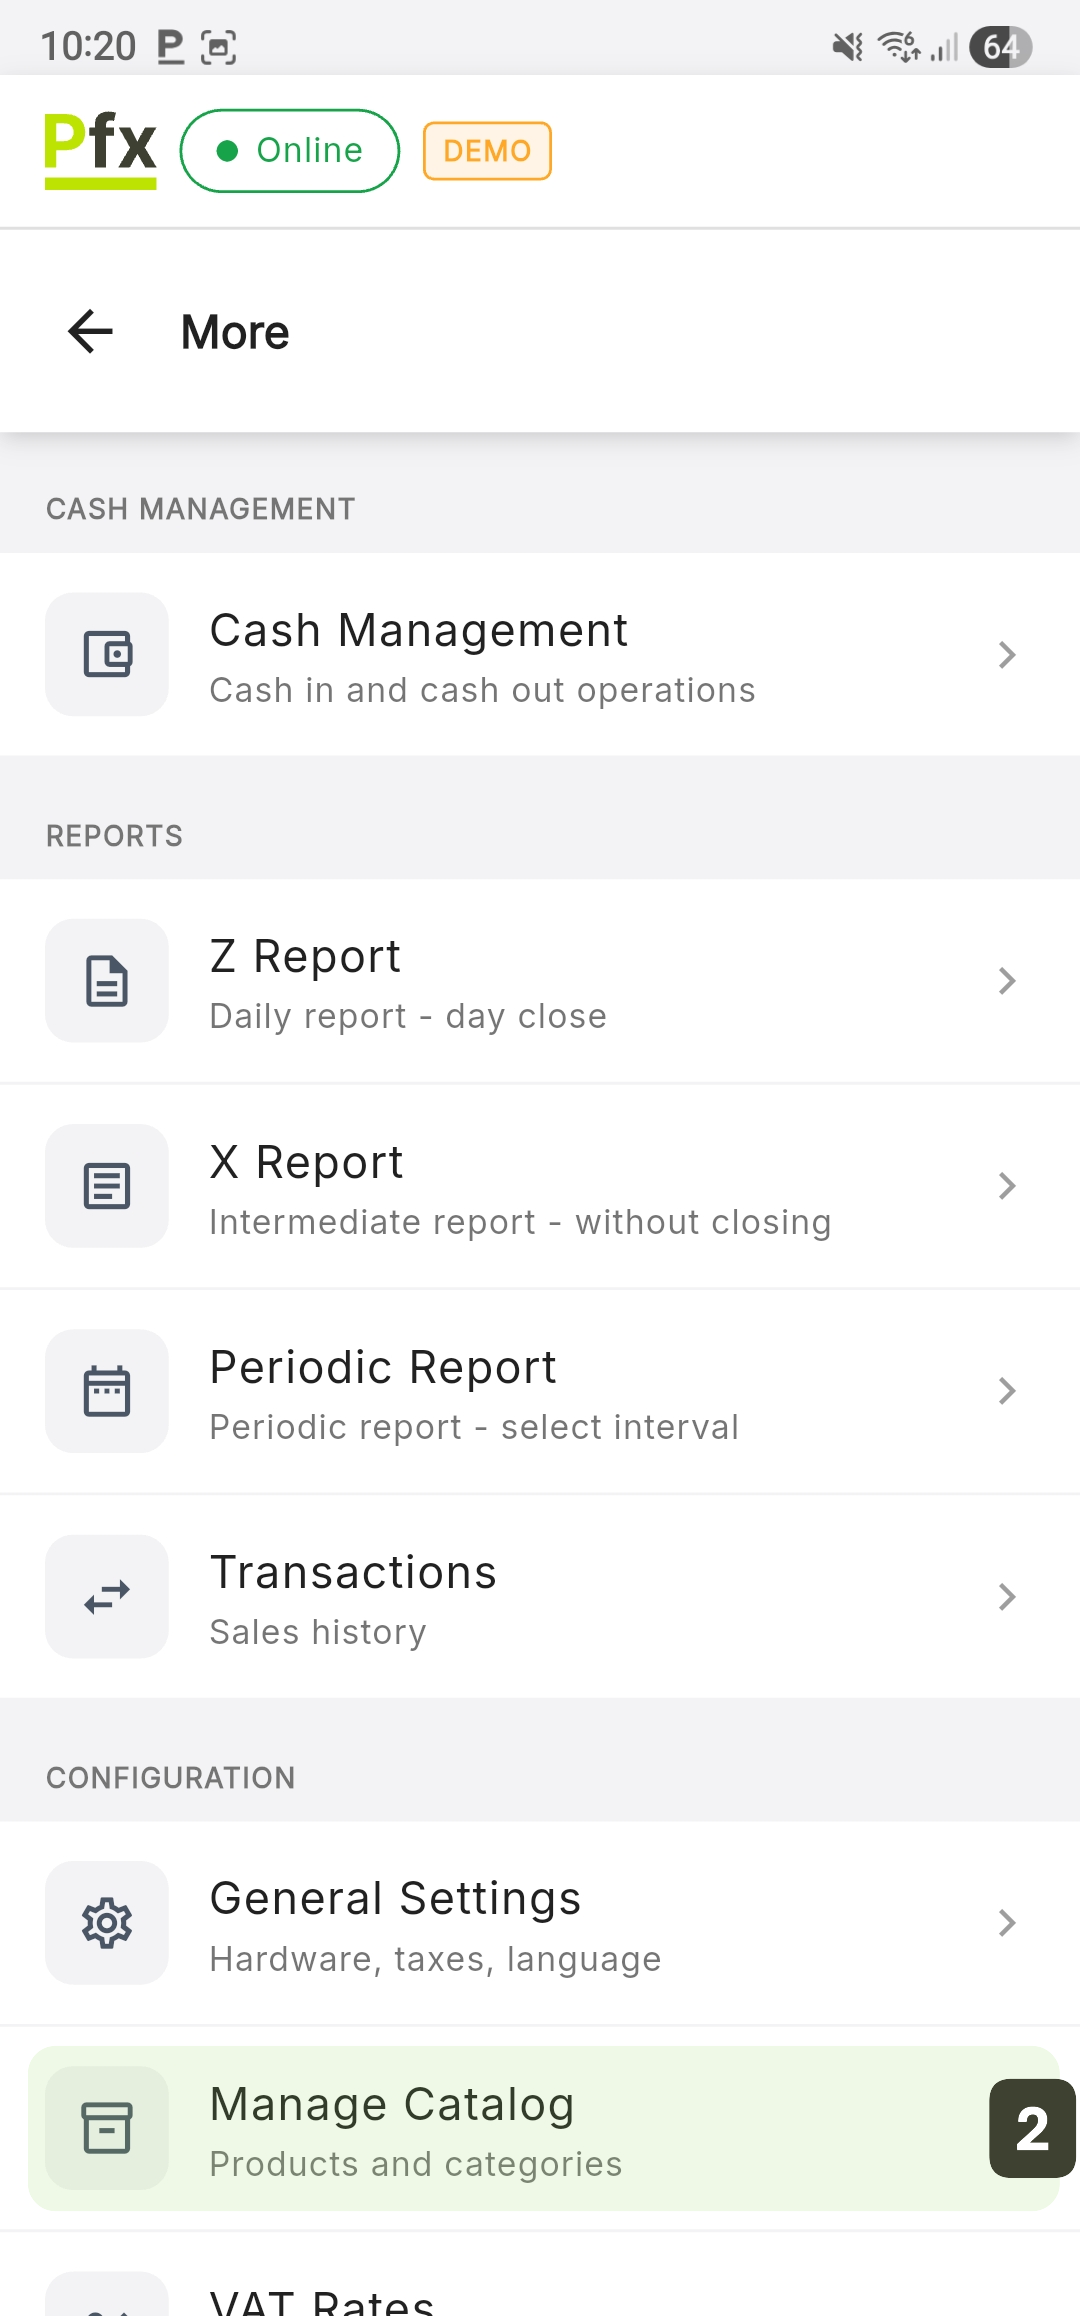
- Press the More button in the bottom navigation bar
- Select Manage Catalog
Editing functions require Administrator rights. Cashiers can view the catalog but cannot modify products.
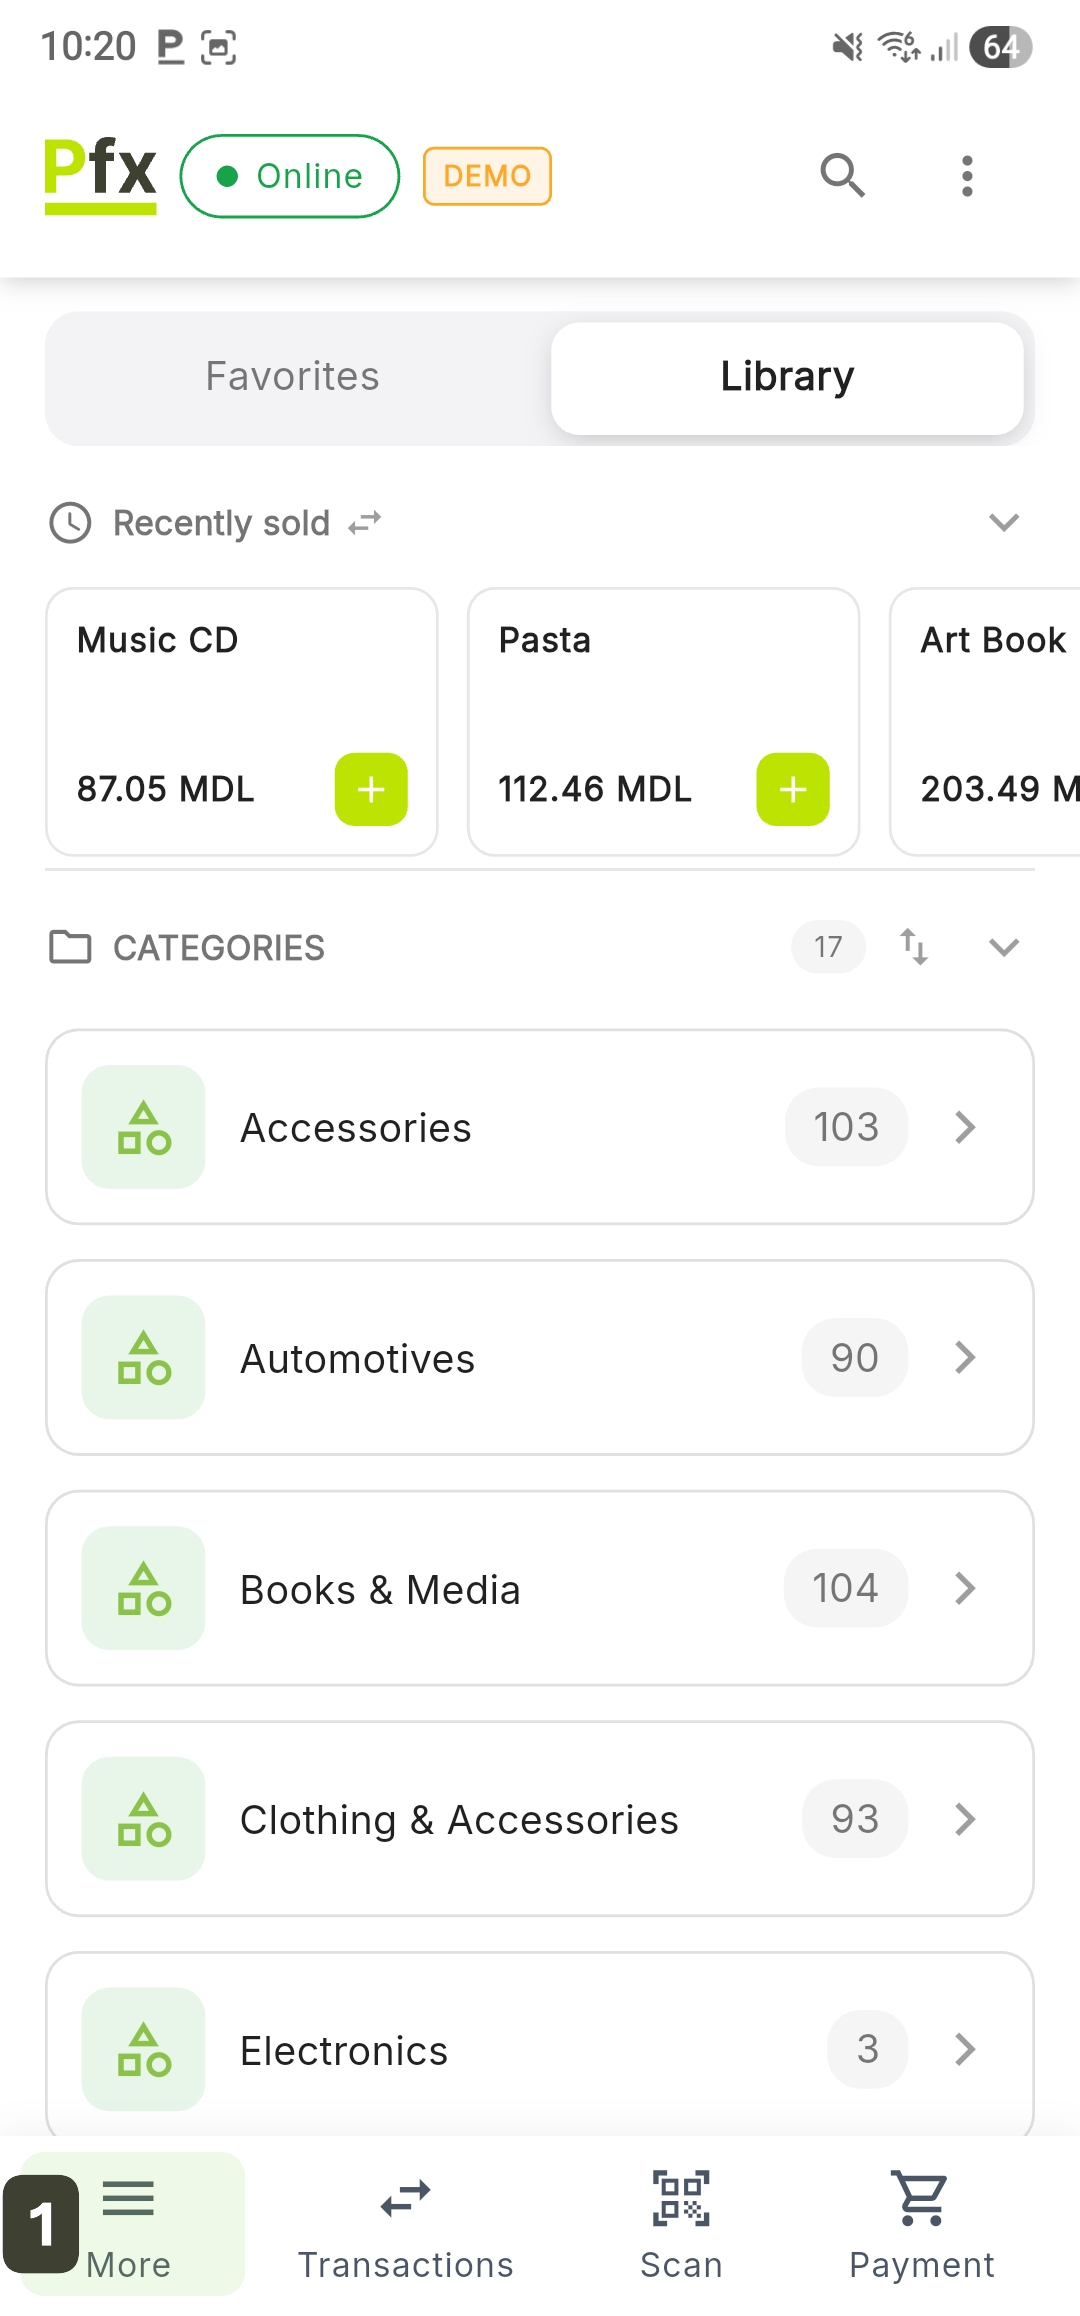
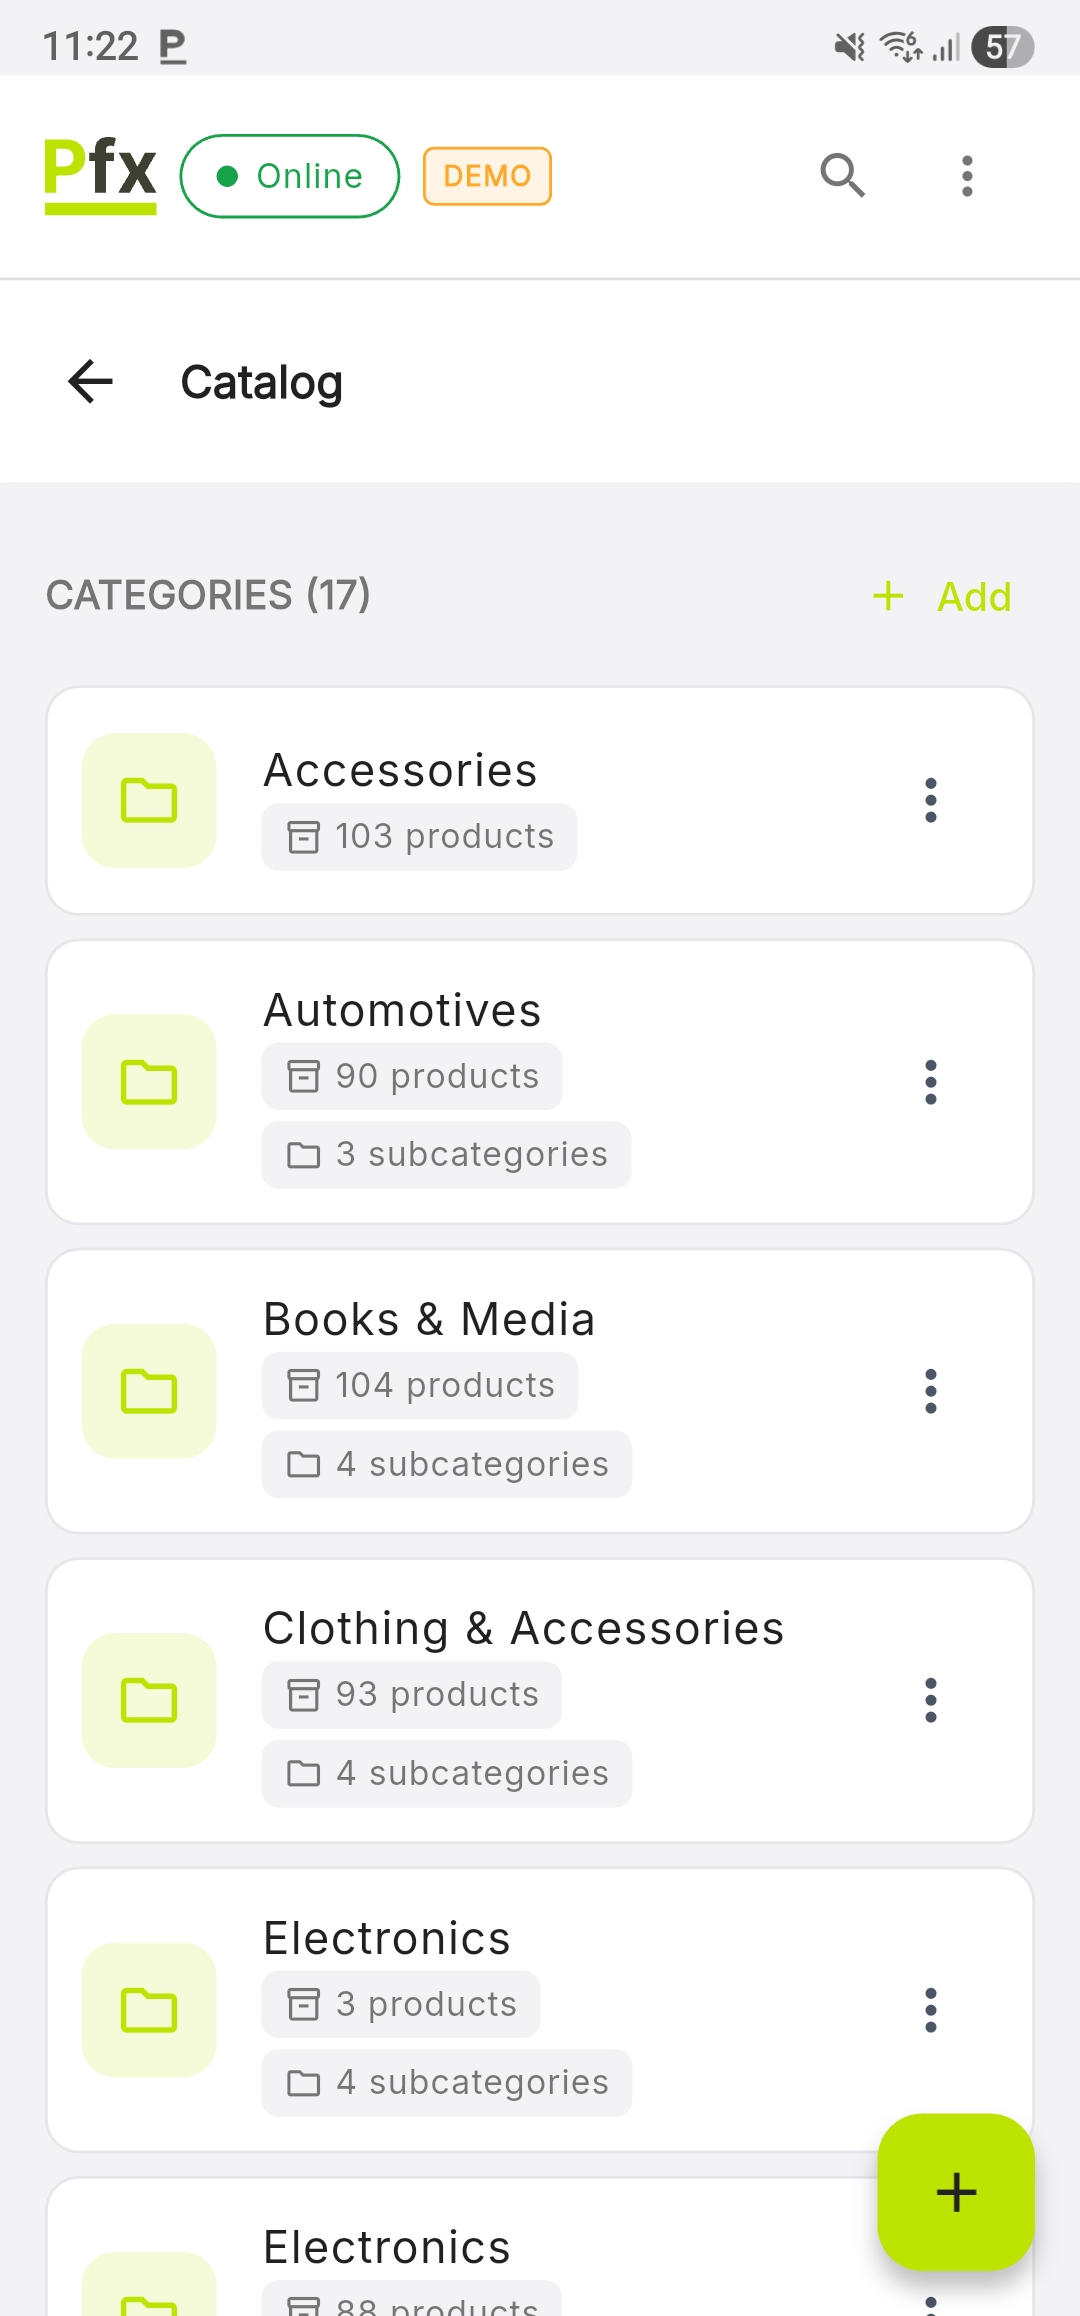
Catalog Interface
The administration screen is optimized for smooth navigation between product groups and individual items, providing quick access to creation functions.
| Element | Description |
|---|---|
| Search bar | Search products by name or barcode |
| Categories | Hierarchical navigation through categories and subcategories |
| Location Indicator | Indicator of current position in the hierarchy |
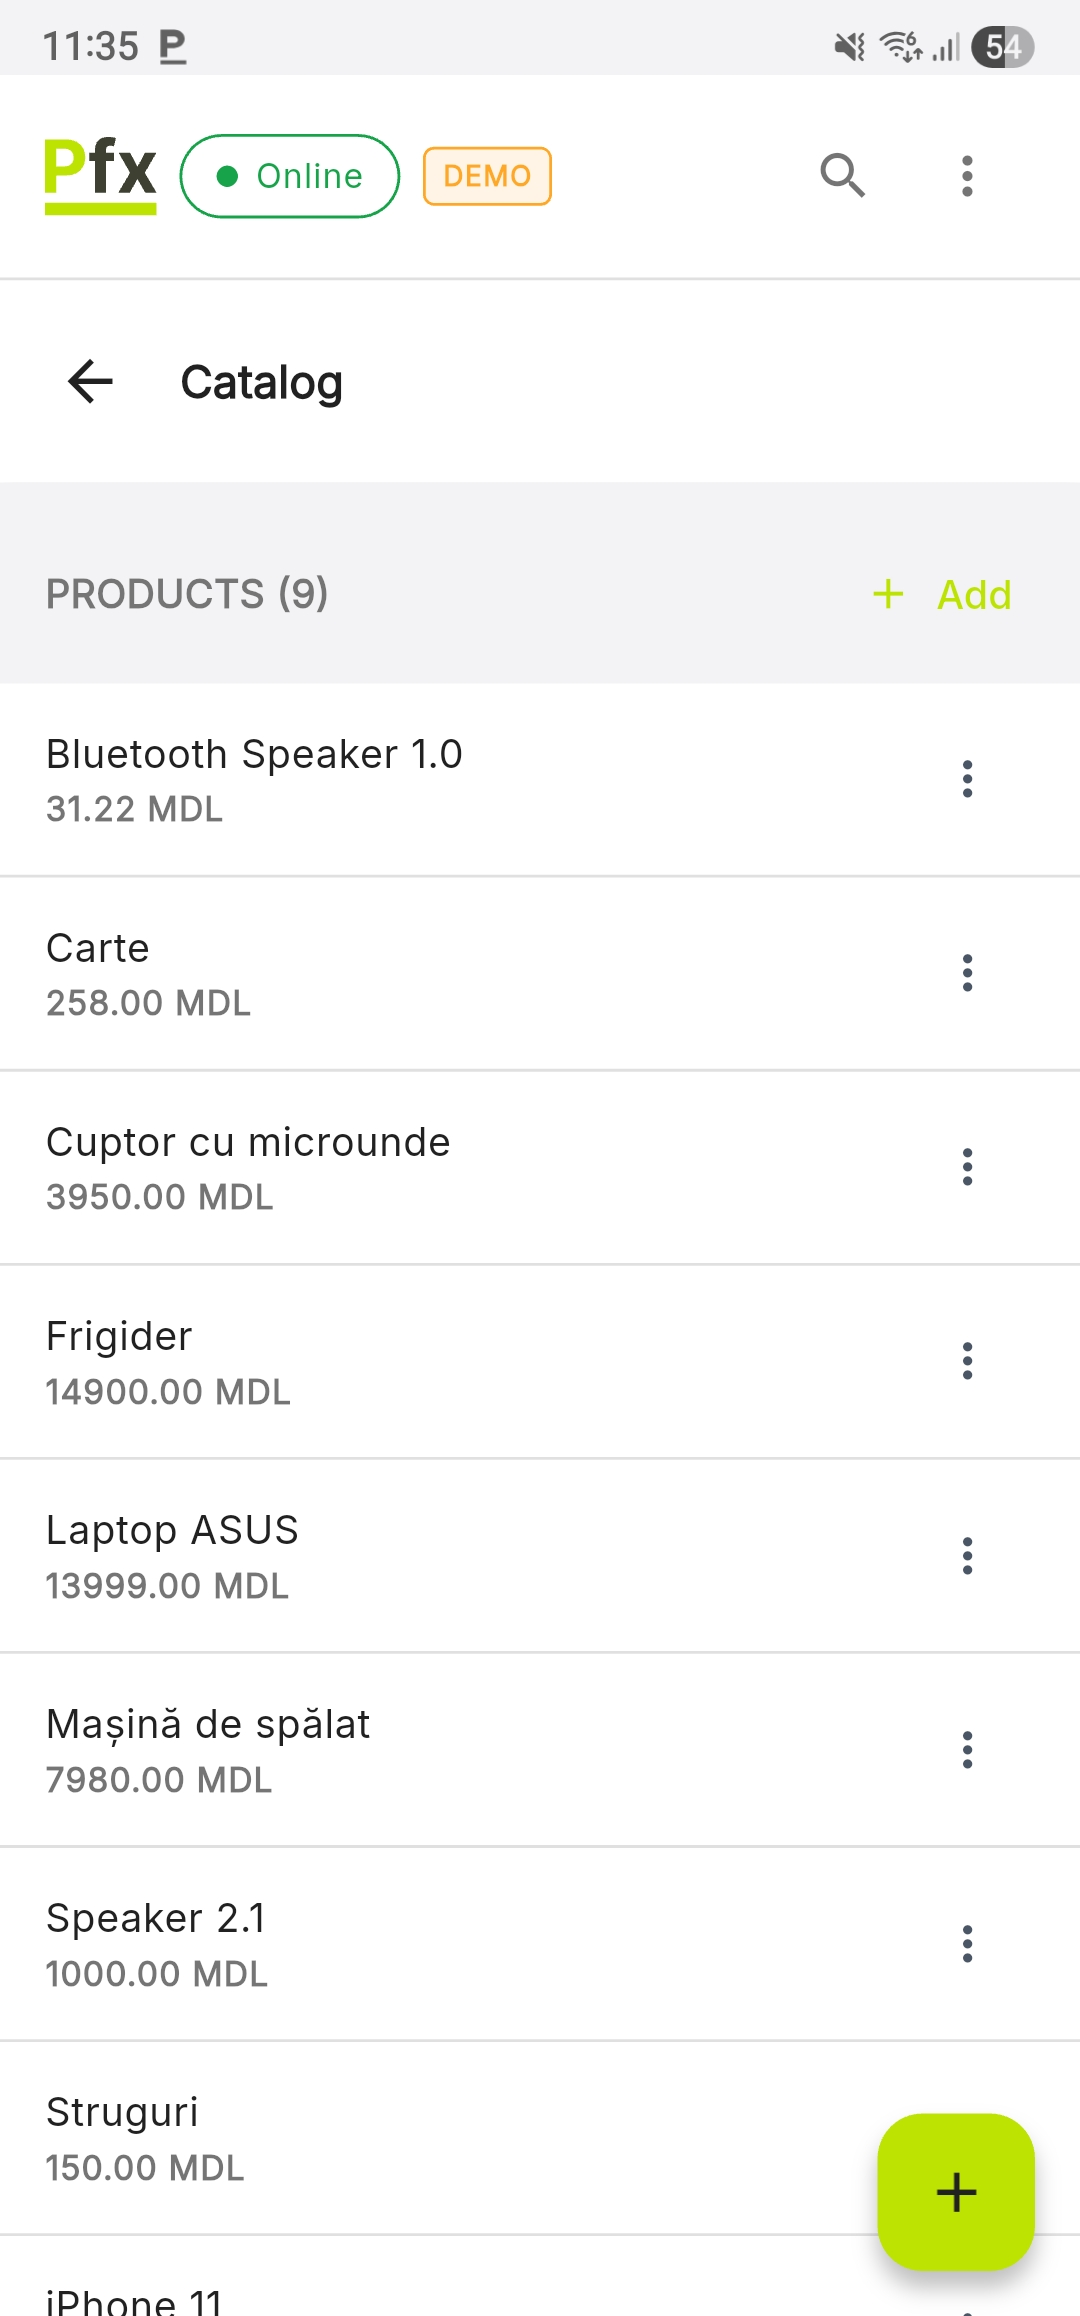
| Product list | Products from the selected category |
| View mode | Switch between Grid and List |
| Add button | Create new categories and products |
Product Management
Adding a New Product
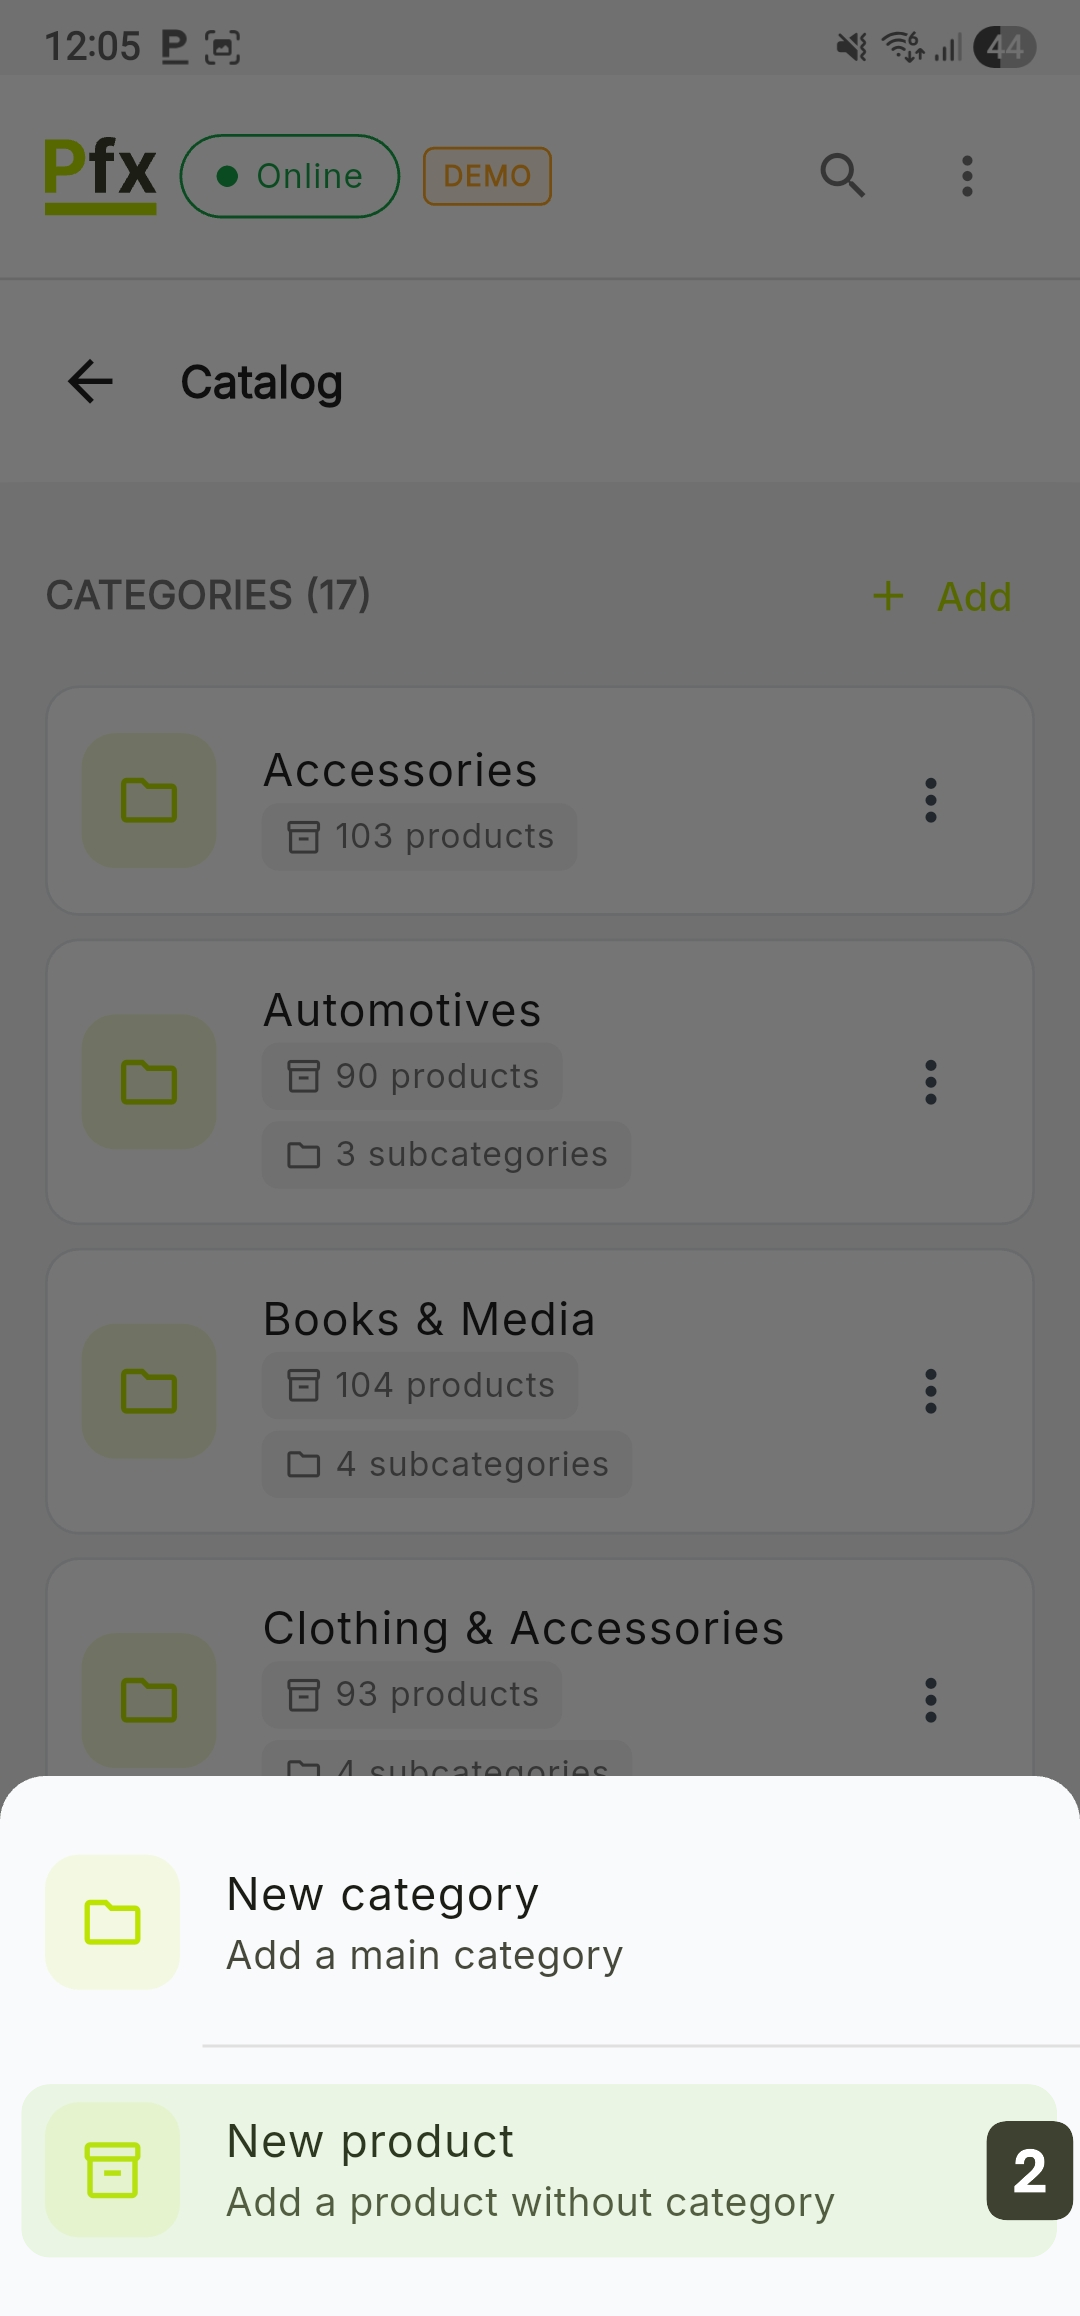
- On the Catalog screen, press the [+] button in the bottom right corner
- From the pop-up menu, choose the New product option
- Tap on the Advanced options section to expand the form with additional details
- Fill in the fields:
| Field | Type | Description |
|---|---|---|
| Product Name | Required | Name that appears on the receipt and in the menu |
| Price | Required | Final selling price (including VAT) |
| Category | Required | Group the product belongs to |
| VAT Rate | Required | Select the fiscal rate: A (20%), B (8%), C (0%) |
| Barcode | Optional | Scan or type the EAN/UPC code |
| SKU / PLU | Optional | Internal codes for inventory management and quick identification |
| Unit of Measure | Optional | Unit of measure (pcs, kg, cm, mg, etc.) |
| Description | Optional | Additional details (ingredients, origin, etc.) |
| Status | Active/Inactive | Availability for sale |
- Press Add product to finalize the registration
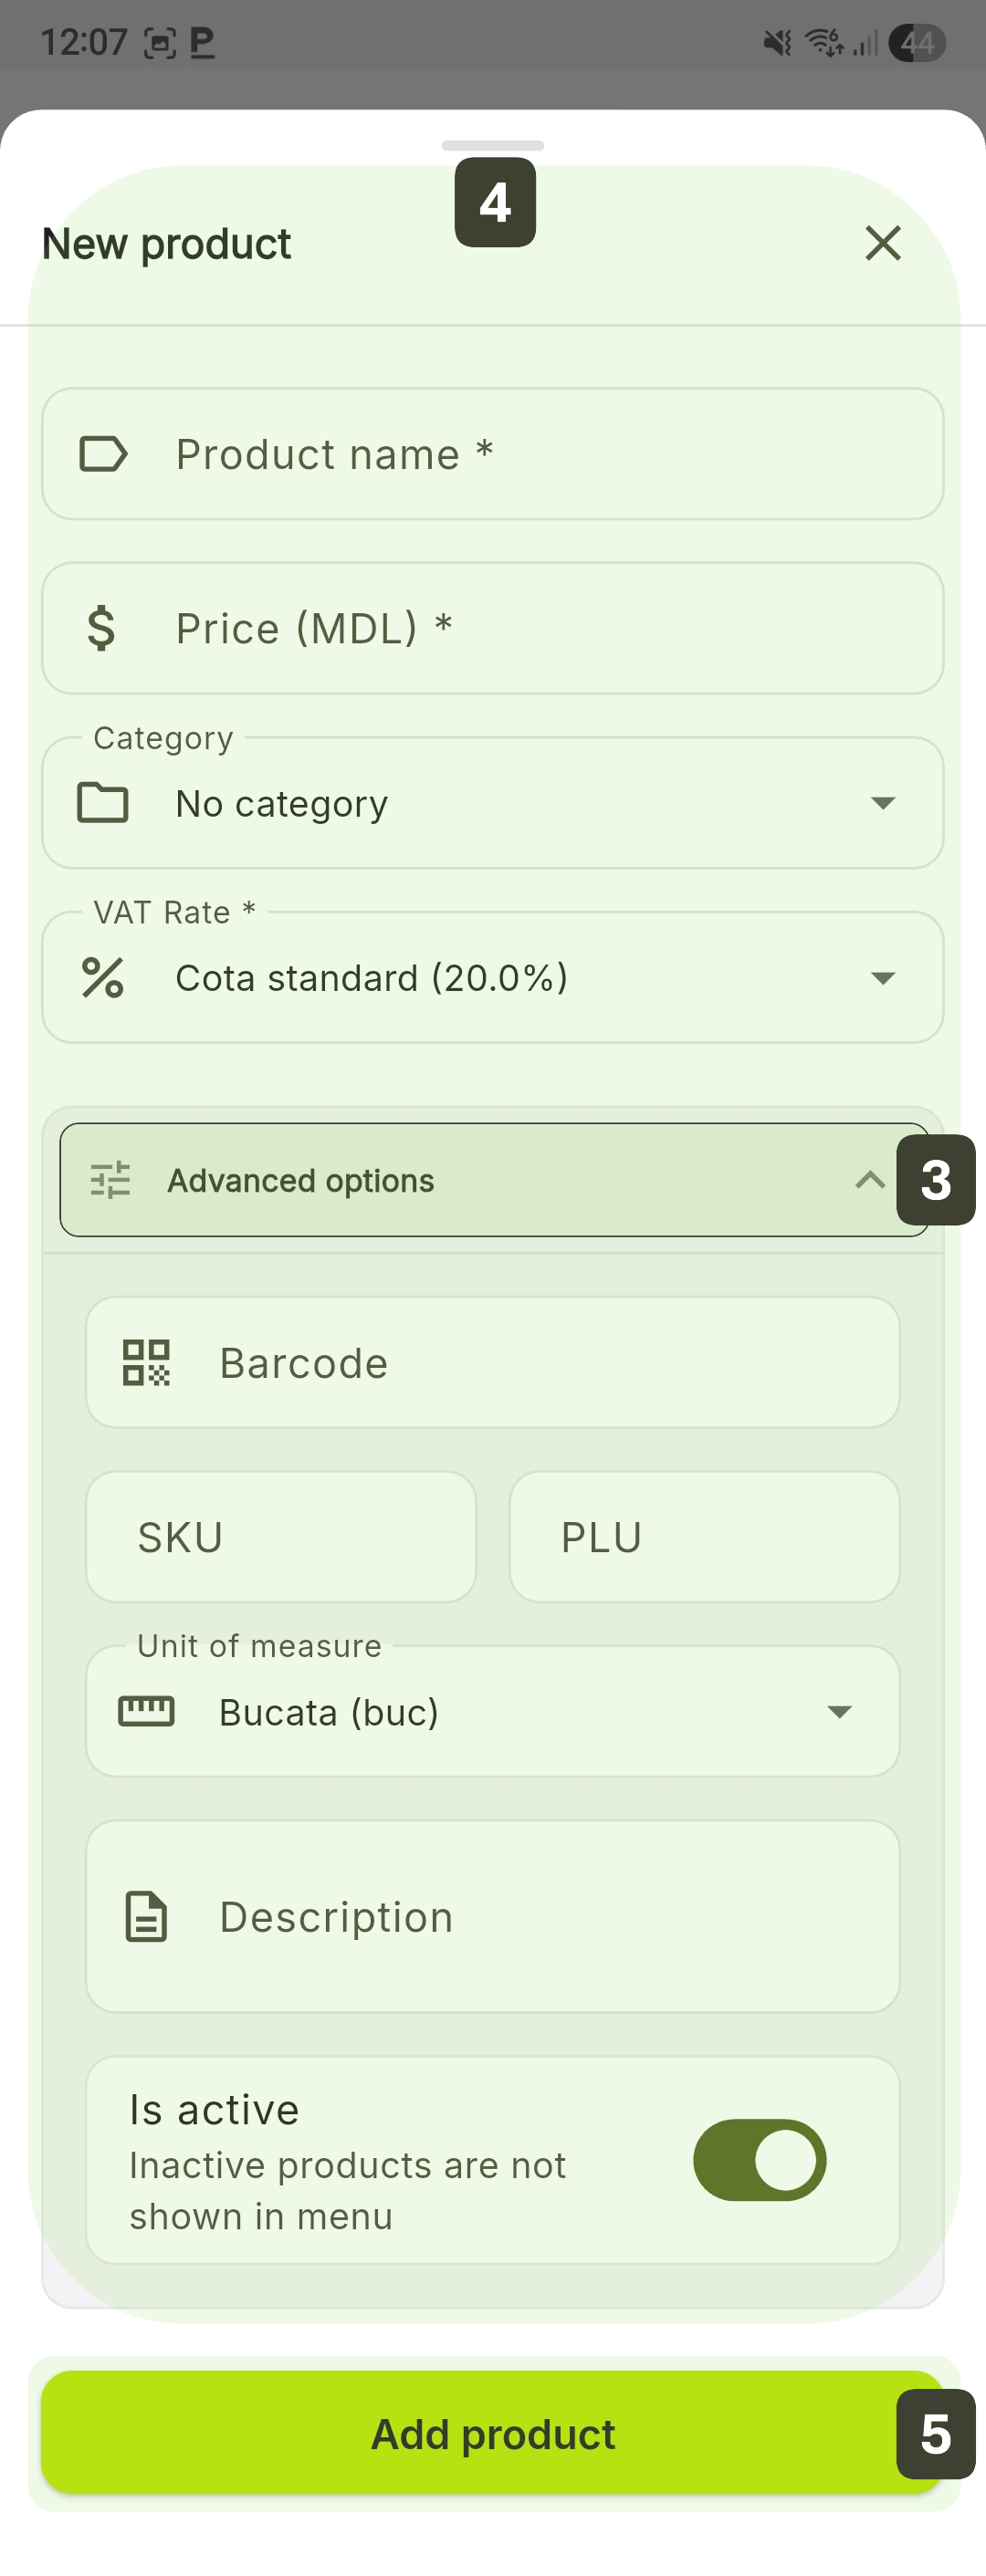
Make sure you select the correct VAT Rate for each product. An incorrect selection leads to erroneous fiscal receipts.
For the Barcode field, do not type the digits manually. Tap the field and scan the product with the scanner. This eliminates the risk of errors.
Editing a Product
Updating product information can be done quickly, either directly from the management module or through quick gestures from the sales screen.
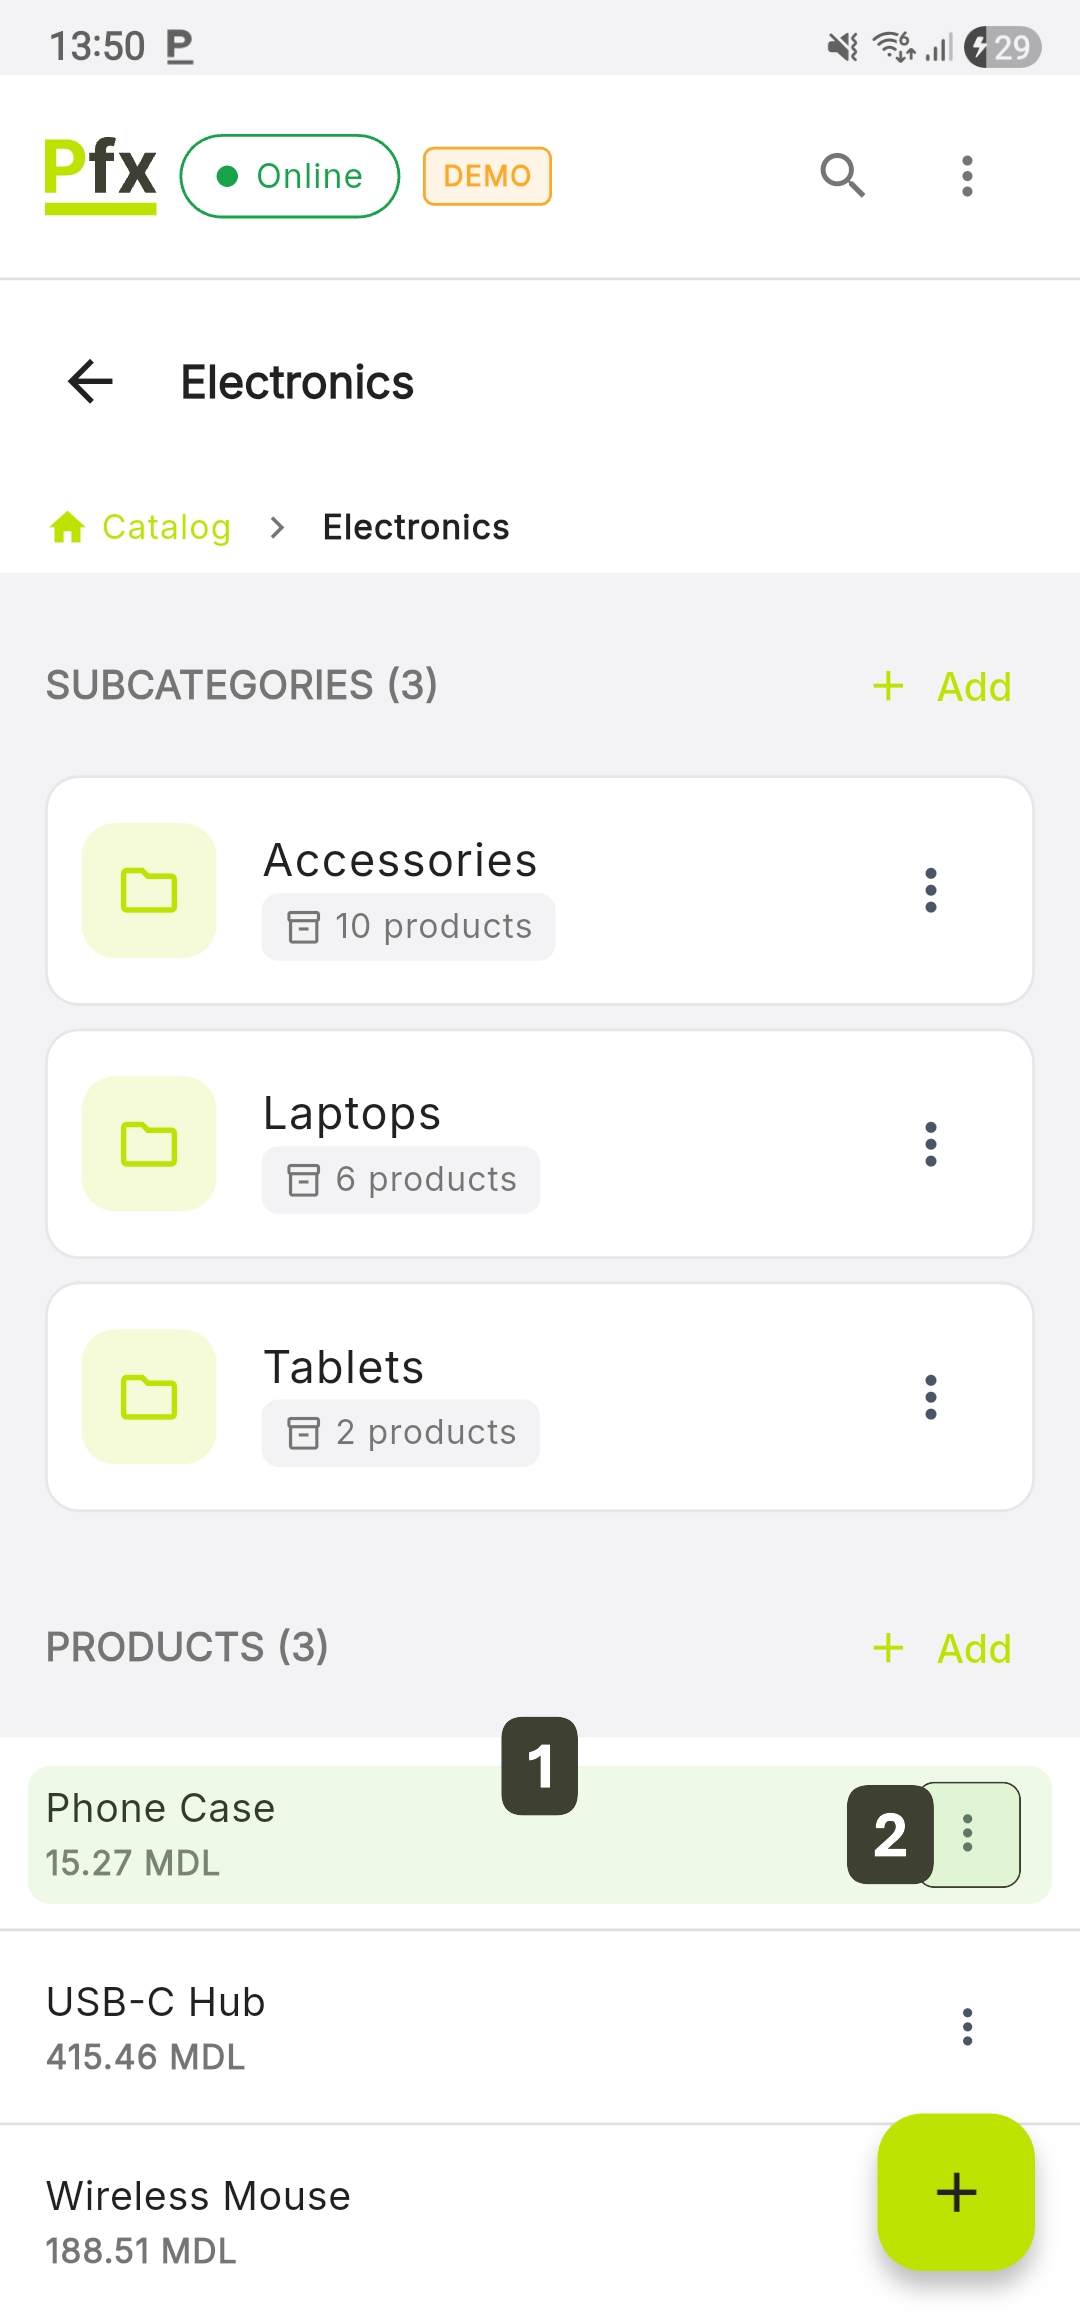
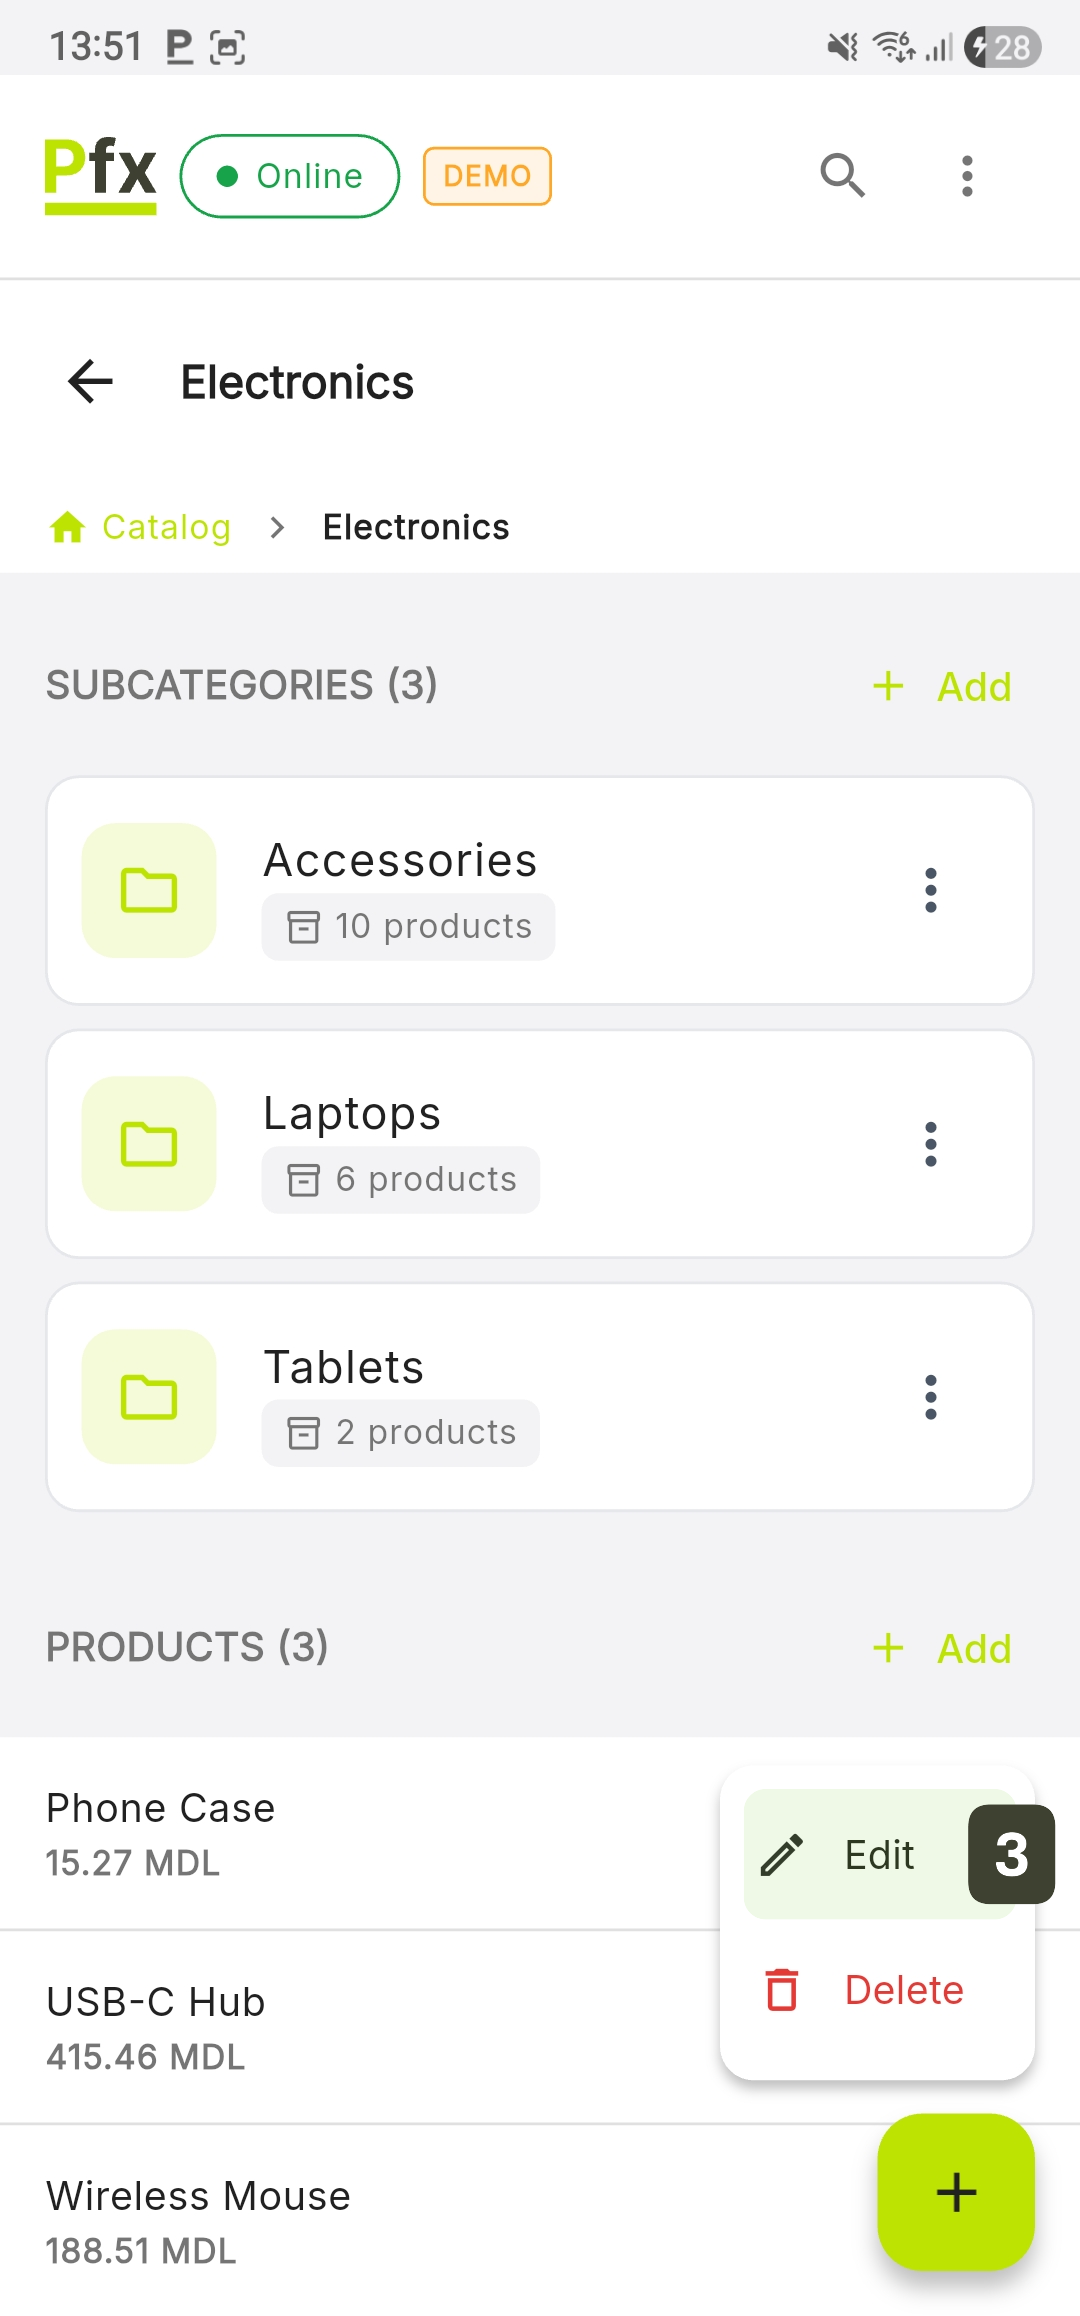
- Locate the product in the catalog (search or category navigation)
- Tap on the three-dot icon [ ⋮ ] next to the product
- Select the Edit option
- Make the necessary changes in the displayed fields
- Press Save changes
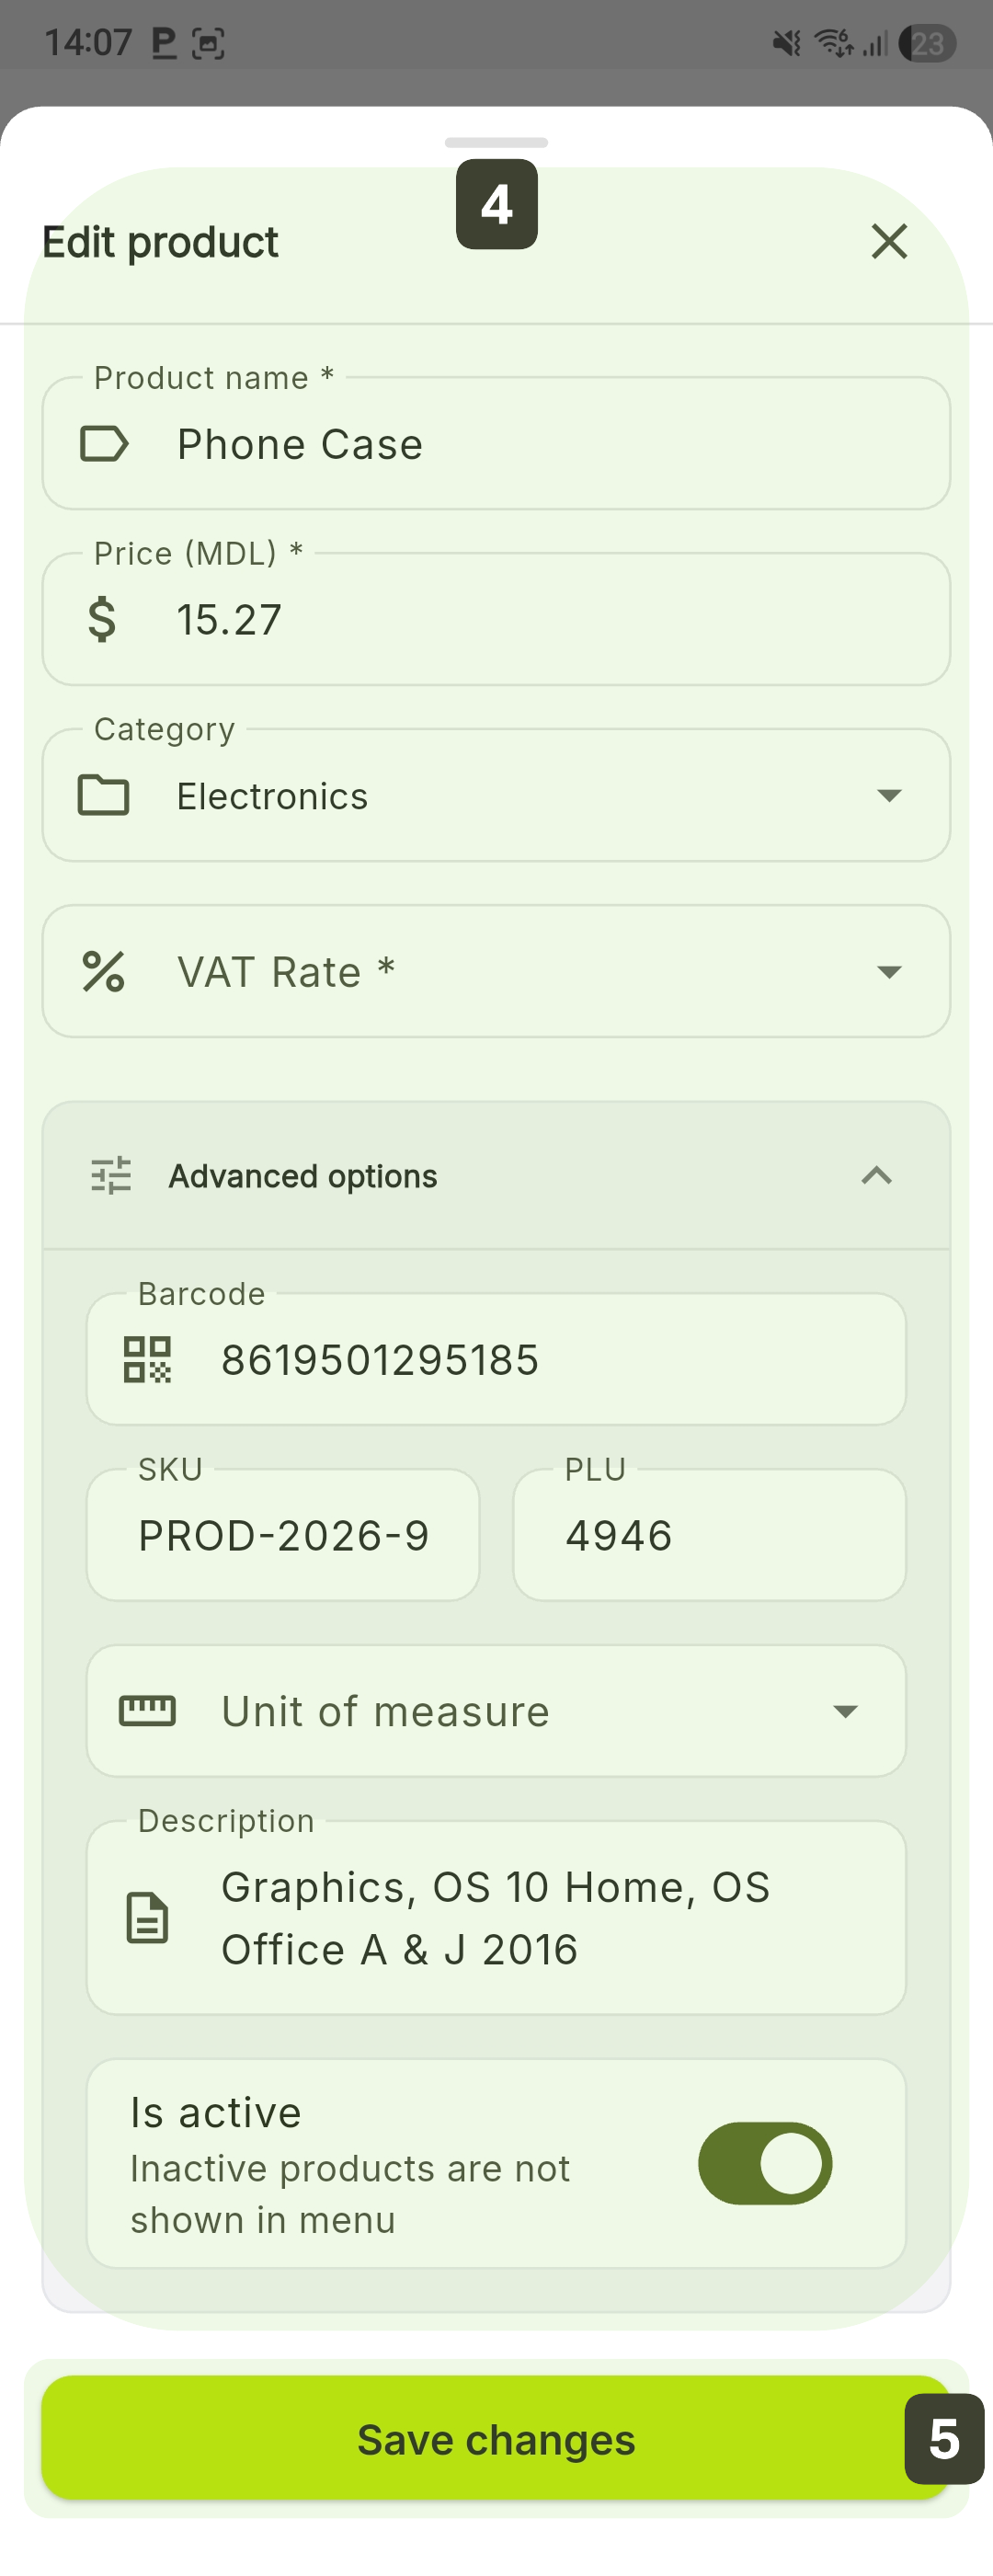
Price changes apply immediately to new sales. Already issued receipts retain the original price.
In the Library or Favorites tabs, perform a long press on any product to access the editing screen.
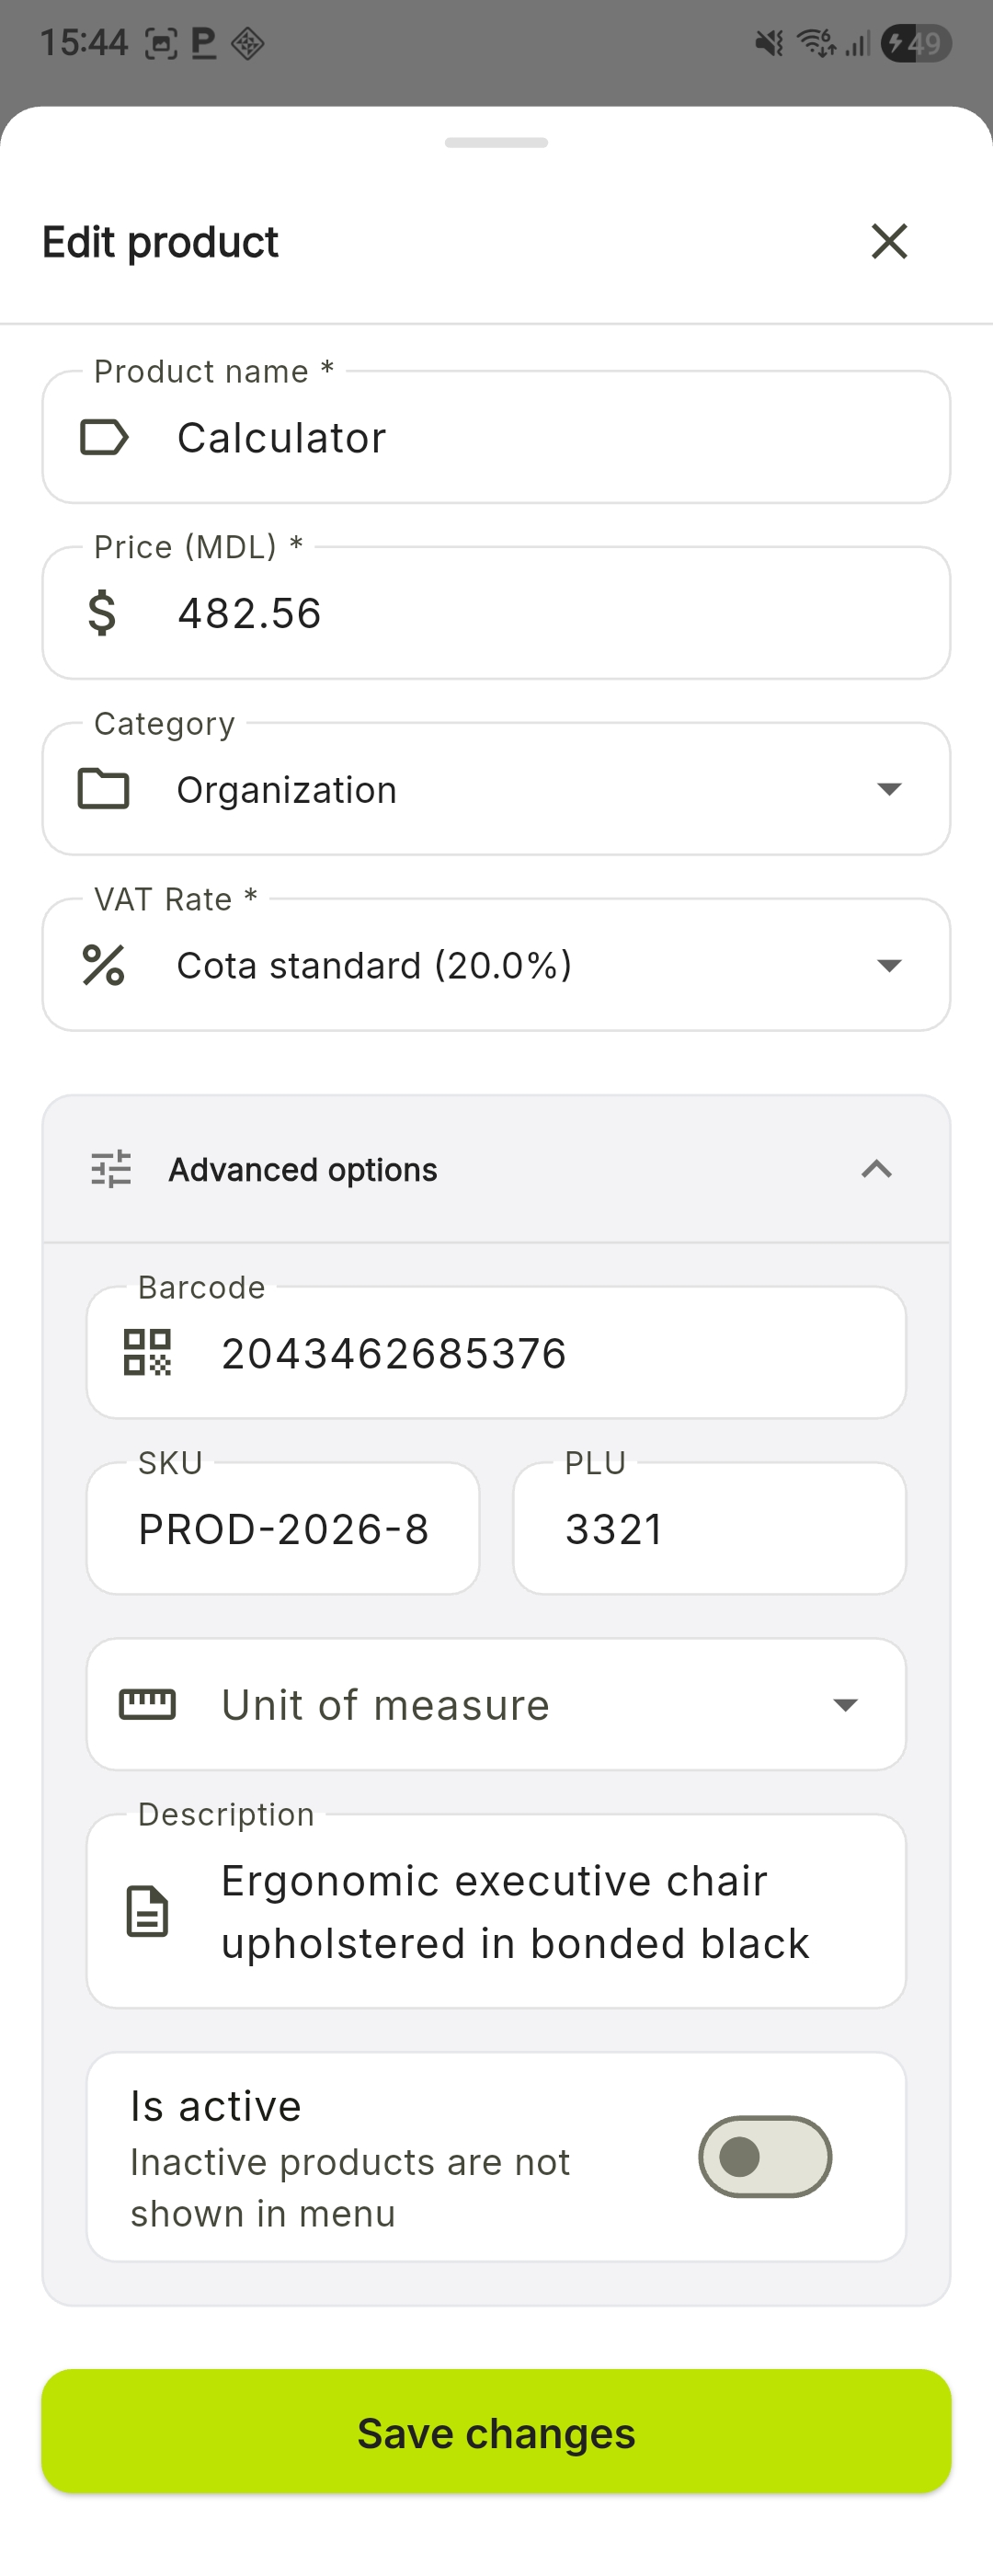
Deactivating a Product
This function is essential for inventory management and seasonal offers. It allows temporarily removing a product from the cashier's sales screens without permanently deleting its data from the system.
Steps for deactivation:
- Open the product editing screen
- Inside the Advanced options section, scroll to the Is active option
- Tap the green toggle to switch it to the "inactive" position
- Press the Save changes button to apply the setting
Products that have been removed from sale appear marked with a specific "Inactive" icon
The product remains in the database, so all previous fiscal reports and sales statistics remain accurate and complete.
Deleting a Product
This function is intended for permanent removal of items from the terminal's sales list, recommended only for correcting data entry errors or for products you no longer sell.
Steps for deletion:
- On the Catalog screen, identify the product you want to remove
- Tap on the three-dot icon [ ⋮ ] next to the product
- Select the Delete option
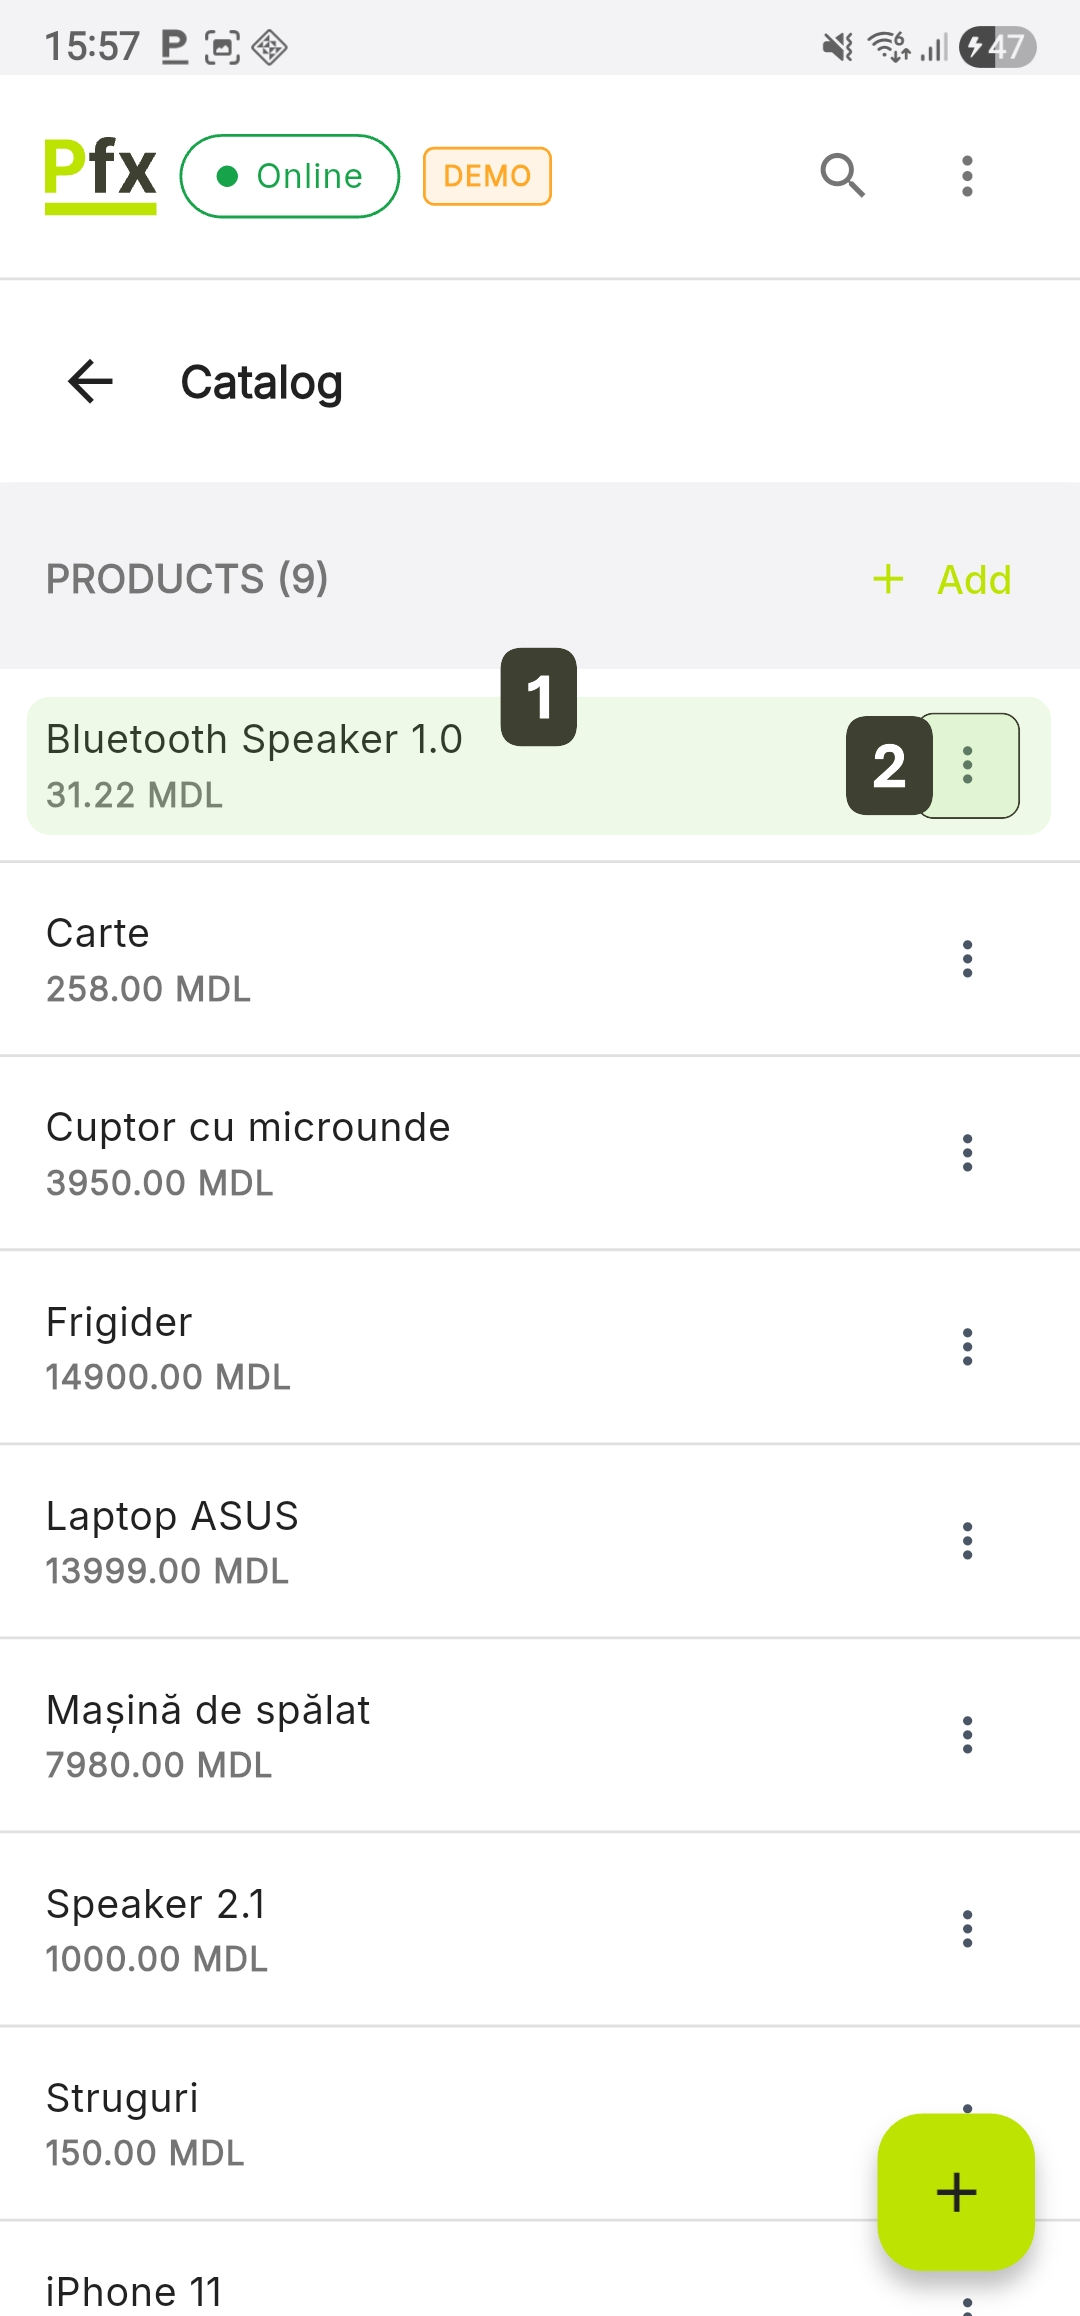

- In the pop-up window, press the Delete button to confirm the action
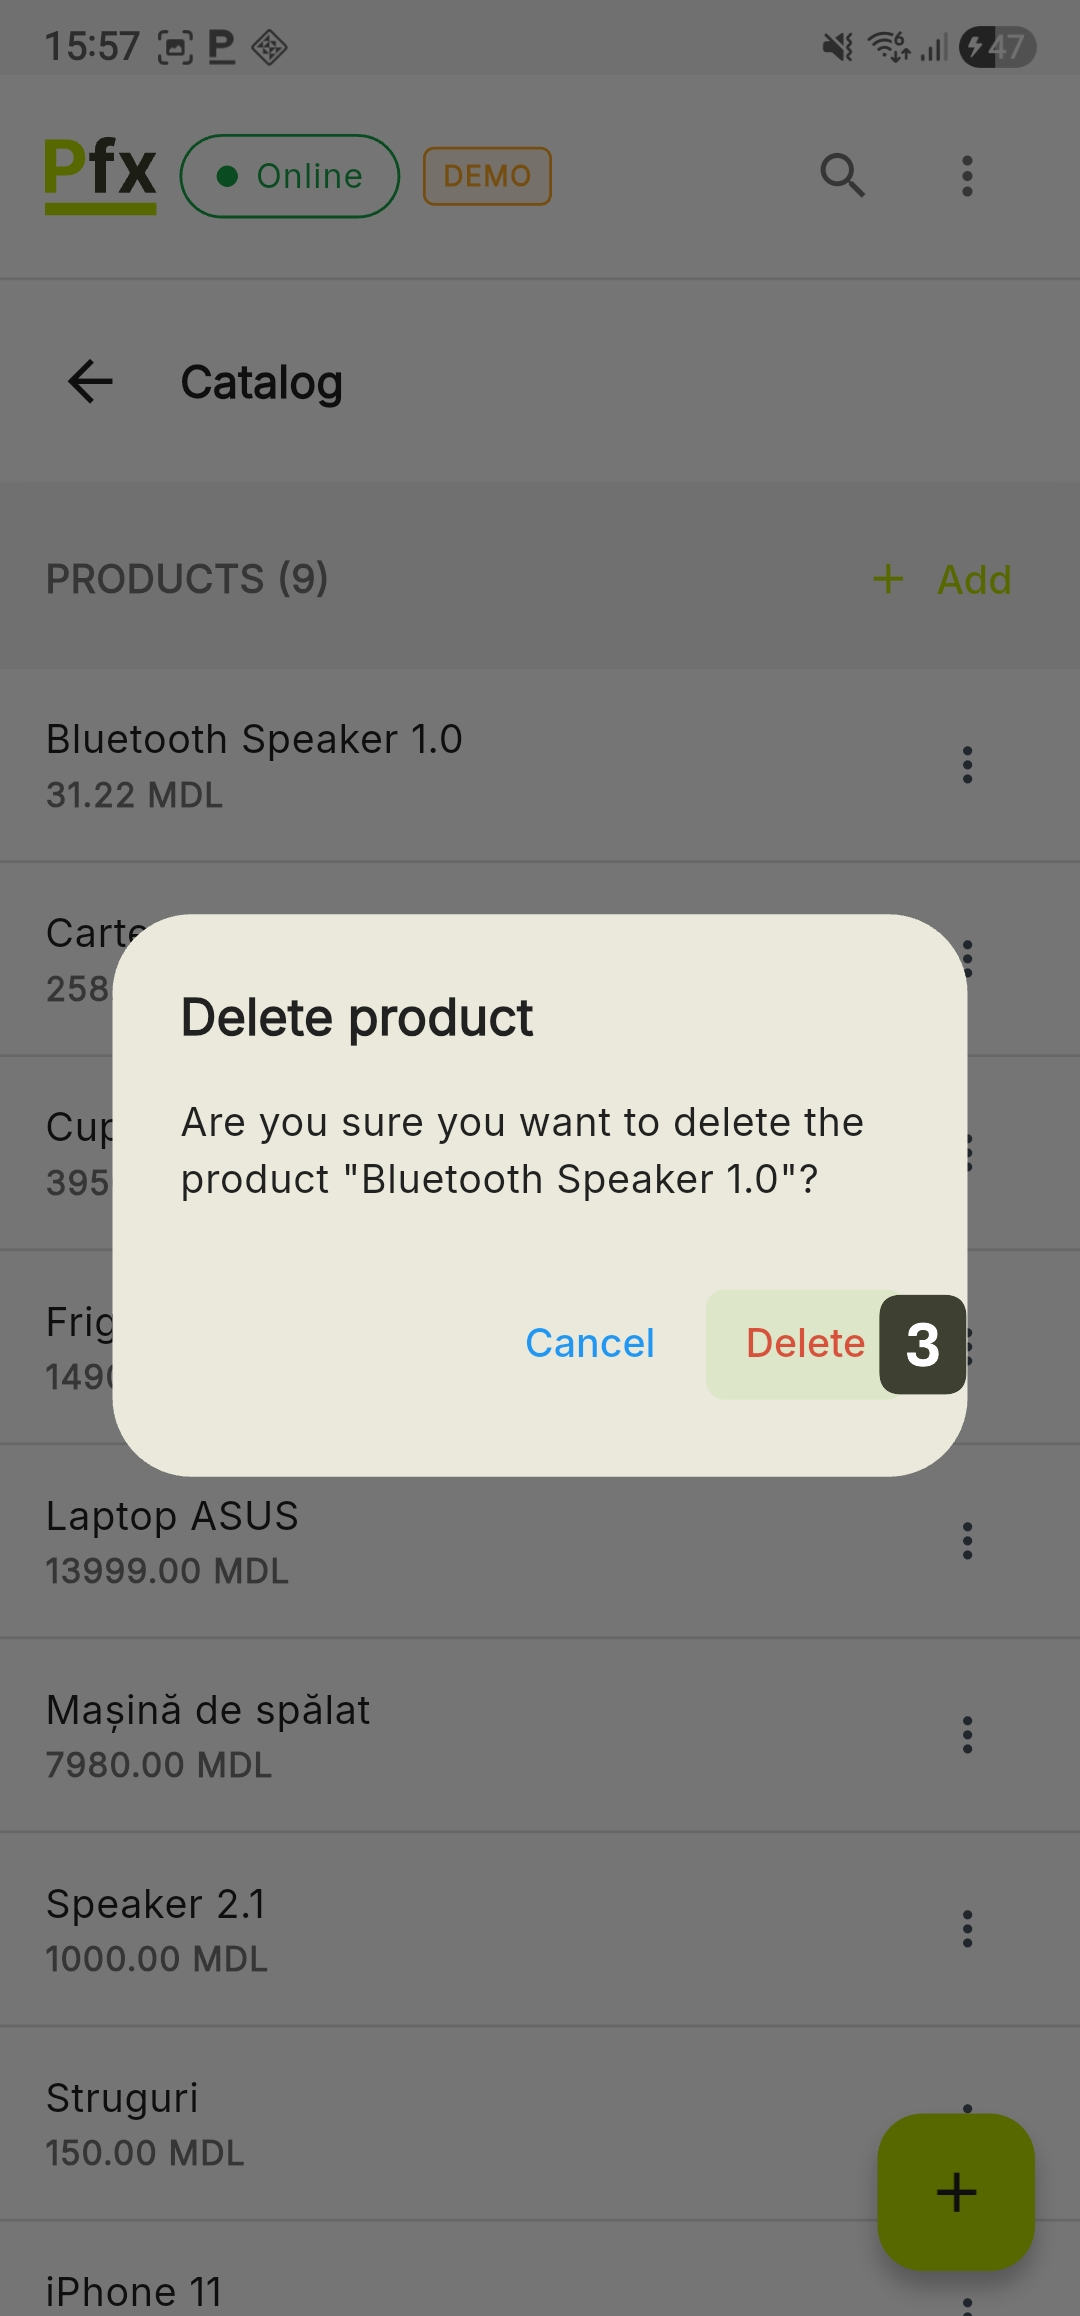
Locally irreversible action: Once confirmed, the deletion removes the product from the terminal interface.
The deleted product remains archived in the control panel (Dashboard) on the server, even if it is no longer visible on the terminal. If a product needs to be brought back to the catalog, this operation can only be performed by an Administrator from the web management interface.
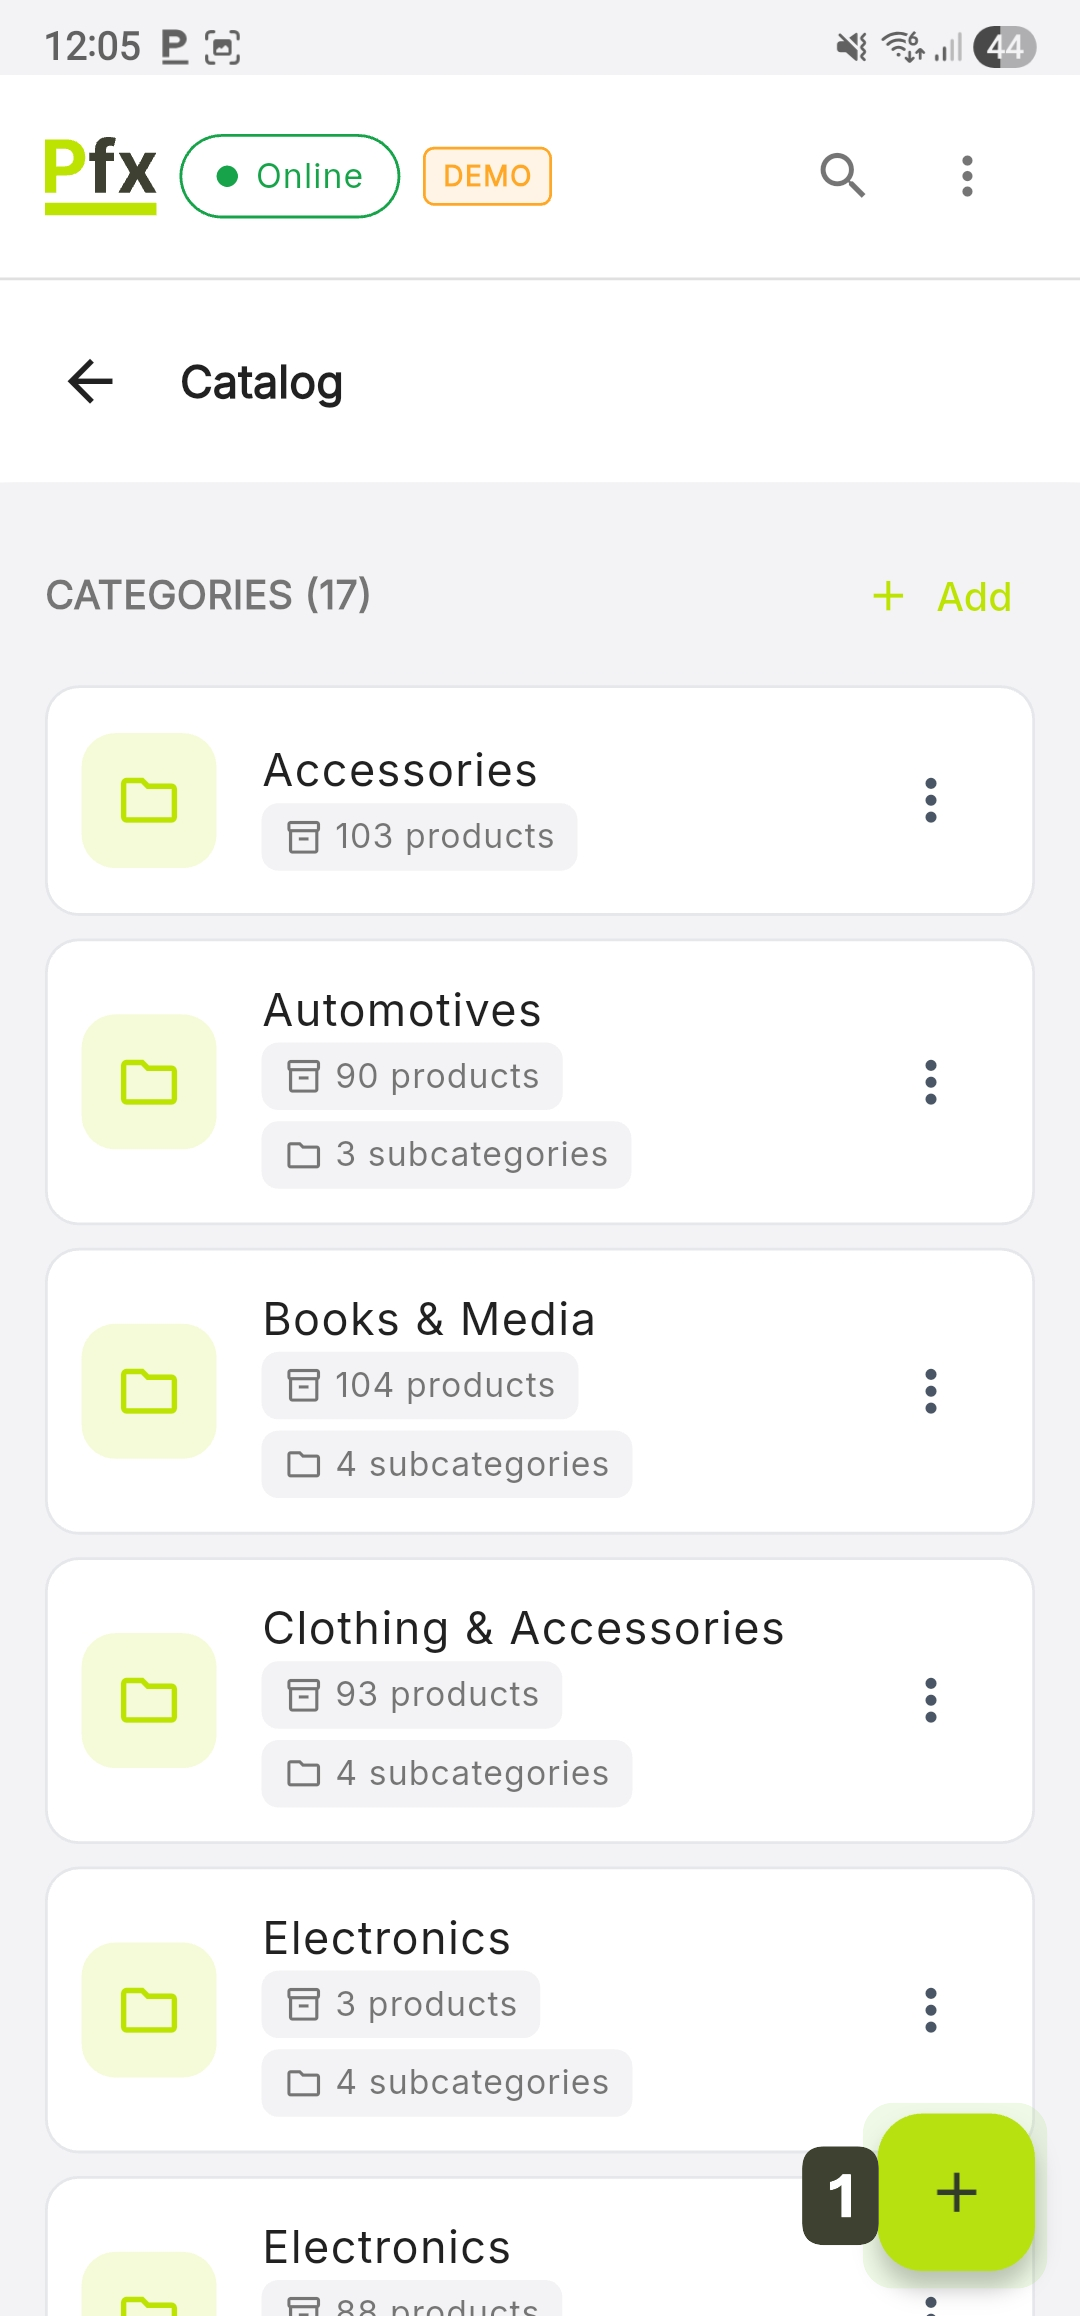
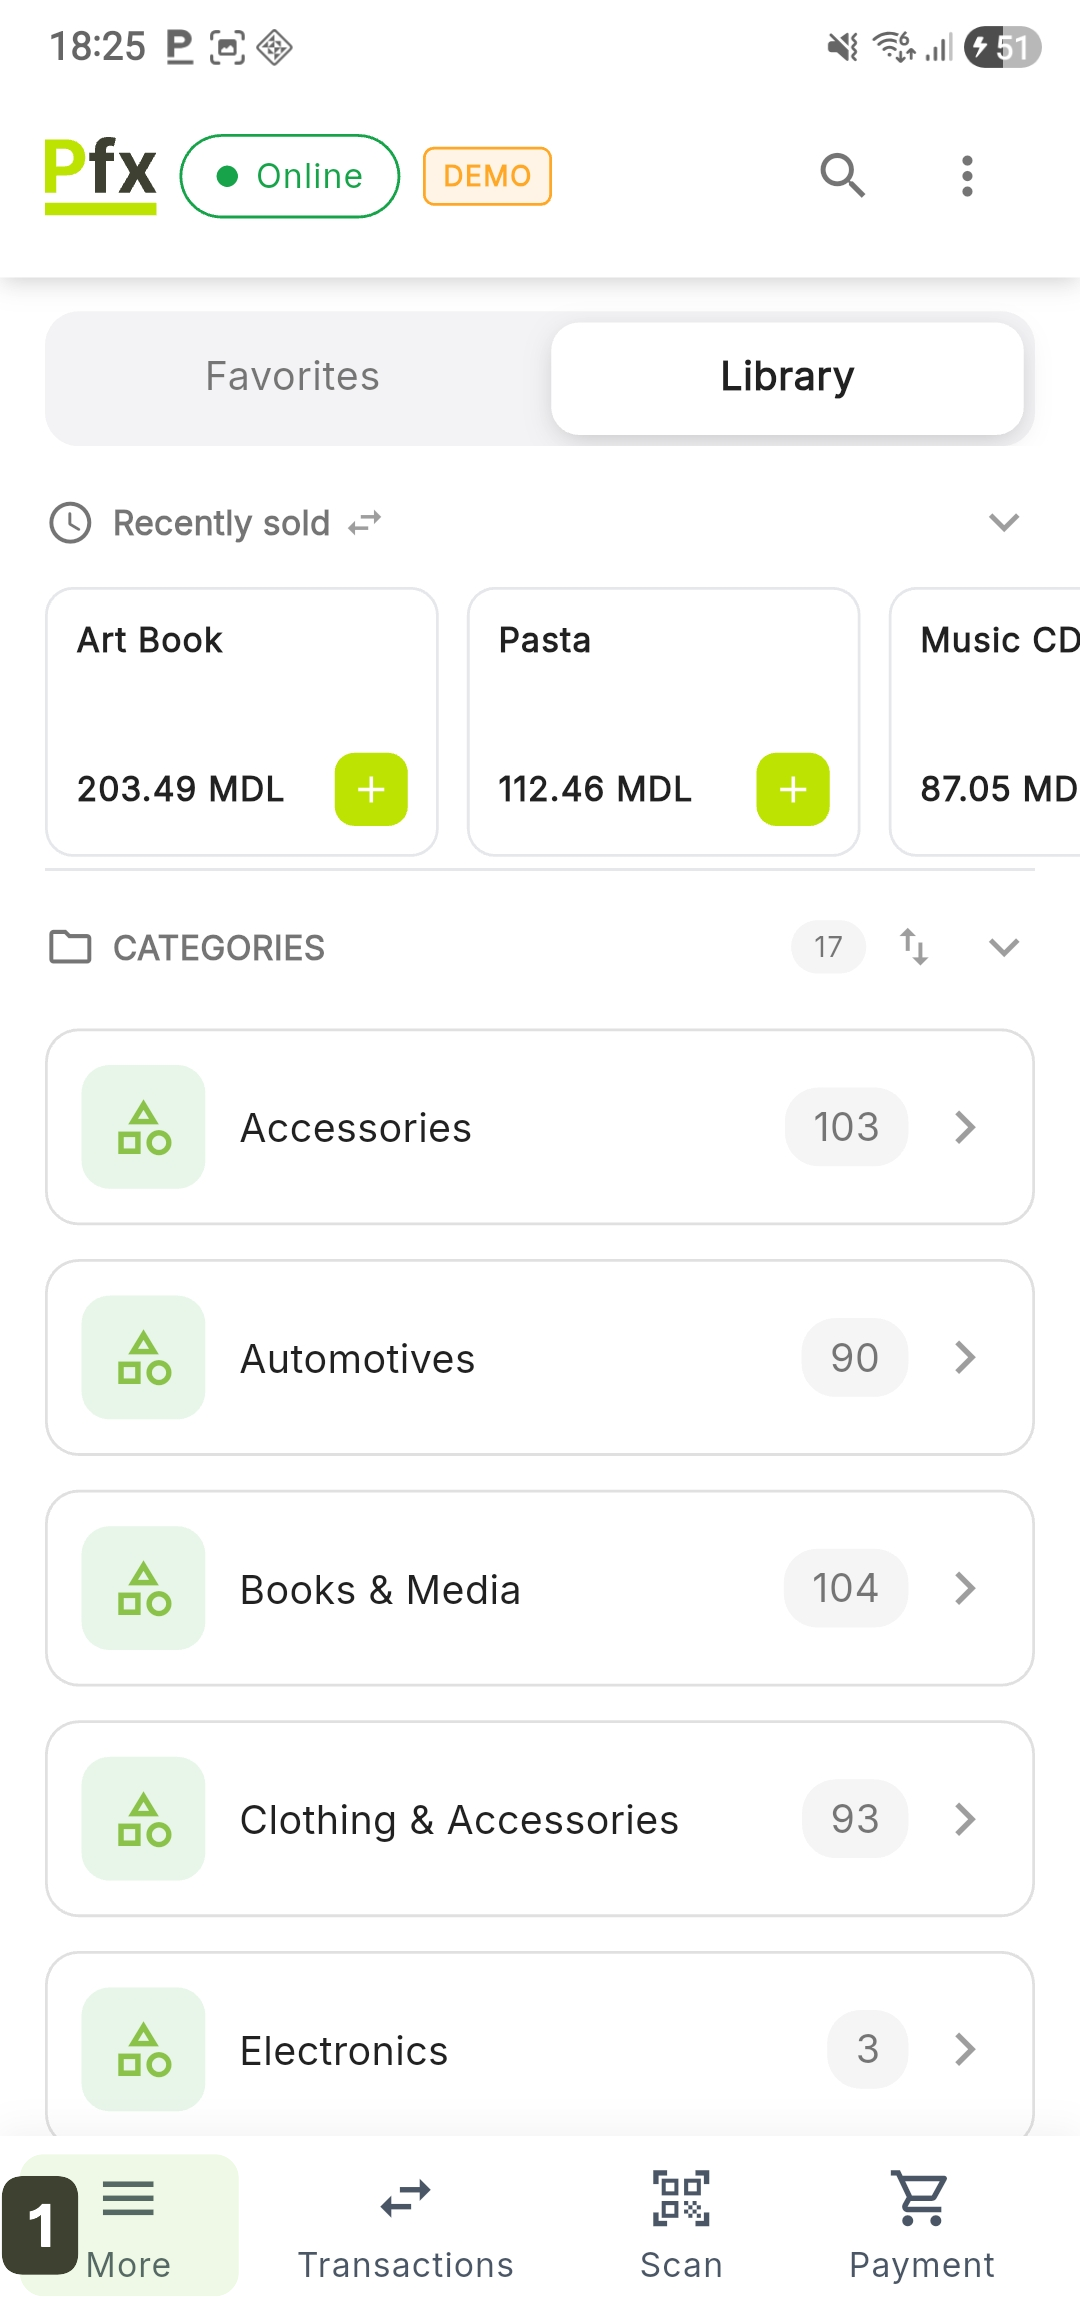
Category Management
Categories are essential for the logical organization of products, allowing cashiers to quickly find items during sales. The PosFix system supports unlimited hierarchies, allowing you to create complex structures of categories and subcategories.
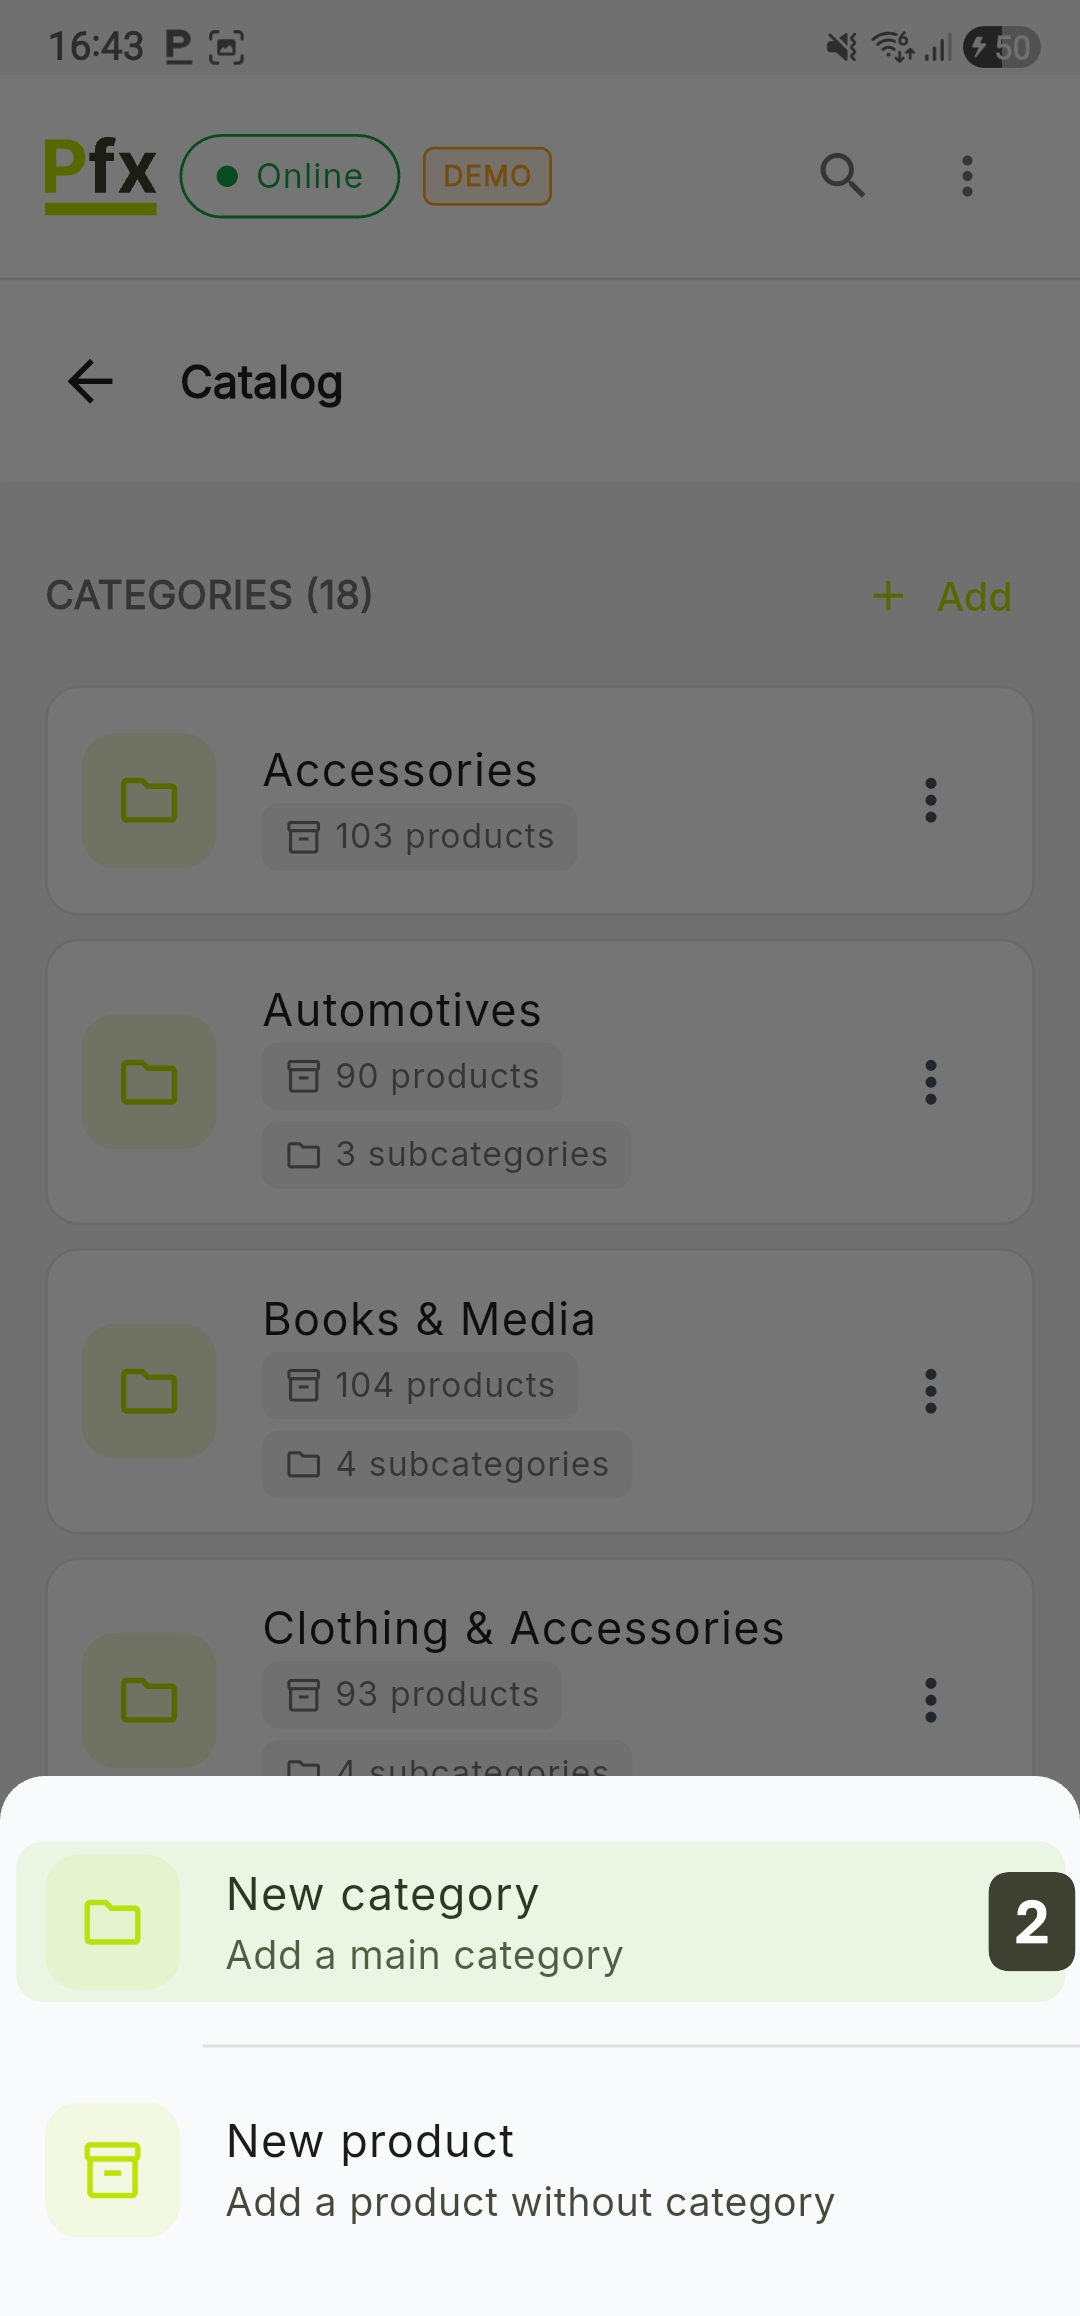
Adding a Category
- On the Catalog screen, press the Add button (for quick access) or the [ + ] button in the bottom right corner
- Select the New category option

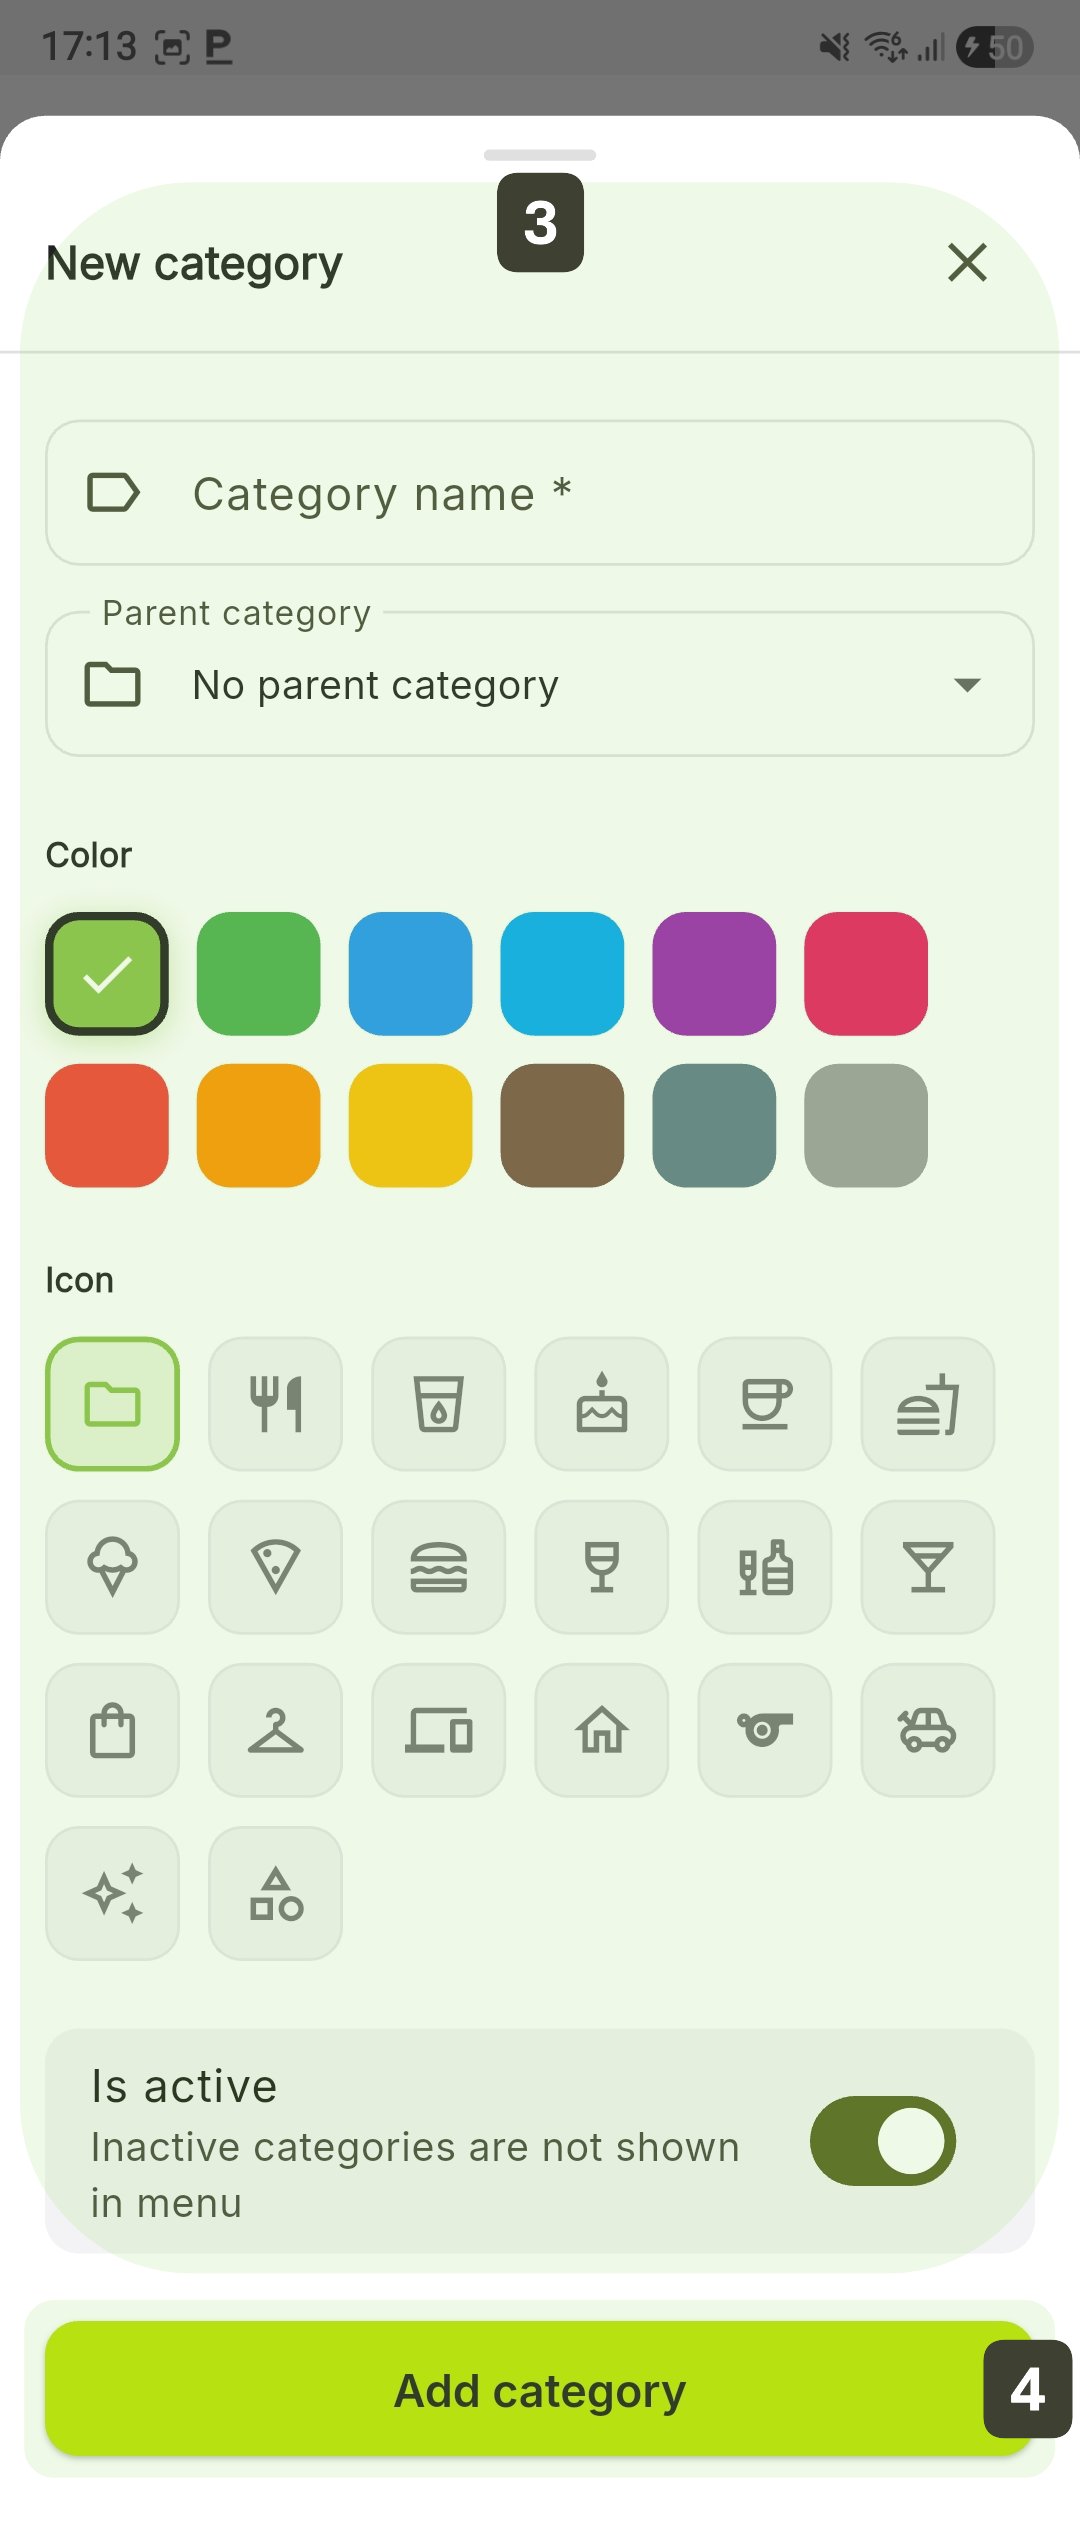
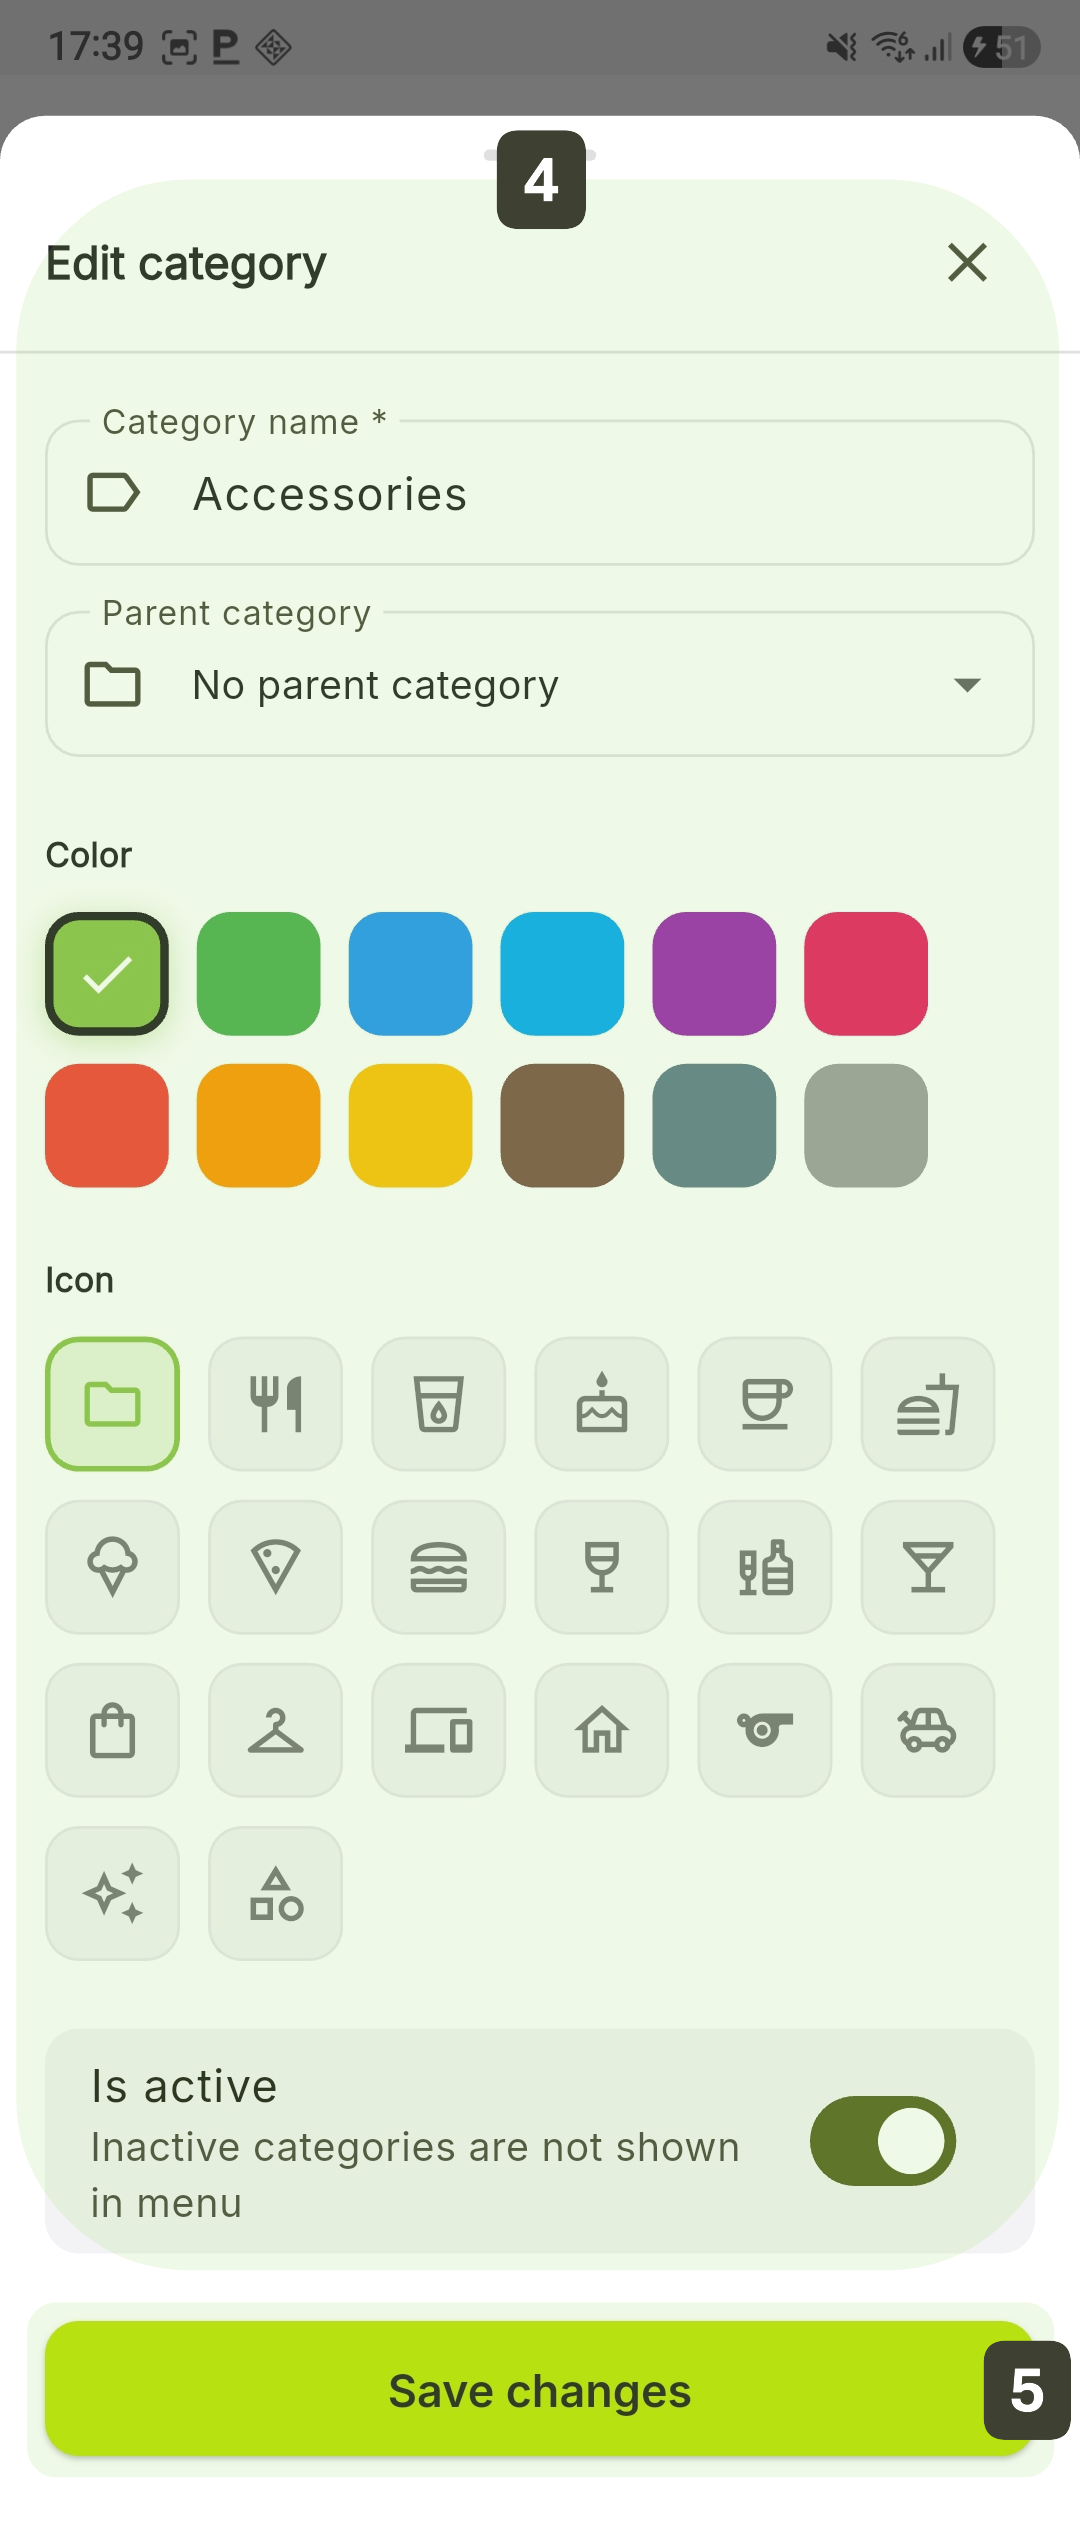
- Fill in the form:
| Field | Functionality |
|---|---|
| Category name | Enter the name that will appear on the sales screen |
| Parent category | Leave the field as "No parent category" for a main category or select an existing category to create a subcategory |
| Color | Choose a color from the available palette to visually identify the group on the sales screen |
| Icon | Select a representative symbol |
| Is active | Deactivation toggle |
- After configuration, press the Add category button
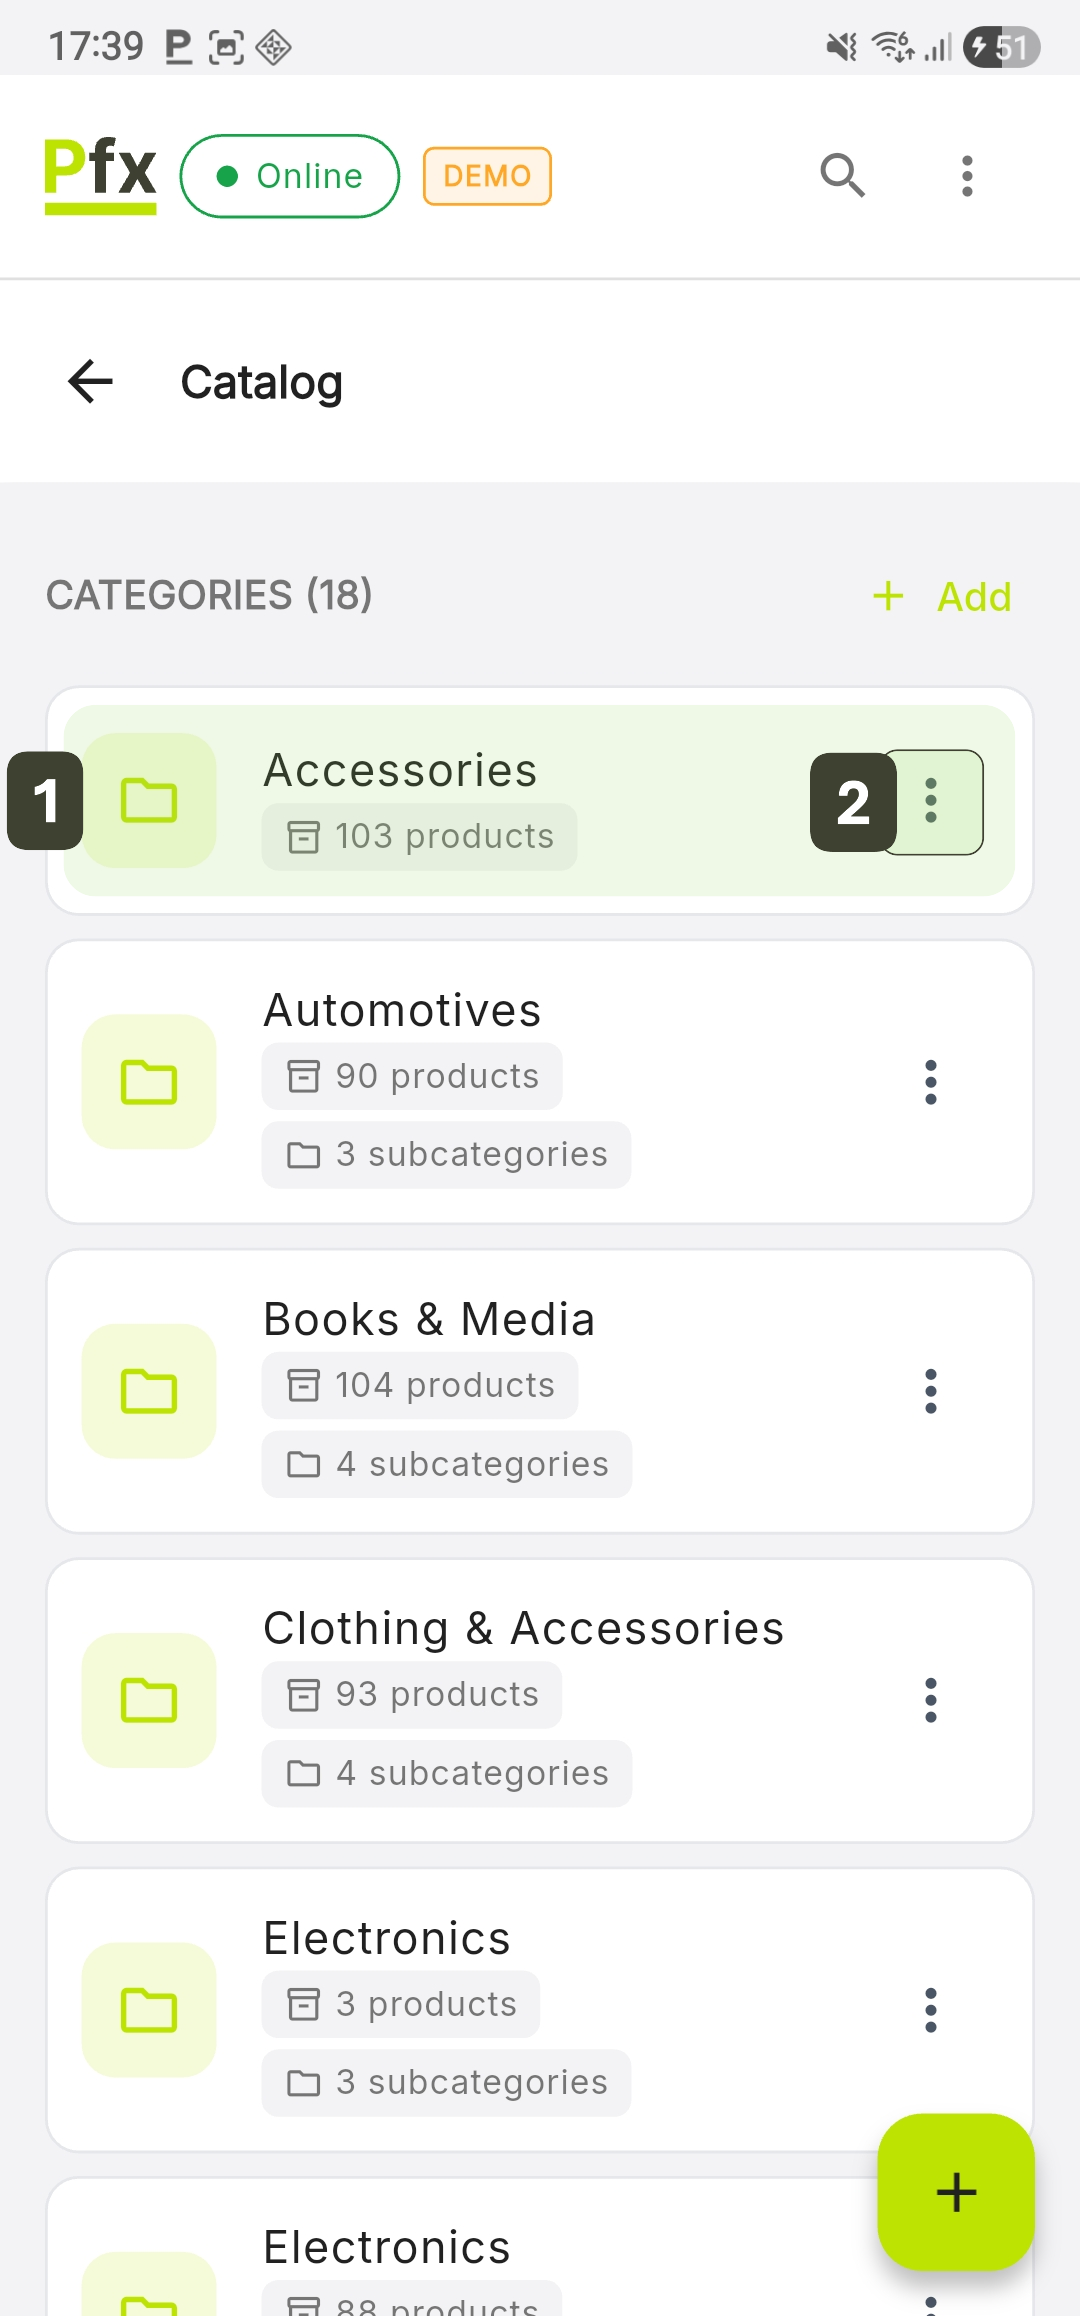
Under each category, the system will automatically display the number of products and subcategories it contains.
Editing a Category
This function allows updating the name, changing the hierarchy (subcategory -> main category or vice versa), and visual customization to optimize the sales flow.
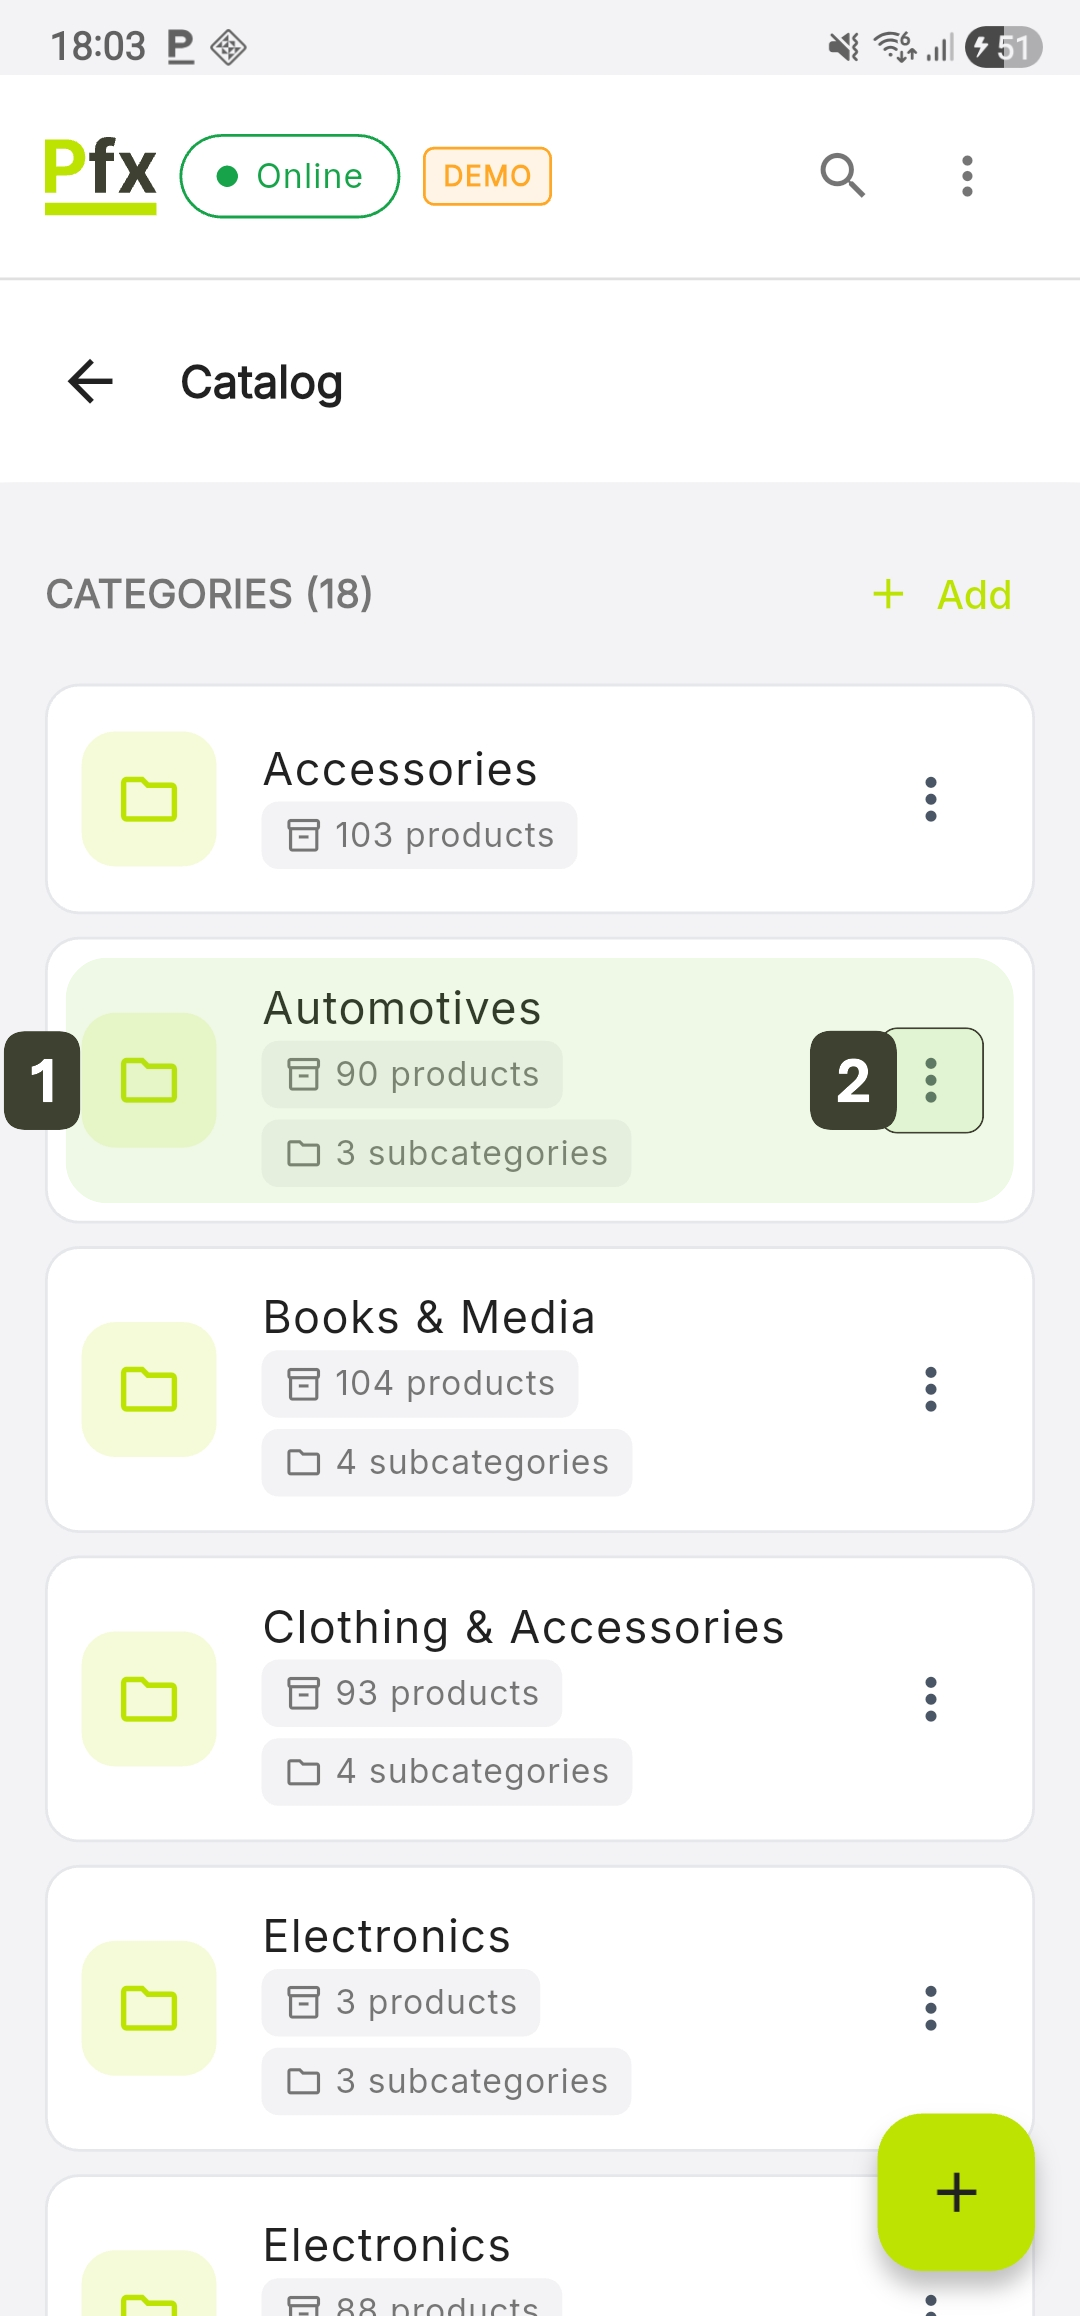
- On the Catalog screen, identify the category you want to modify
- Tap on the [ ⋮ ] icon next to the category
- Select the Edit option
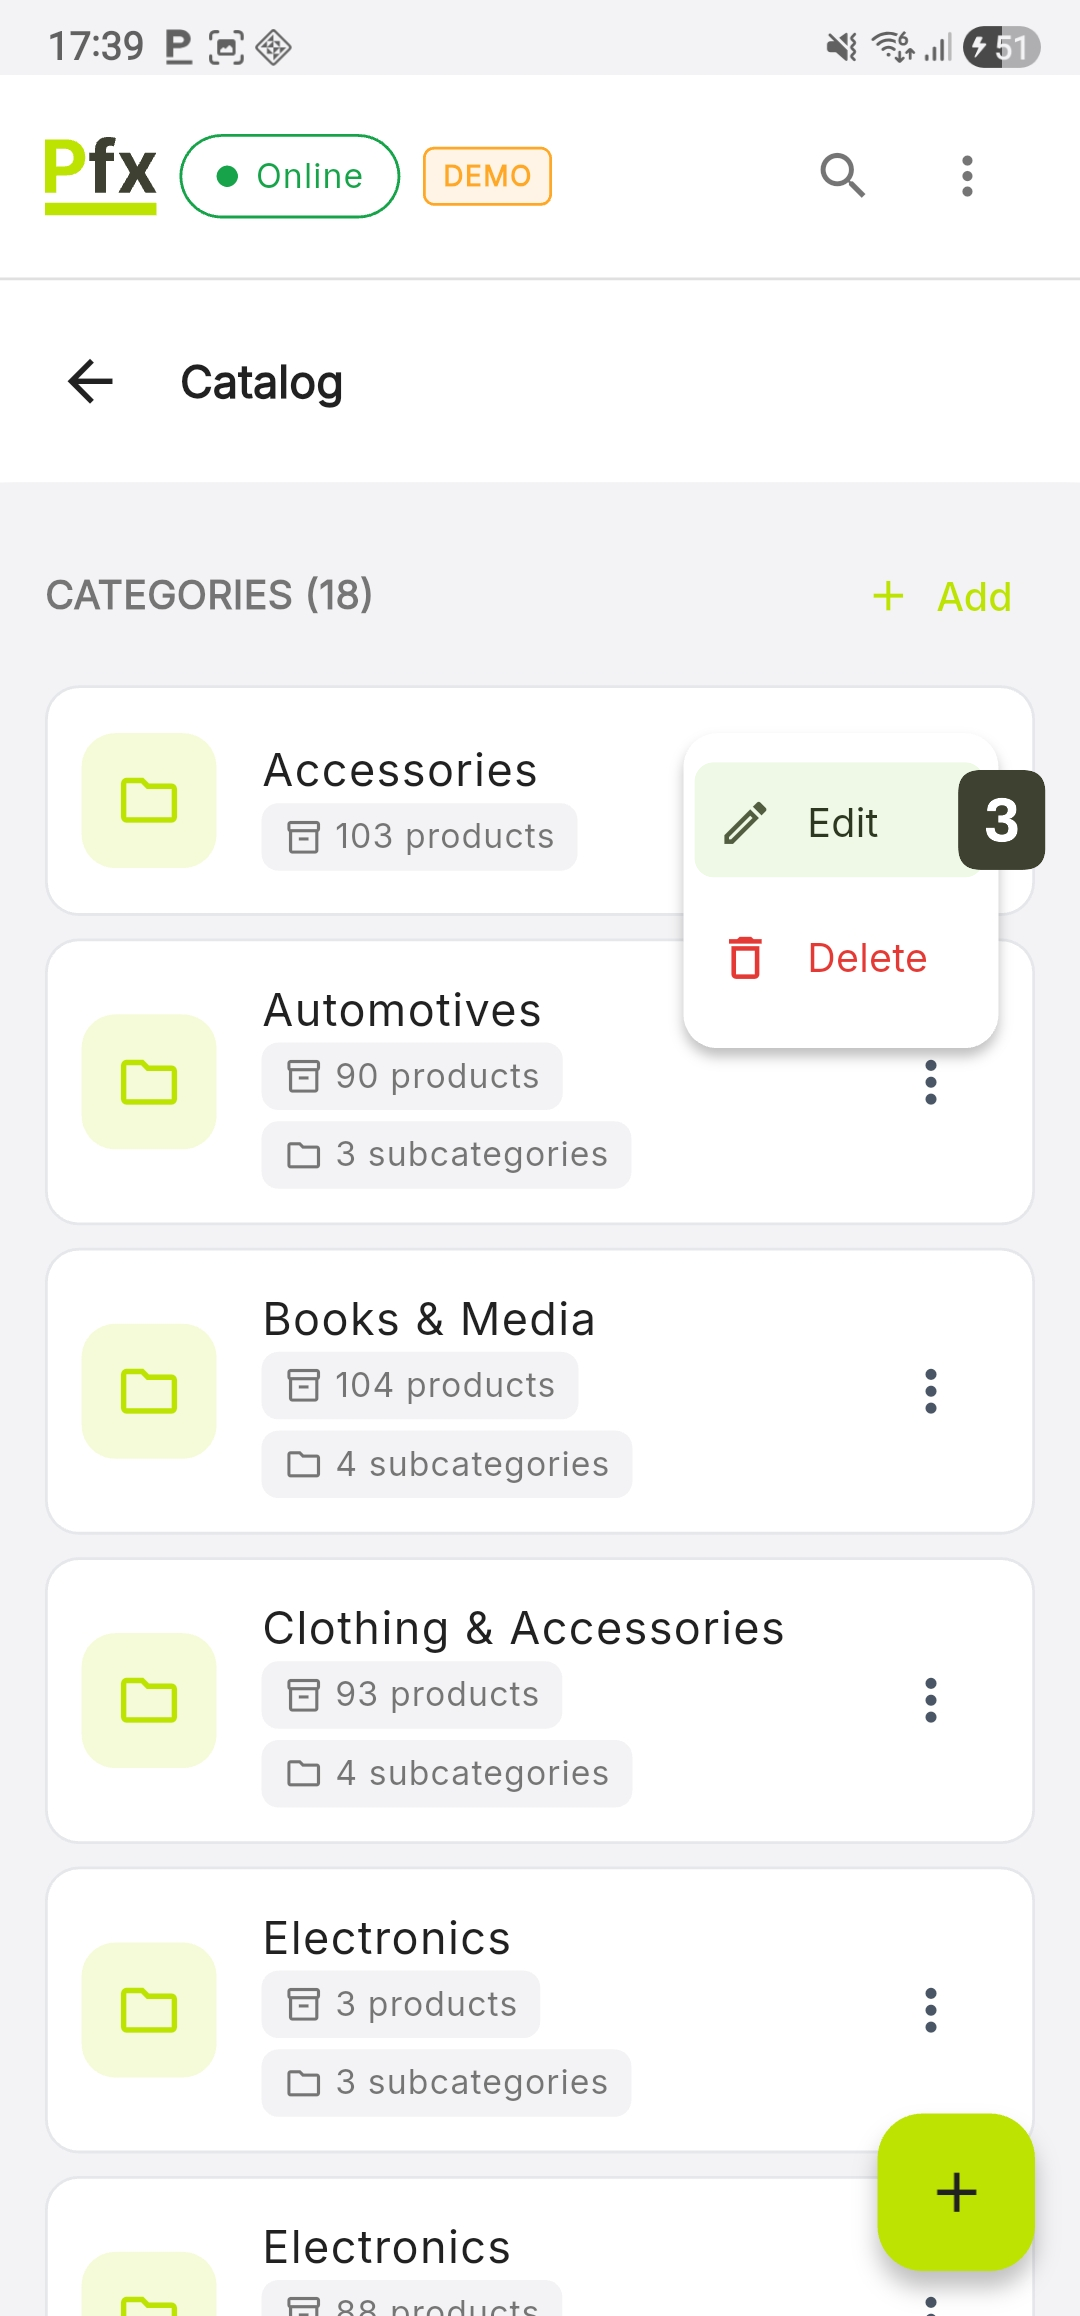
- In the Edit category window, make the necessary changes in the displayed fields
- Press Save changes
Deleting a Category
- On the Catalog screen, identify the category you want to remove.
- Tap on the [ ⋮ ] icon next to the category
- Select the Delete option
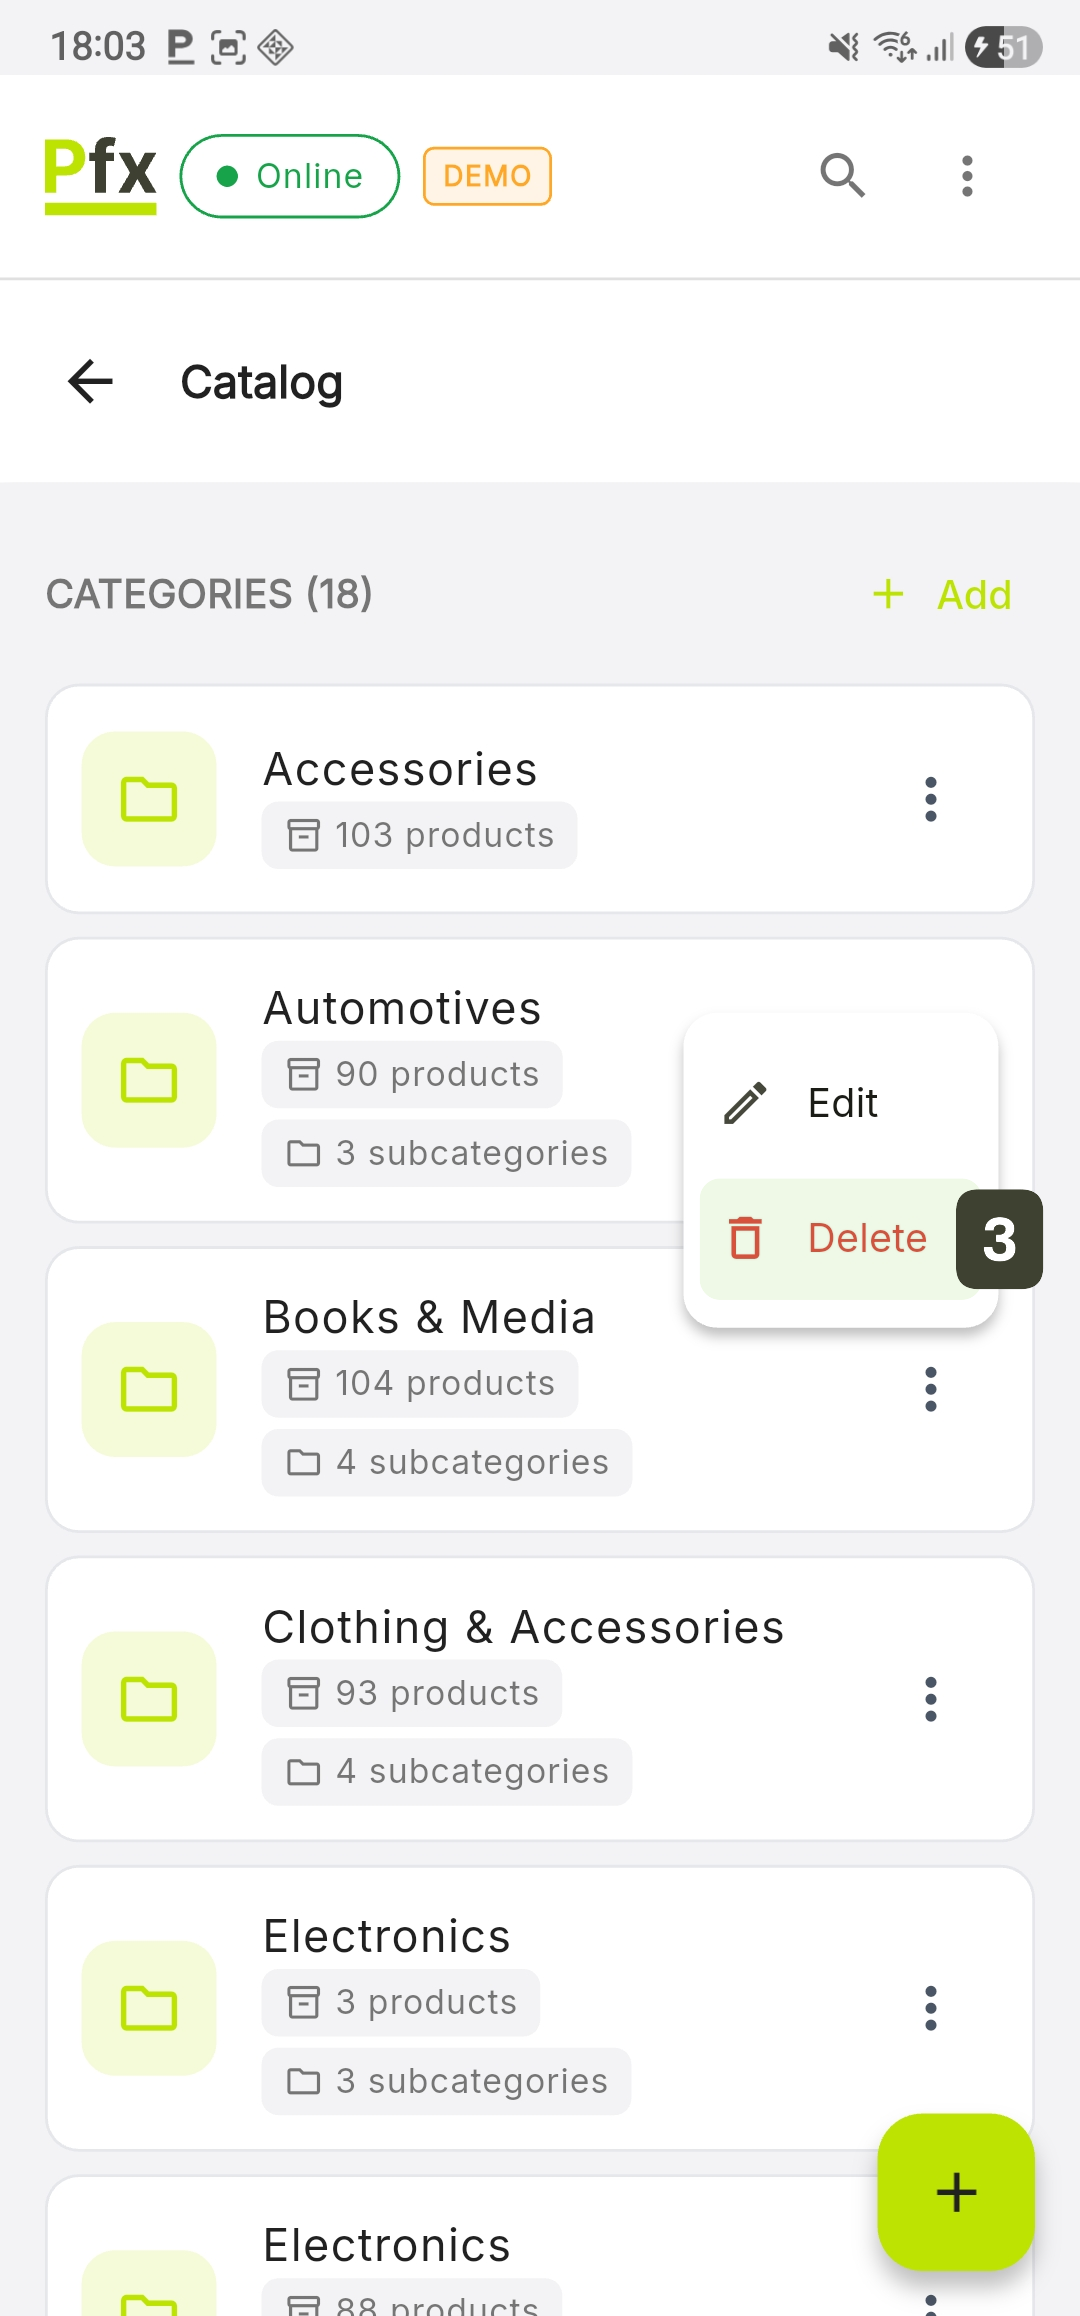
- In the dialog box, press the Delete button to confirm the action
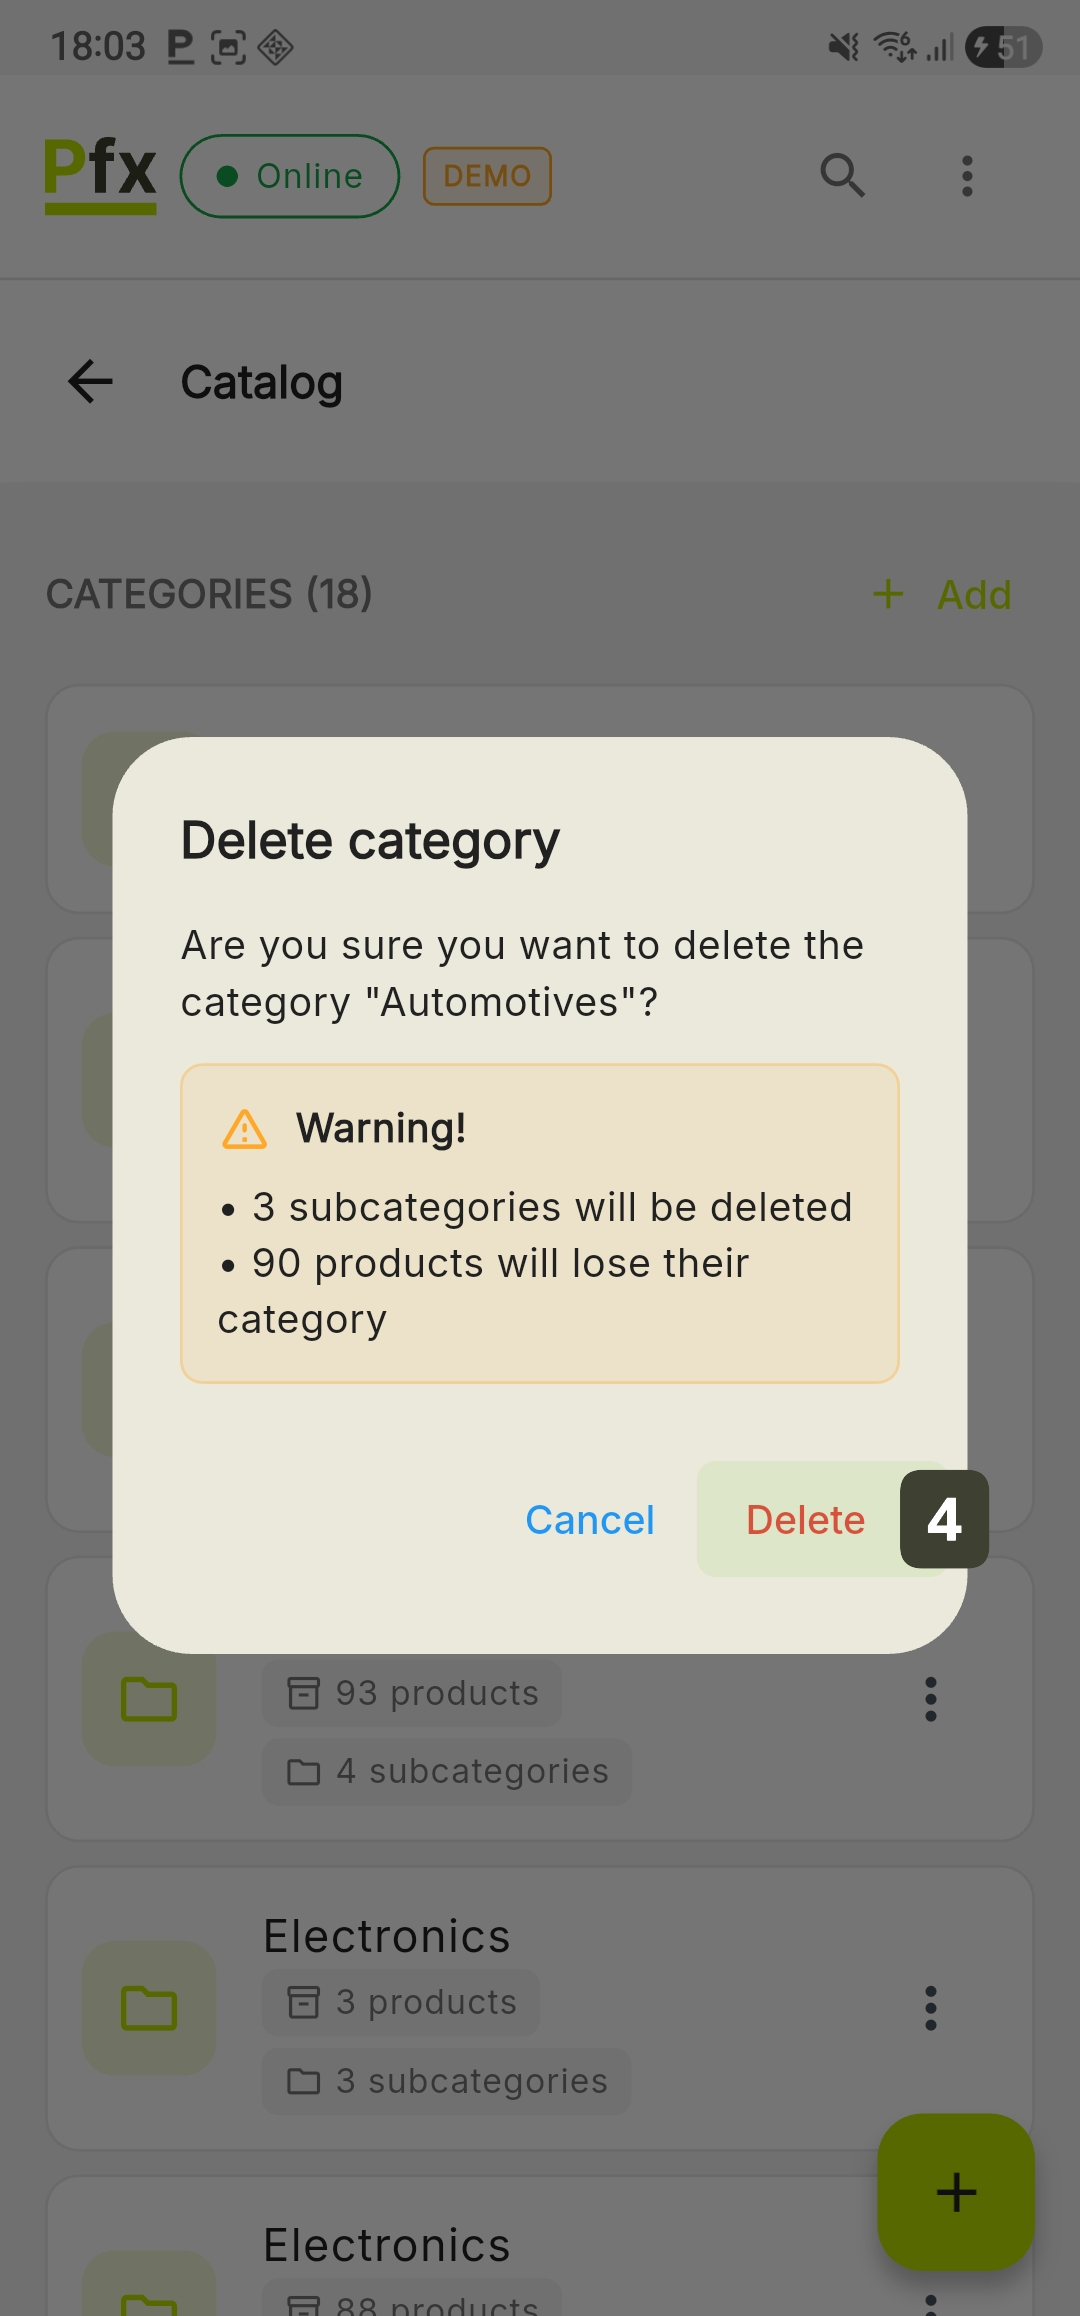
Before deleting, check the numbers displayed in the warning dialog to correctly evaluate the volume of affected data.
To prevent products from being left without a category, it is recommended to edit each important product and change its Parent Category before removing the current folder.
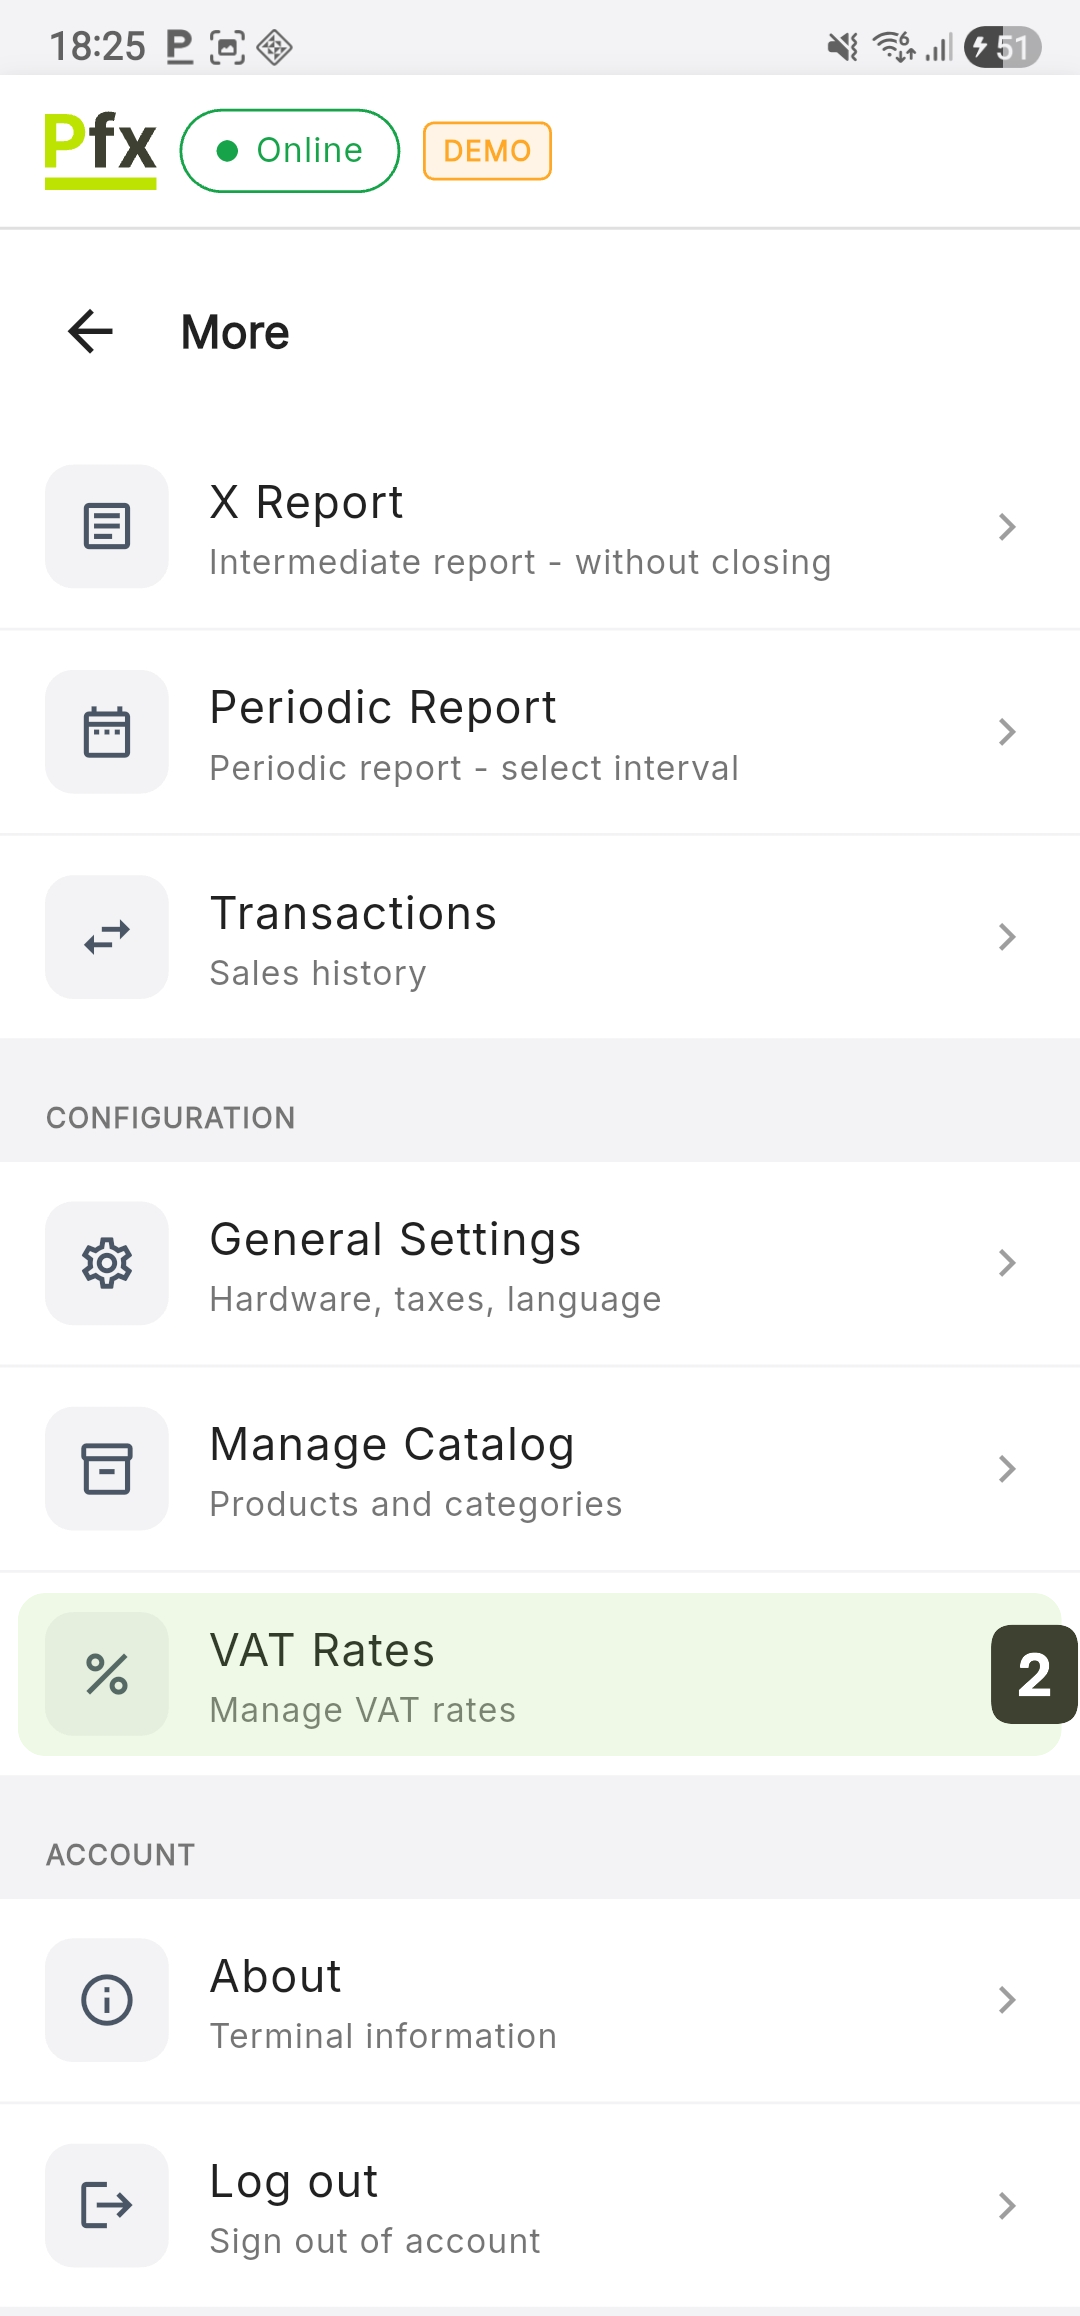
VAT Rate Management
The VAT rate management module allows configuring the fiscal taxes applied to products.
Accessing VAT Rates
To view or modify the VAT rates configured in the PosFix application, follow these steps:
- Press the More button in the bottom navigation bar
- Select VAT Rates
The VAT rates configured in this module are those that subsequently appear in the creation or editing form for each product.
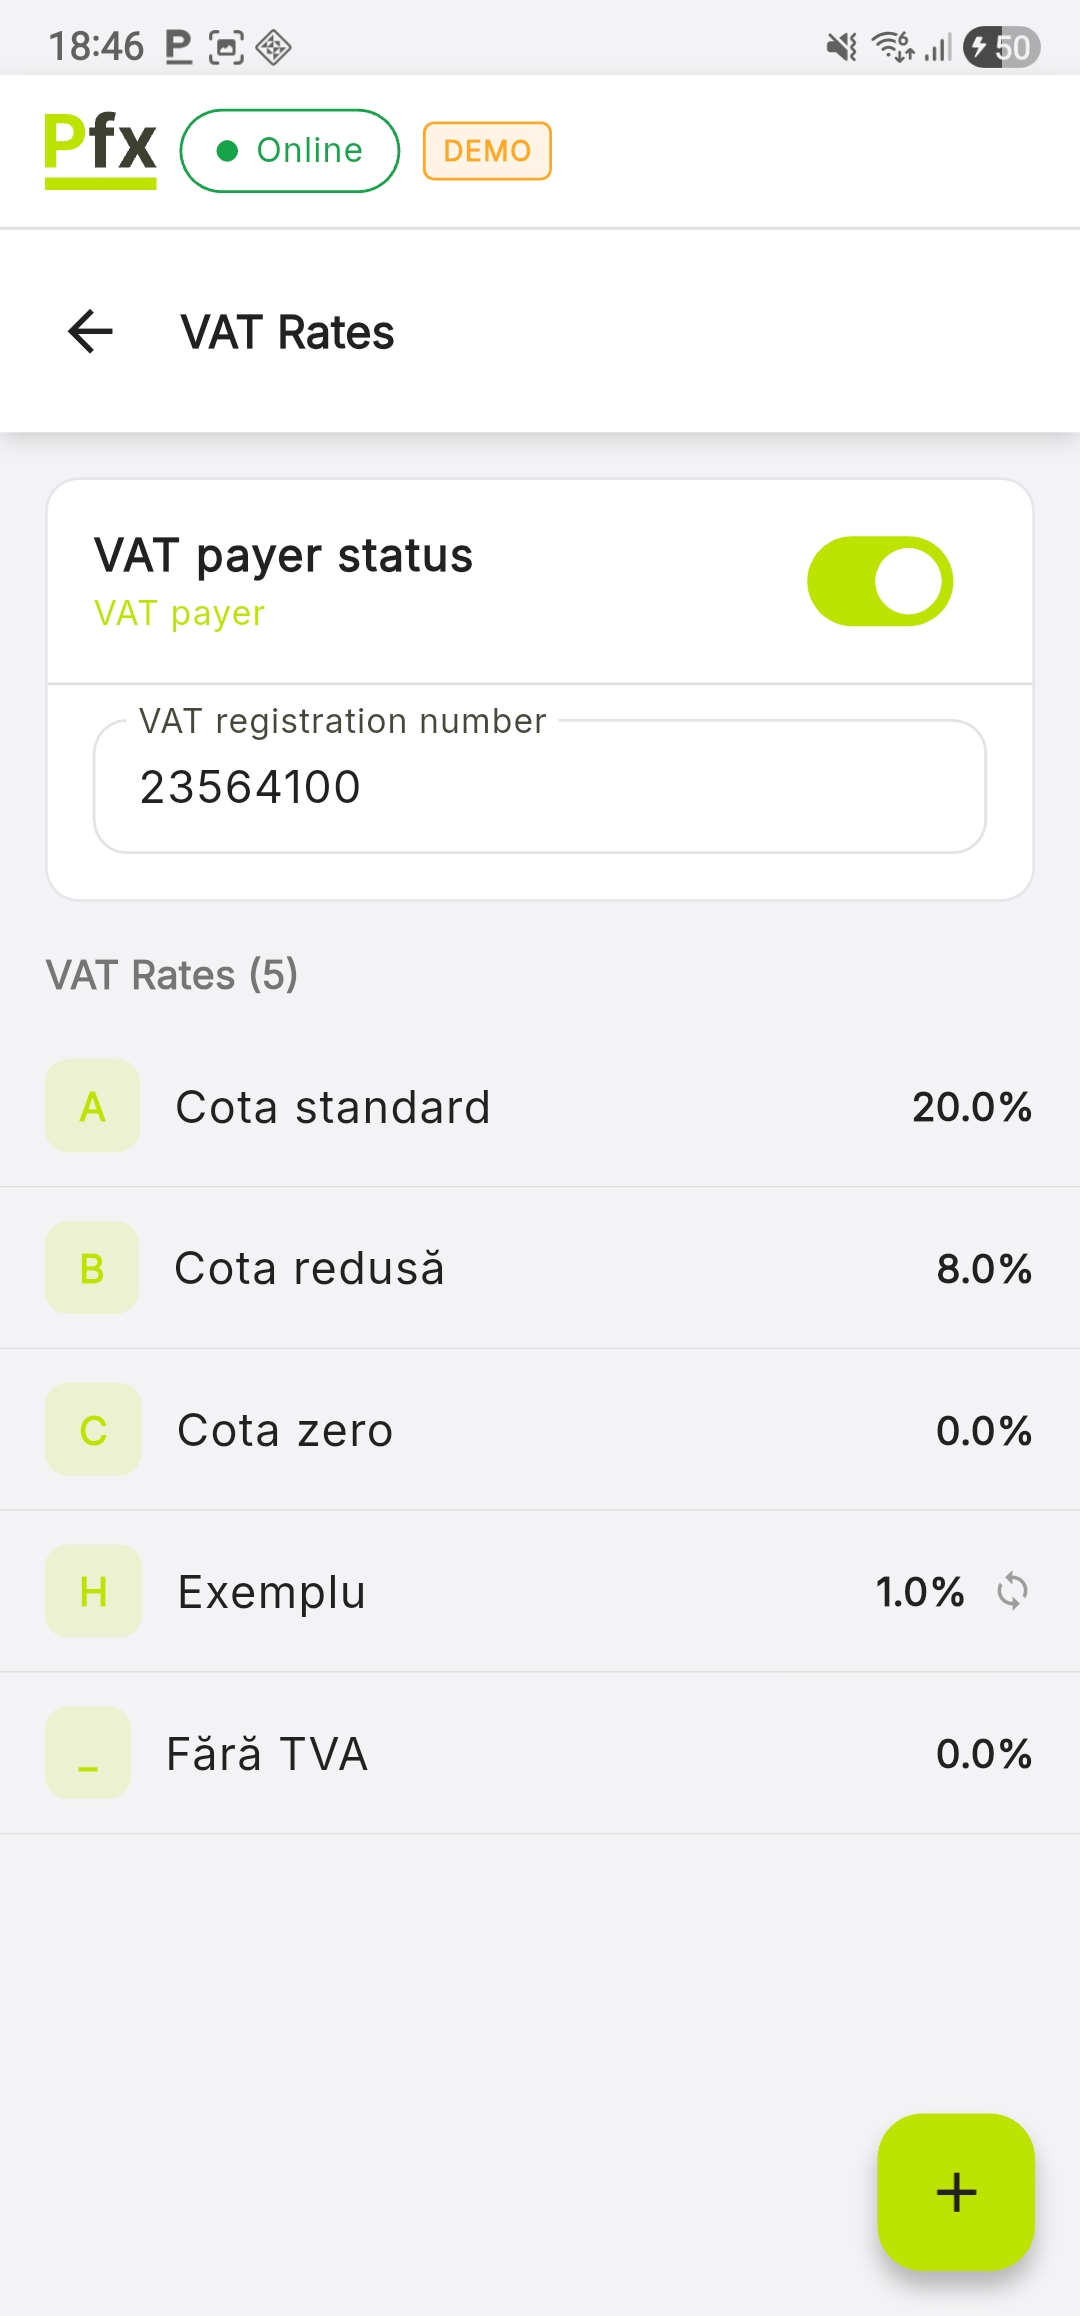
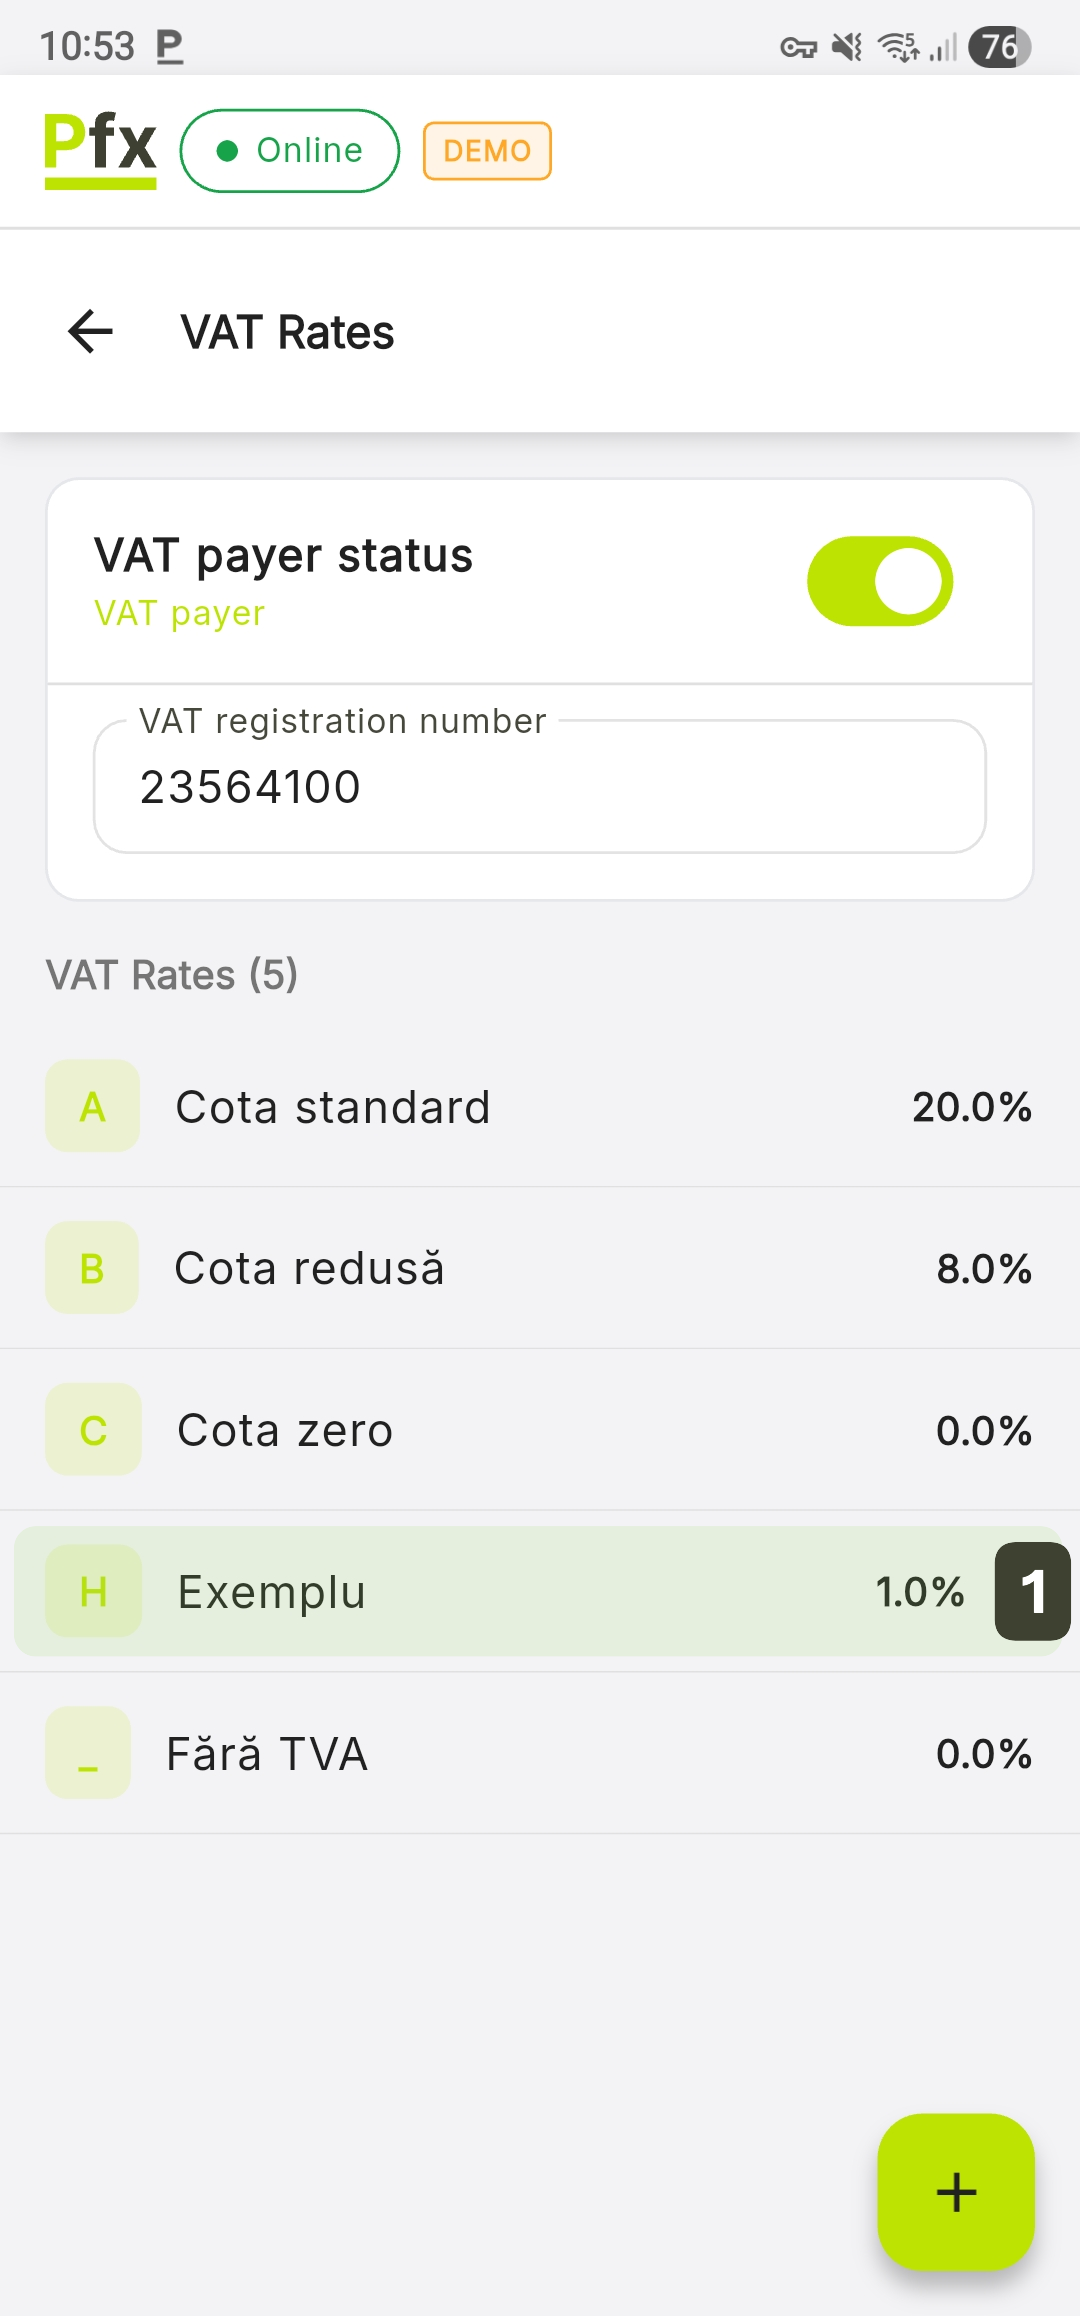
Viewing VAT Rates
The VAT Rates screen provides an overview of the fiscal regime configured on the terminal, divided into the fiscal status section and the detailed list of applicable taxes.
At the top of the screen, the administrator can manage the fiscal identity of the point of sale:
- VAT payer status: Toggle that activates the taxation regime. When enabled, the system will display the VAT Payer label
- VAT registration number: Field for entering the fiscal registration code
- VAT Rates: The system displays all available rates to be associated with products
Adding a VAT Rate
To add a new tax rate into the system, follow these steps on the VAT Rates screen:
- Press the [ + ] button located in the bottom right corner
- Fill in the fields in the Add VAT Rate window:
| Field | Type | Description |
|---|---|---|
| Code | Required | A unique identifier consisting of letters (e.g.: D, E) that will serve as a fiscal reference |
| Name | Required | Descriptive name of the rate, as it will be recognized in operations (e.g.: "Reduced VAT 5%") |
| Percent | Required | Numerical value of the percentage rate (e.g.: 5%) |
| Description | Optional | Additional details or observations regarding the applicability of this rate |
| Active | Toggle | Determines whether this rate is available (active/inactive) |
- Press Add VAT Rate to save the changes
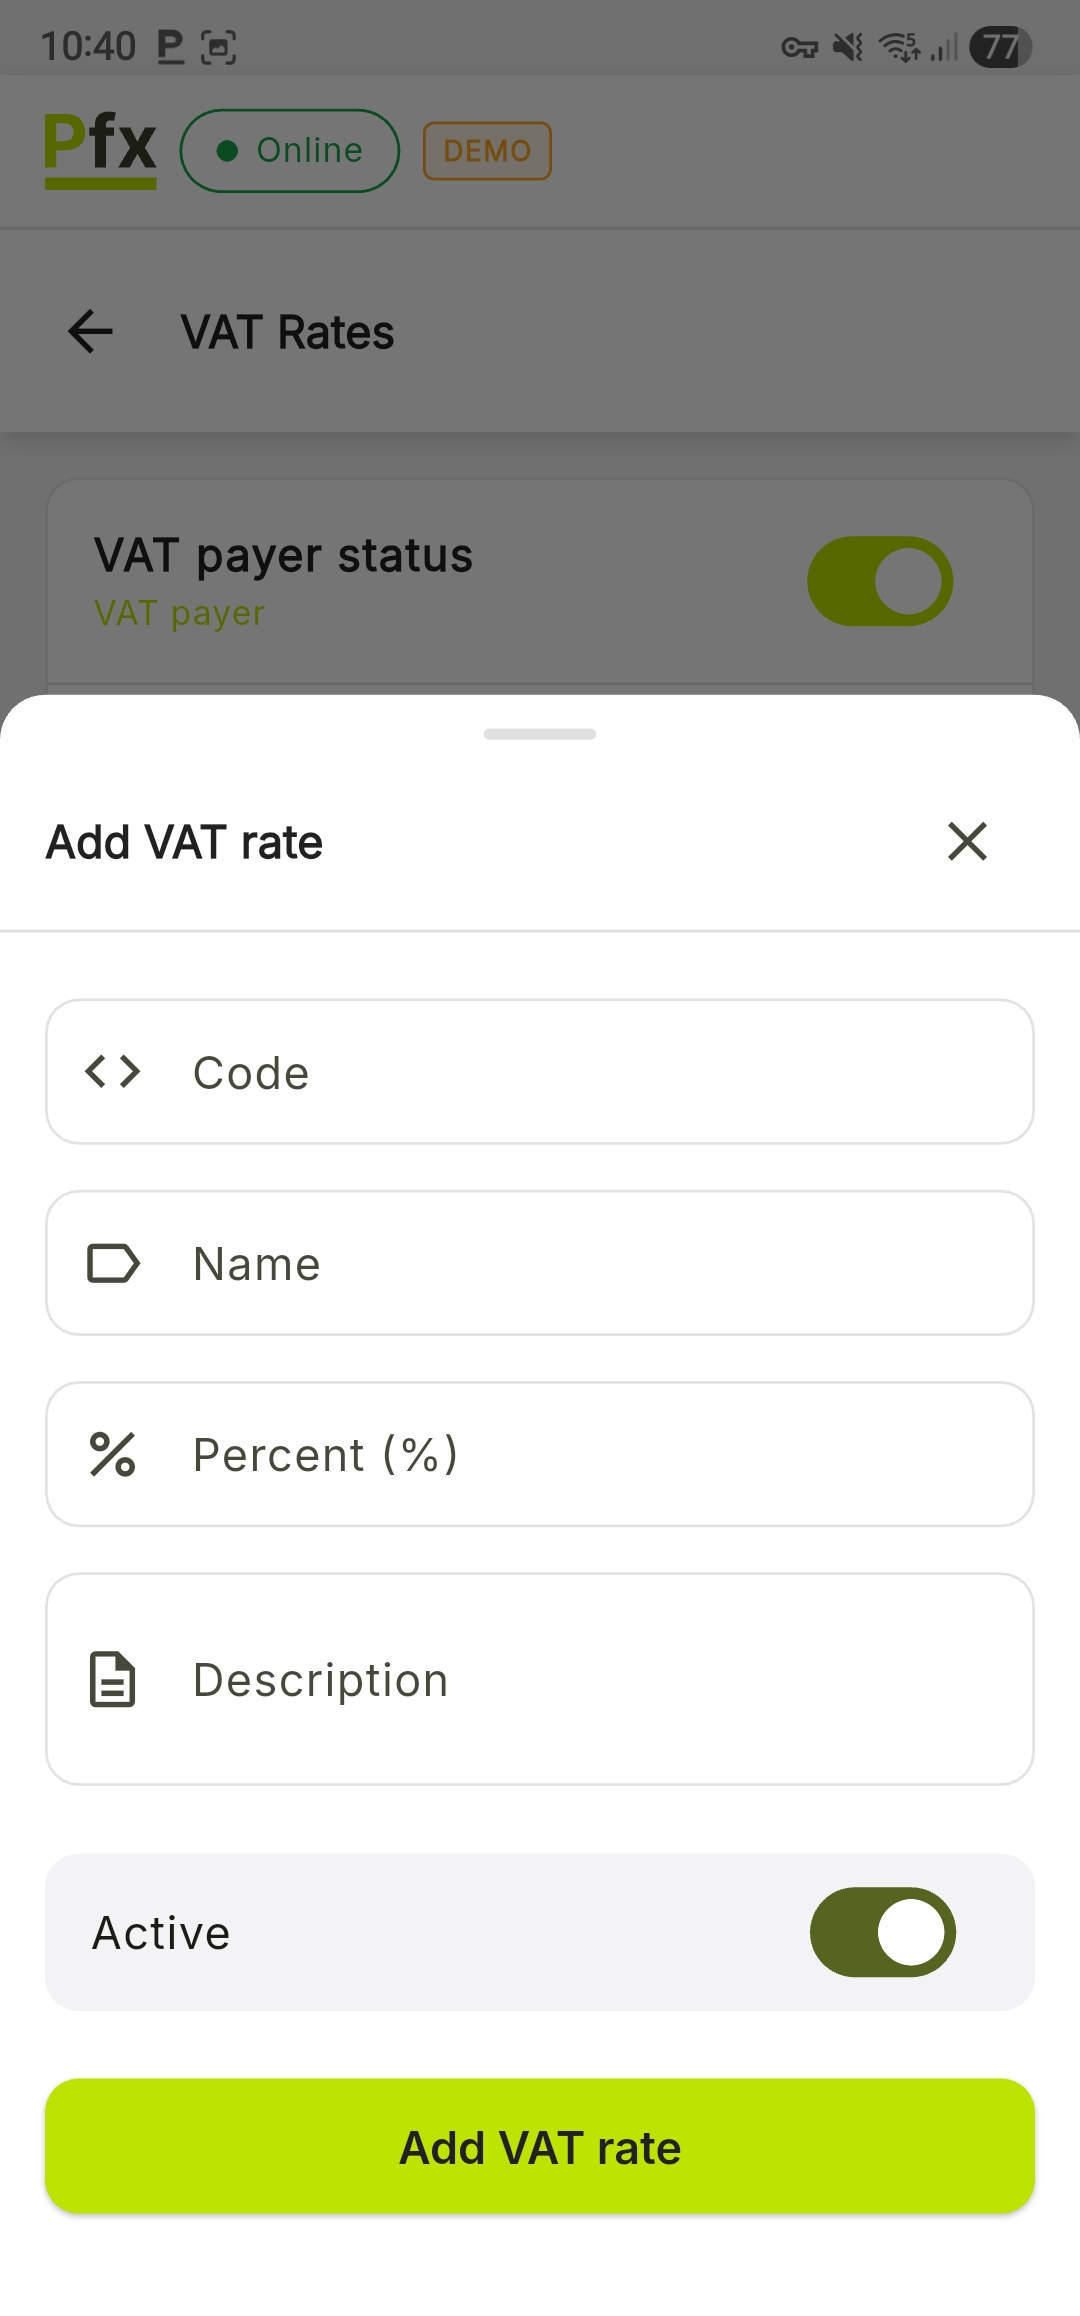
The VAT rate code must be unique. The system displays an error if you enter an already existing code.
Editing a VAT Rate
Adjusting VAT rates is necessary in case of fiscal legislation changes.
- In the list on the VAT Rates screen, tap directly on the row corresponding to the rate you want to update
- Modify the desired fields (the code cannot be changed after creation)
- Press the Save button
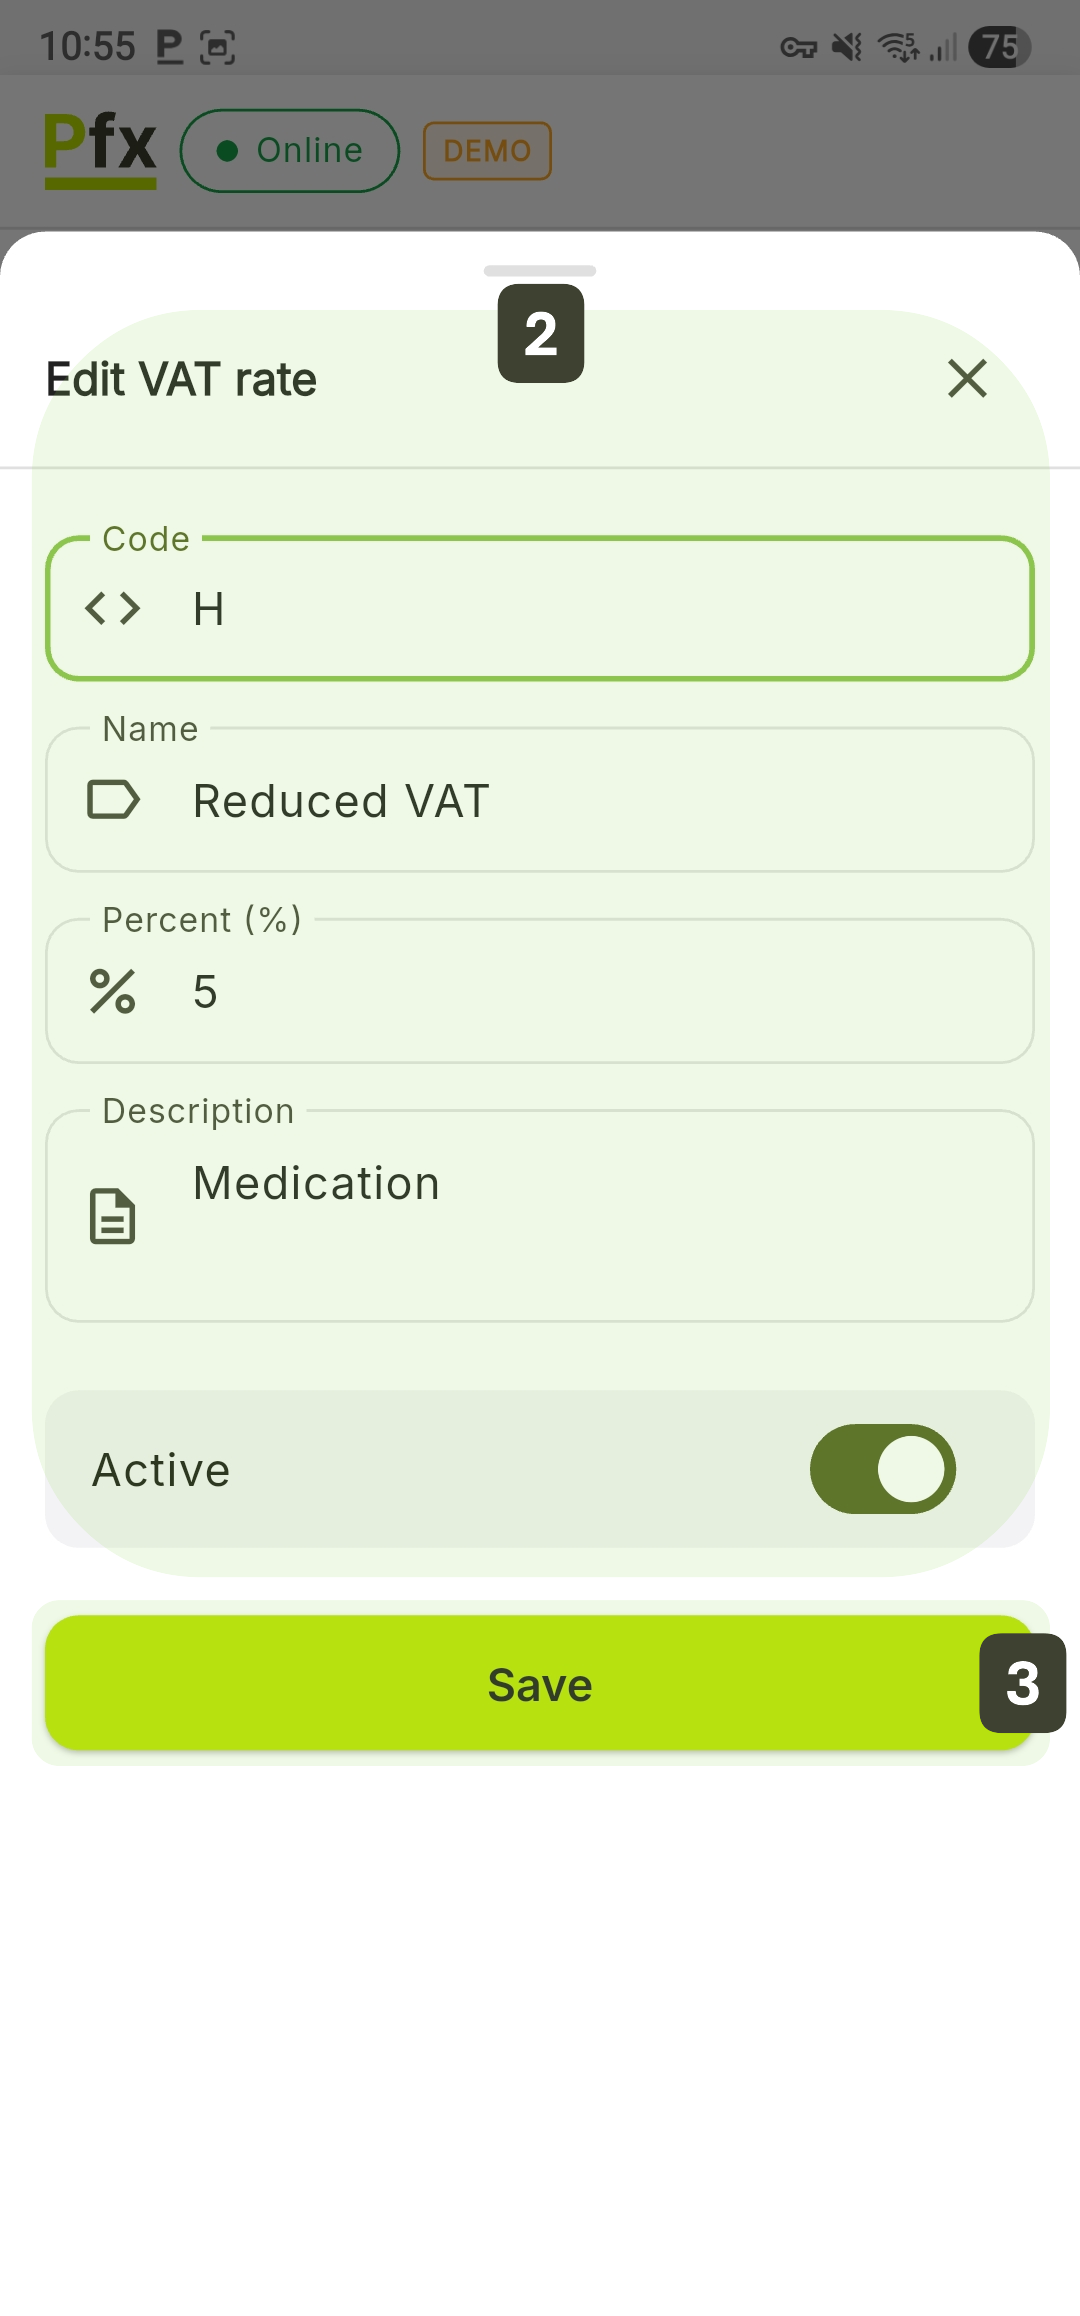
The VAT rate code is read-only after creation, because it is used as a unique identifier in existing fiscal receipts.
If a VAT rate is no longer valid according to the law, it is recommended to set its status to Inactive.
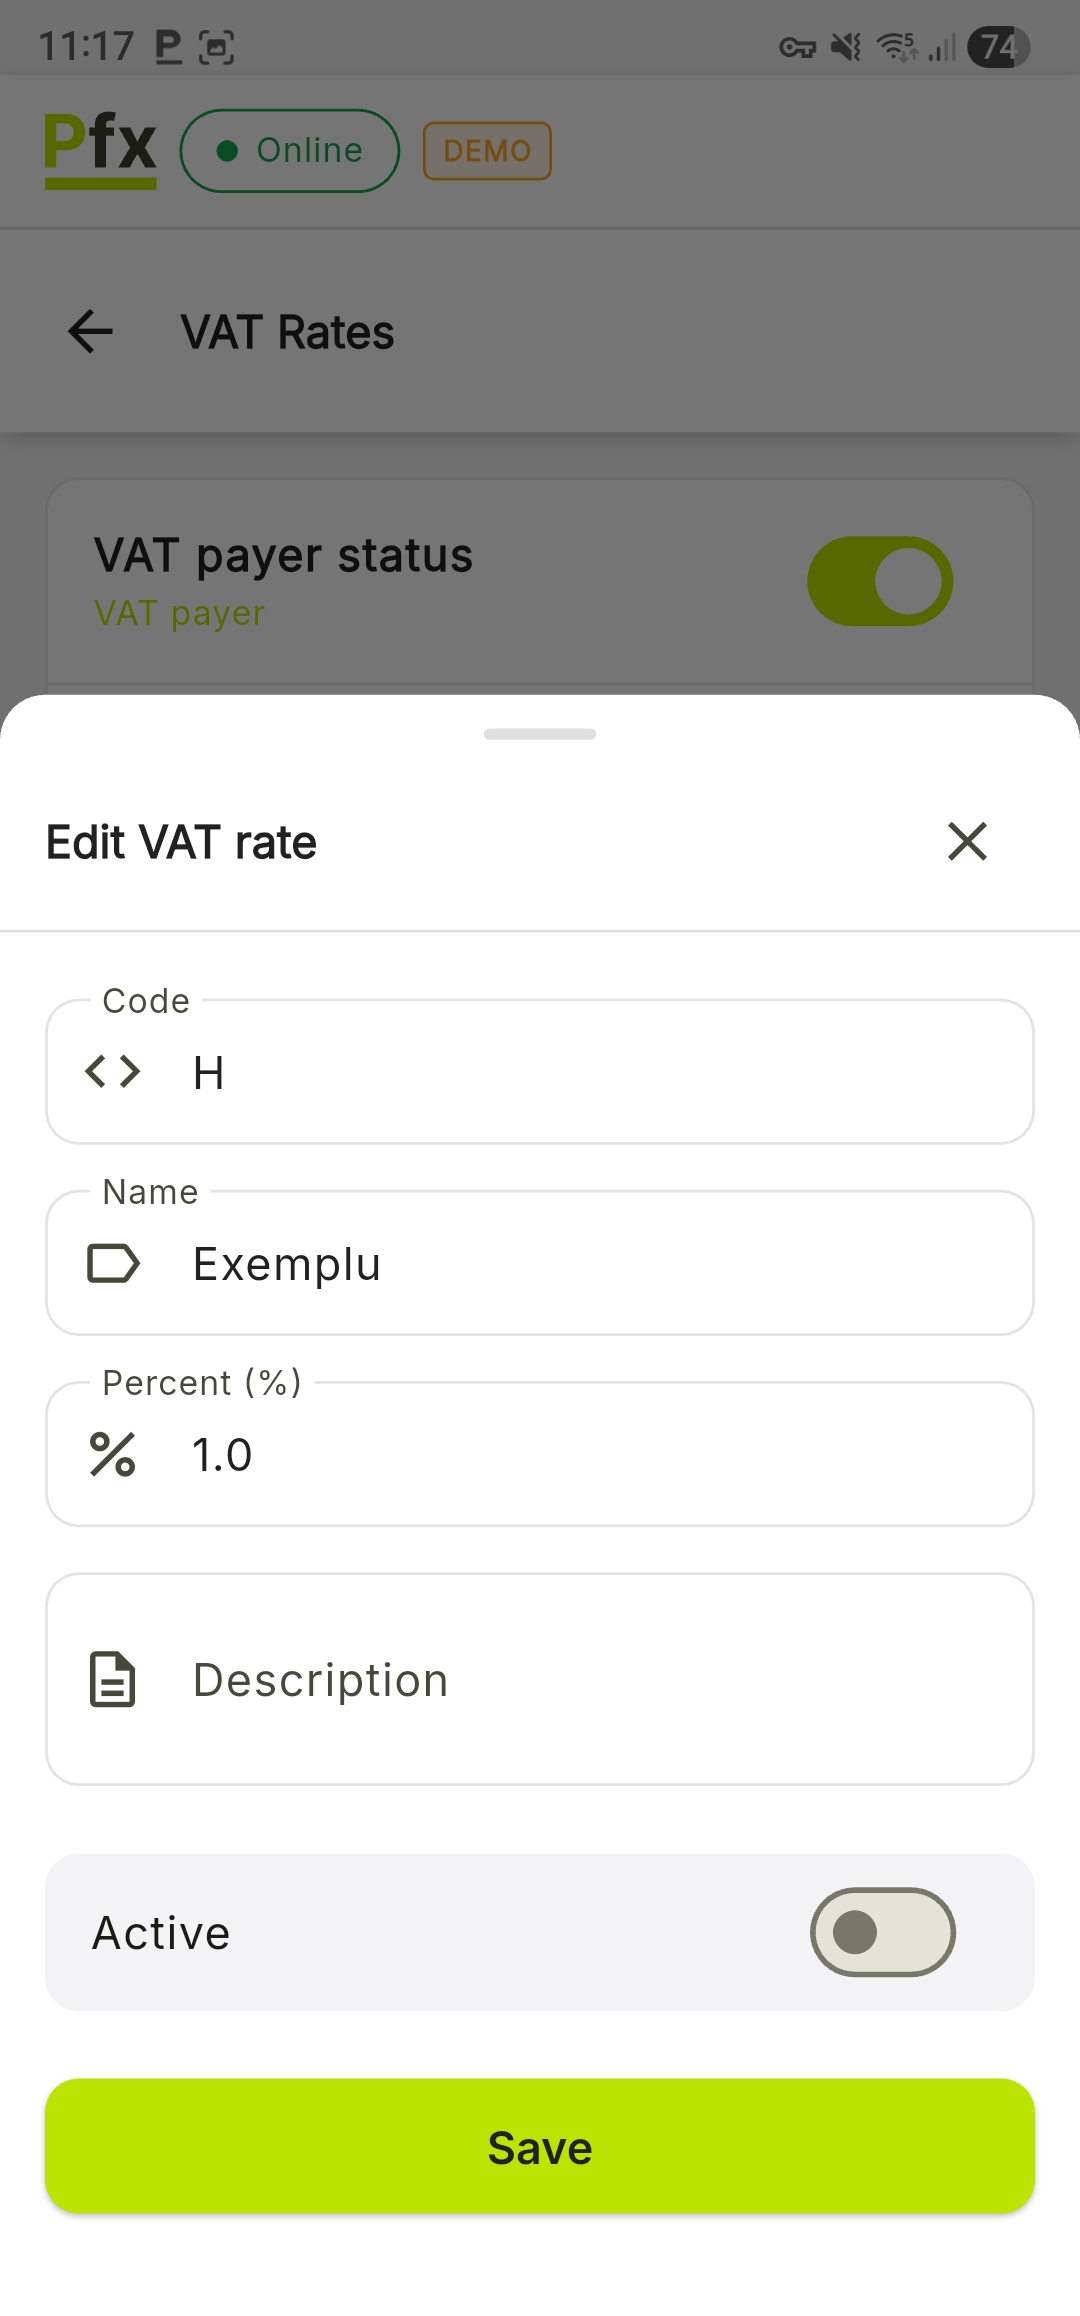
Deactivating a VAT Rate
This option is recommended when a tax rate is no longer current (e.g.: legislative changes) but was previously used on sold products.
Procedure: In the rate editing window, deactivate the Active toggle and press Save.
Permissions
Managing VAT rates requires special rights:
| Action | Required Permission |
|---|---|
| View | All users |
| Create/Edit | Administrator |
| Deactivate | Administrator |
Users without administrator rights will see the VAT rate list in read-only mode, without the add button or editing options.
Synchronization and Data Priority
The PosFix system ensures the consistency of fiscal data through automatic synchronization, while following a strict hierarchy to prevent reporting discrepancies across different work locations.
- Server Priority: Although VAT rates can be adjusted locally on the terminal for urgent cases, the settings configured in the Dashboard (web interface) are considered primary.
- Global Propagation: Any change made by an administrator in the Dashboard is automatically applied to all POS terminals connected to that account, ensuring fiscal uniformity across the entire network.
- Synchronization: Add, edit, or deactivate actions are saved locally and flagged with a "Syncing" indicator until the data is validated by the server.
Any fiscal changes must be made exclusively after the Z Report (daily closure) has been generated. This measure prevents calculation conflicts in daily fiscal reports and ensures a smooth transition to the new tax rate for the next sales session.
If you have multiple terminals, the safest way to change a VAT rate is to edit it from the Dashboard, after all locations have completed their closing.
Standard VAT Rates
| Rate | Percent | Usage |
|---|---|---|
| A | 20% | Standard rate |
| B | 8% | Reduced rate |
| C | 0% | VAT exempt |
| D | 0% | Non-taxable |