Main Interface (POS)
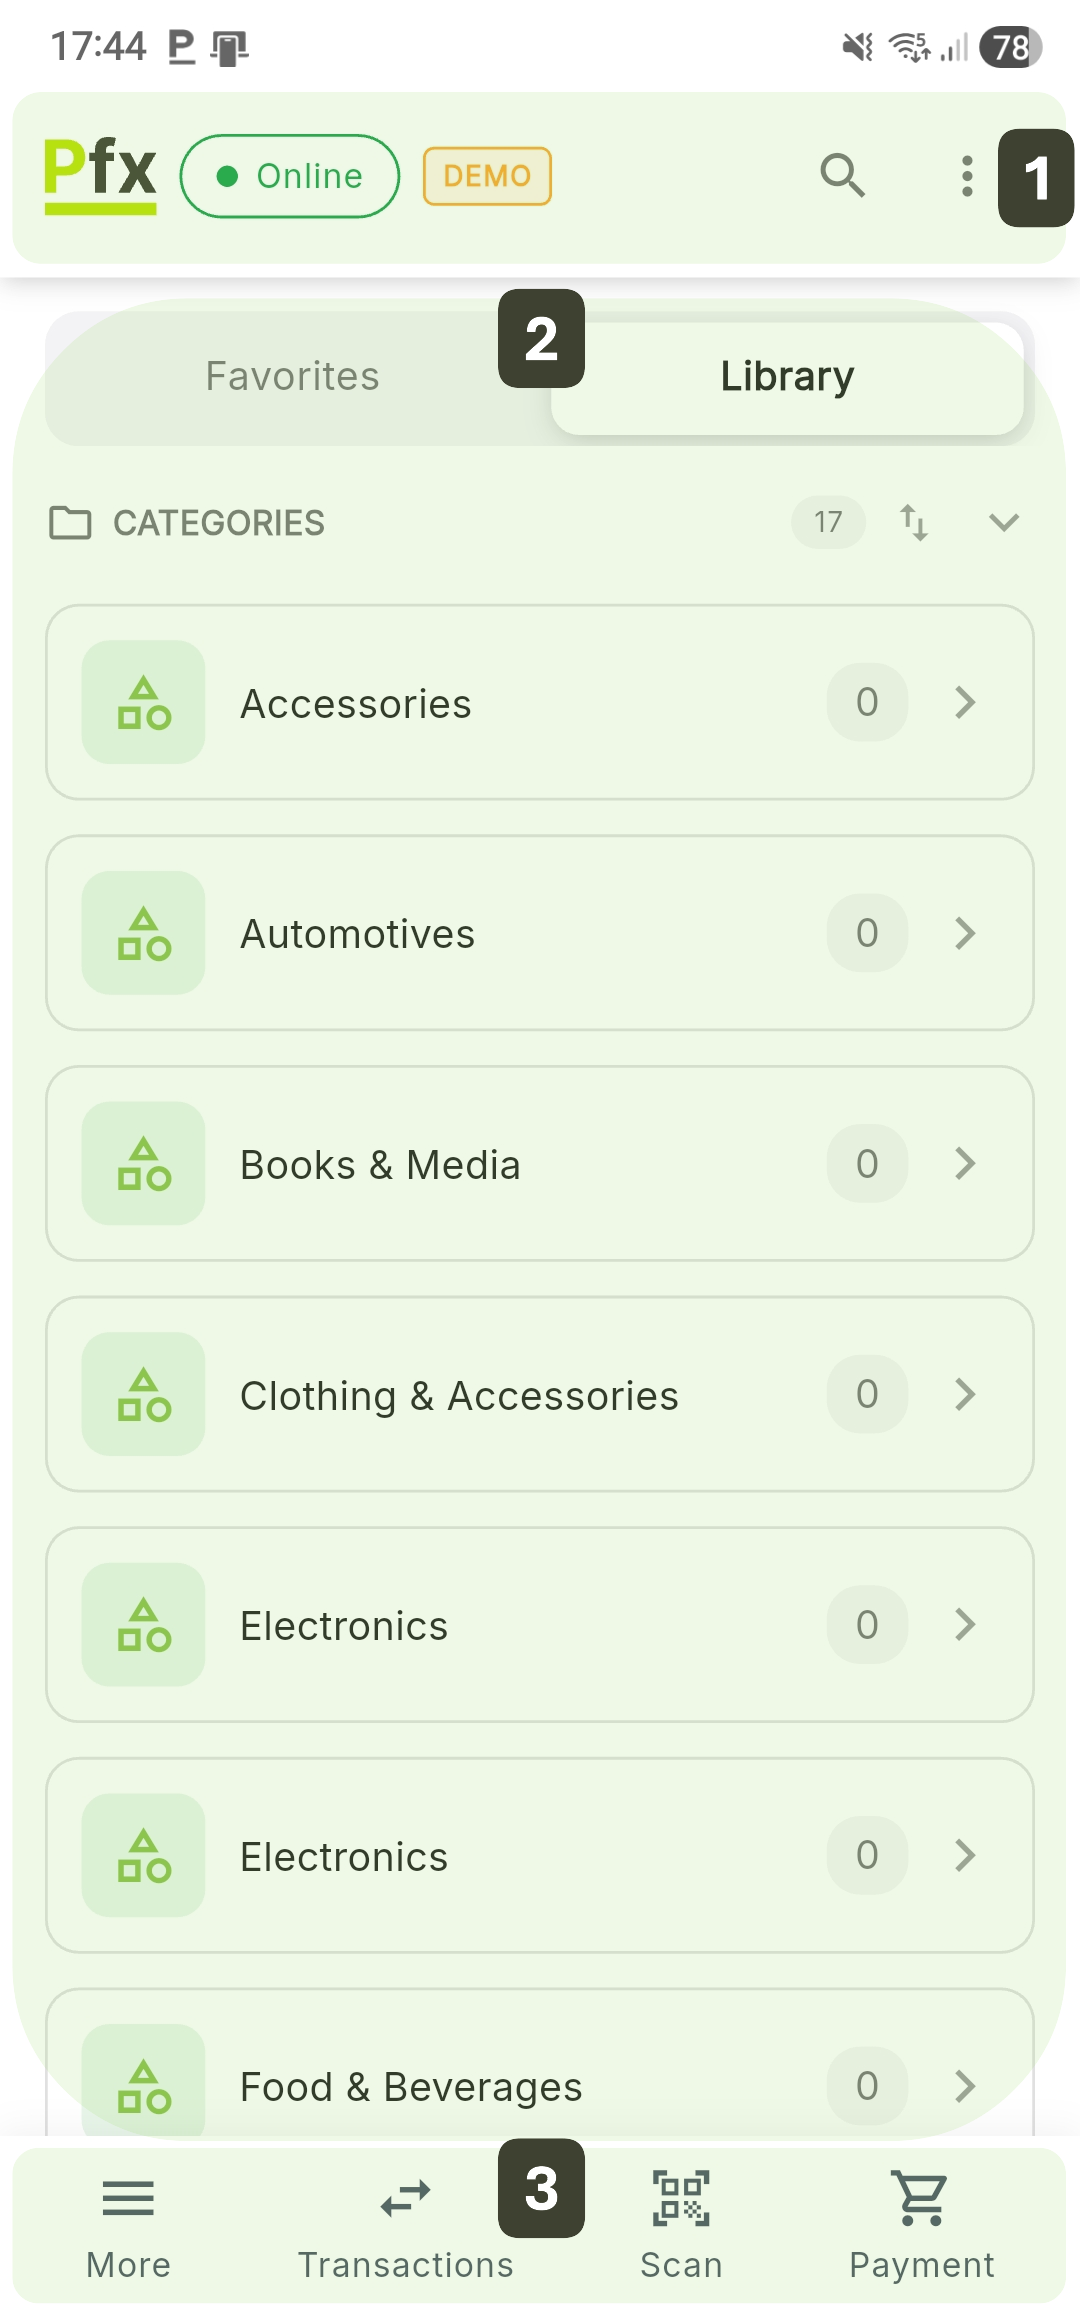
After authentication, you will access the main sales screen. The interface is optimized for quick use on touch terminals and is divided into three interaction zones.
Interface Components
The interface is organized into three main zones:
| Zone | Description |
|---|---|
| 1. Top Bar | Logo, online/offline indicator, search bar |
| 2. Central Zone | Quick navigation, products displayed in grid or list |
| 3. Navigation Bar (Bottom) | Quick access: More, Transactions, Scan, Payment (Cart) |
Top Bar
| Element | Description |
|---|---|
| 1. PosFix Logo | Application indicator |
| 2. Online/Offline Indicator | Green = connected to server, Red = disconnected |
| 3. Search Bar | Identify products by name or barcode |
| 4. View Mode | Product display mode |

Search Bar
The search bar allows quick identification of items from a large catalog, eliminating the need to navigate through categories. The search bar appears by pulling the screen down (pull-down) or by tapping the magnifying glass icon:
- Enter the first few letters of the product name or its code
- The system displays in real time the list of products matching the criteria, indicating the total number of results found
- To add the product to the cart, press the Add button next to the desired item
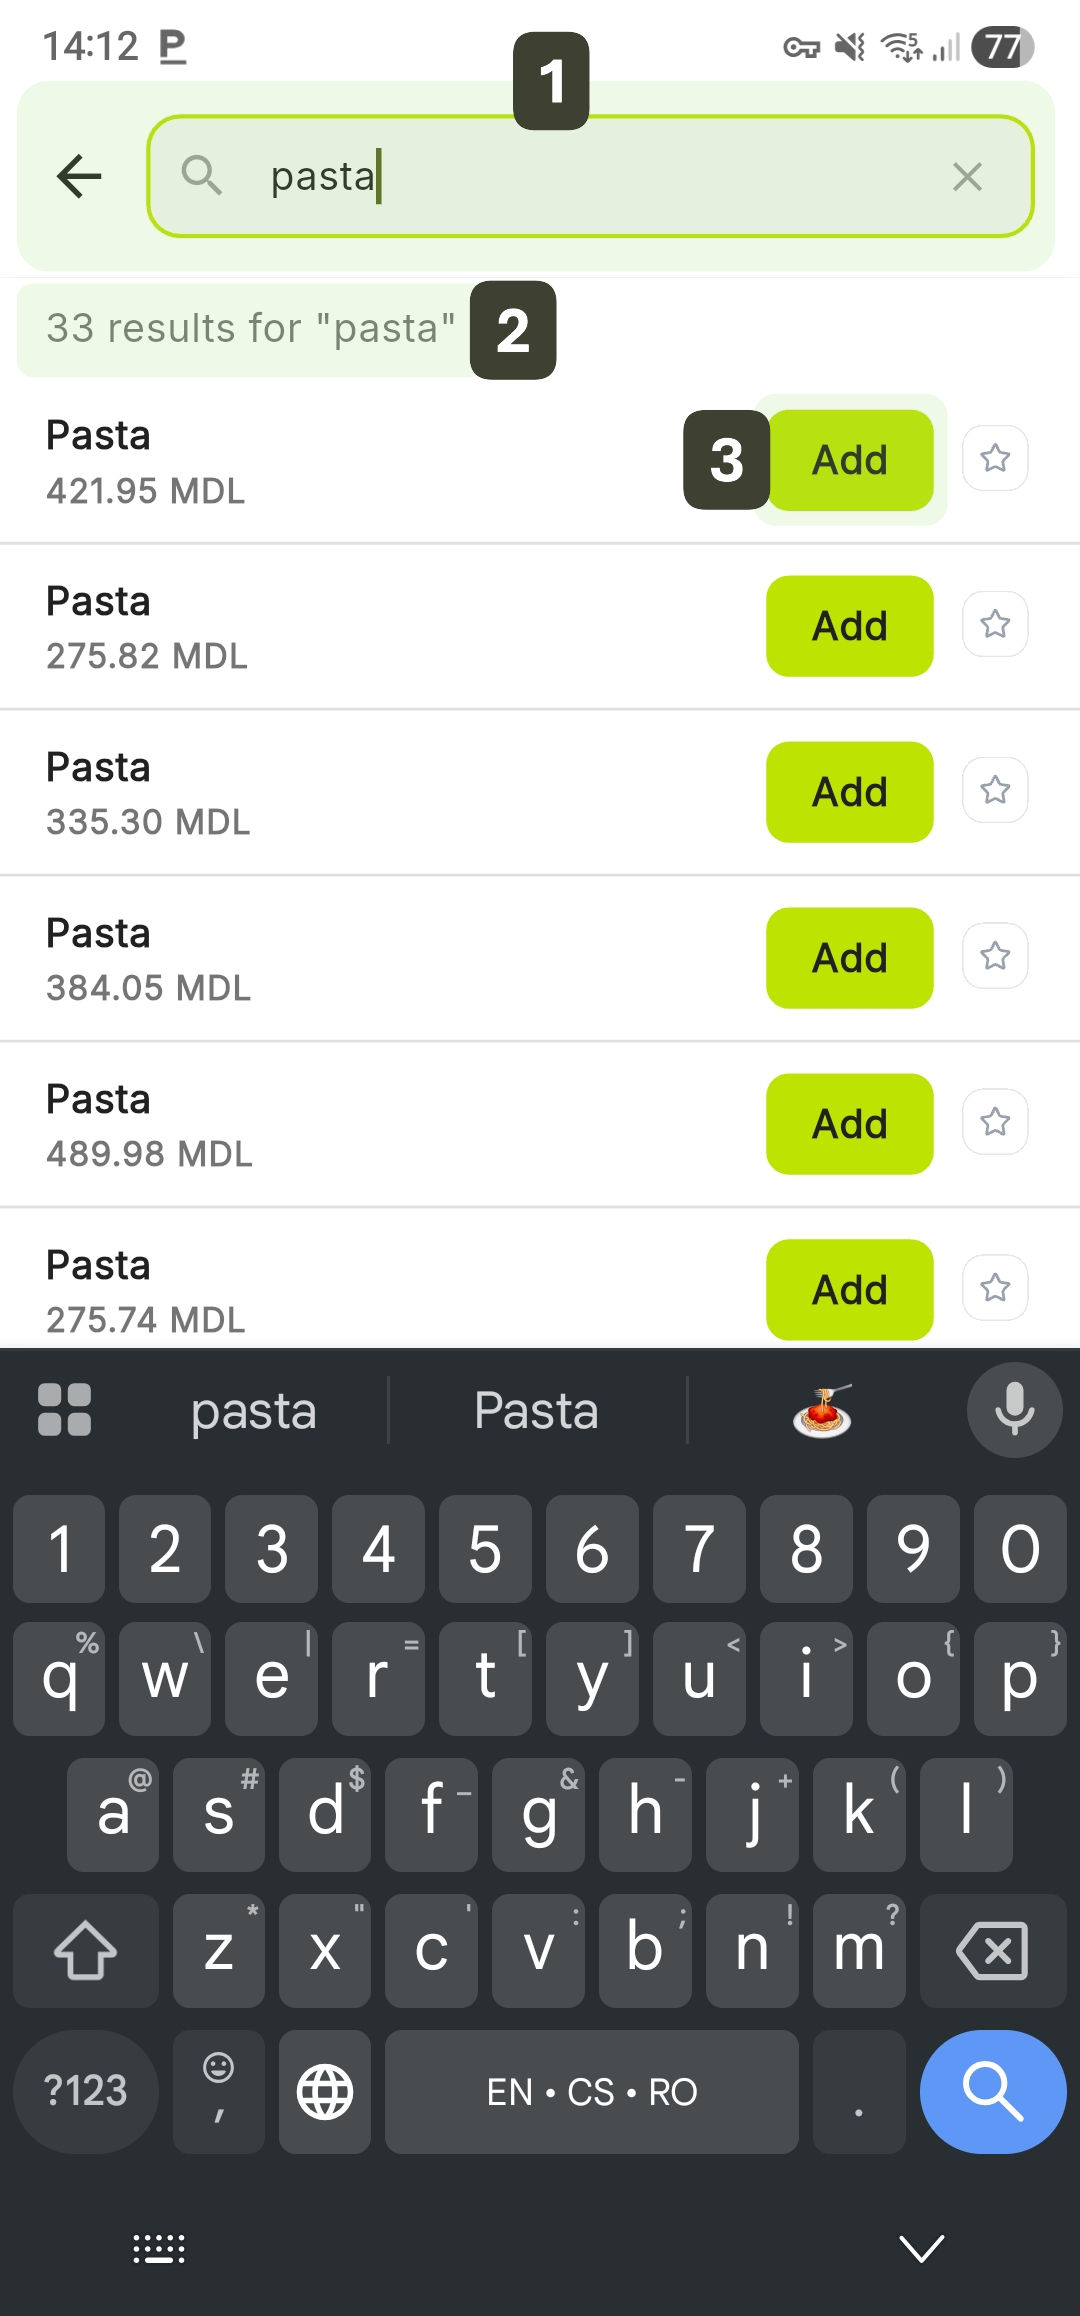
Control Elements on the Search Screen:
- "X" Button: Instantly clears the entered text to start a new search.
- Back Arrow: Closes the search interface and returns to the main screen.
- Star Icon: Allows marking a product as "Favorite" directly from the search list.
For a very large database, it is recommended to enter at least 3 characters to get relevant and fast filtering.
Product Navigation Tabs
The central area of the interface is organized into two main sections to facilitate quick access to the entire product catalog.
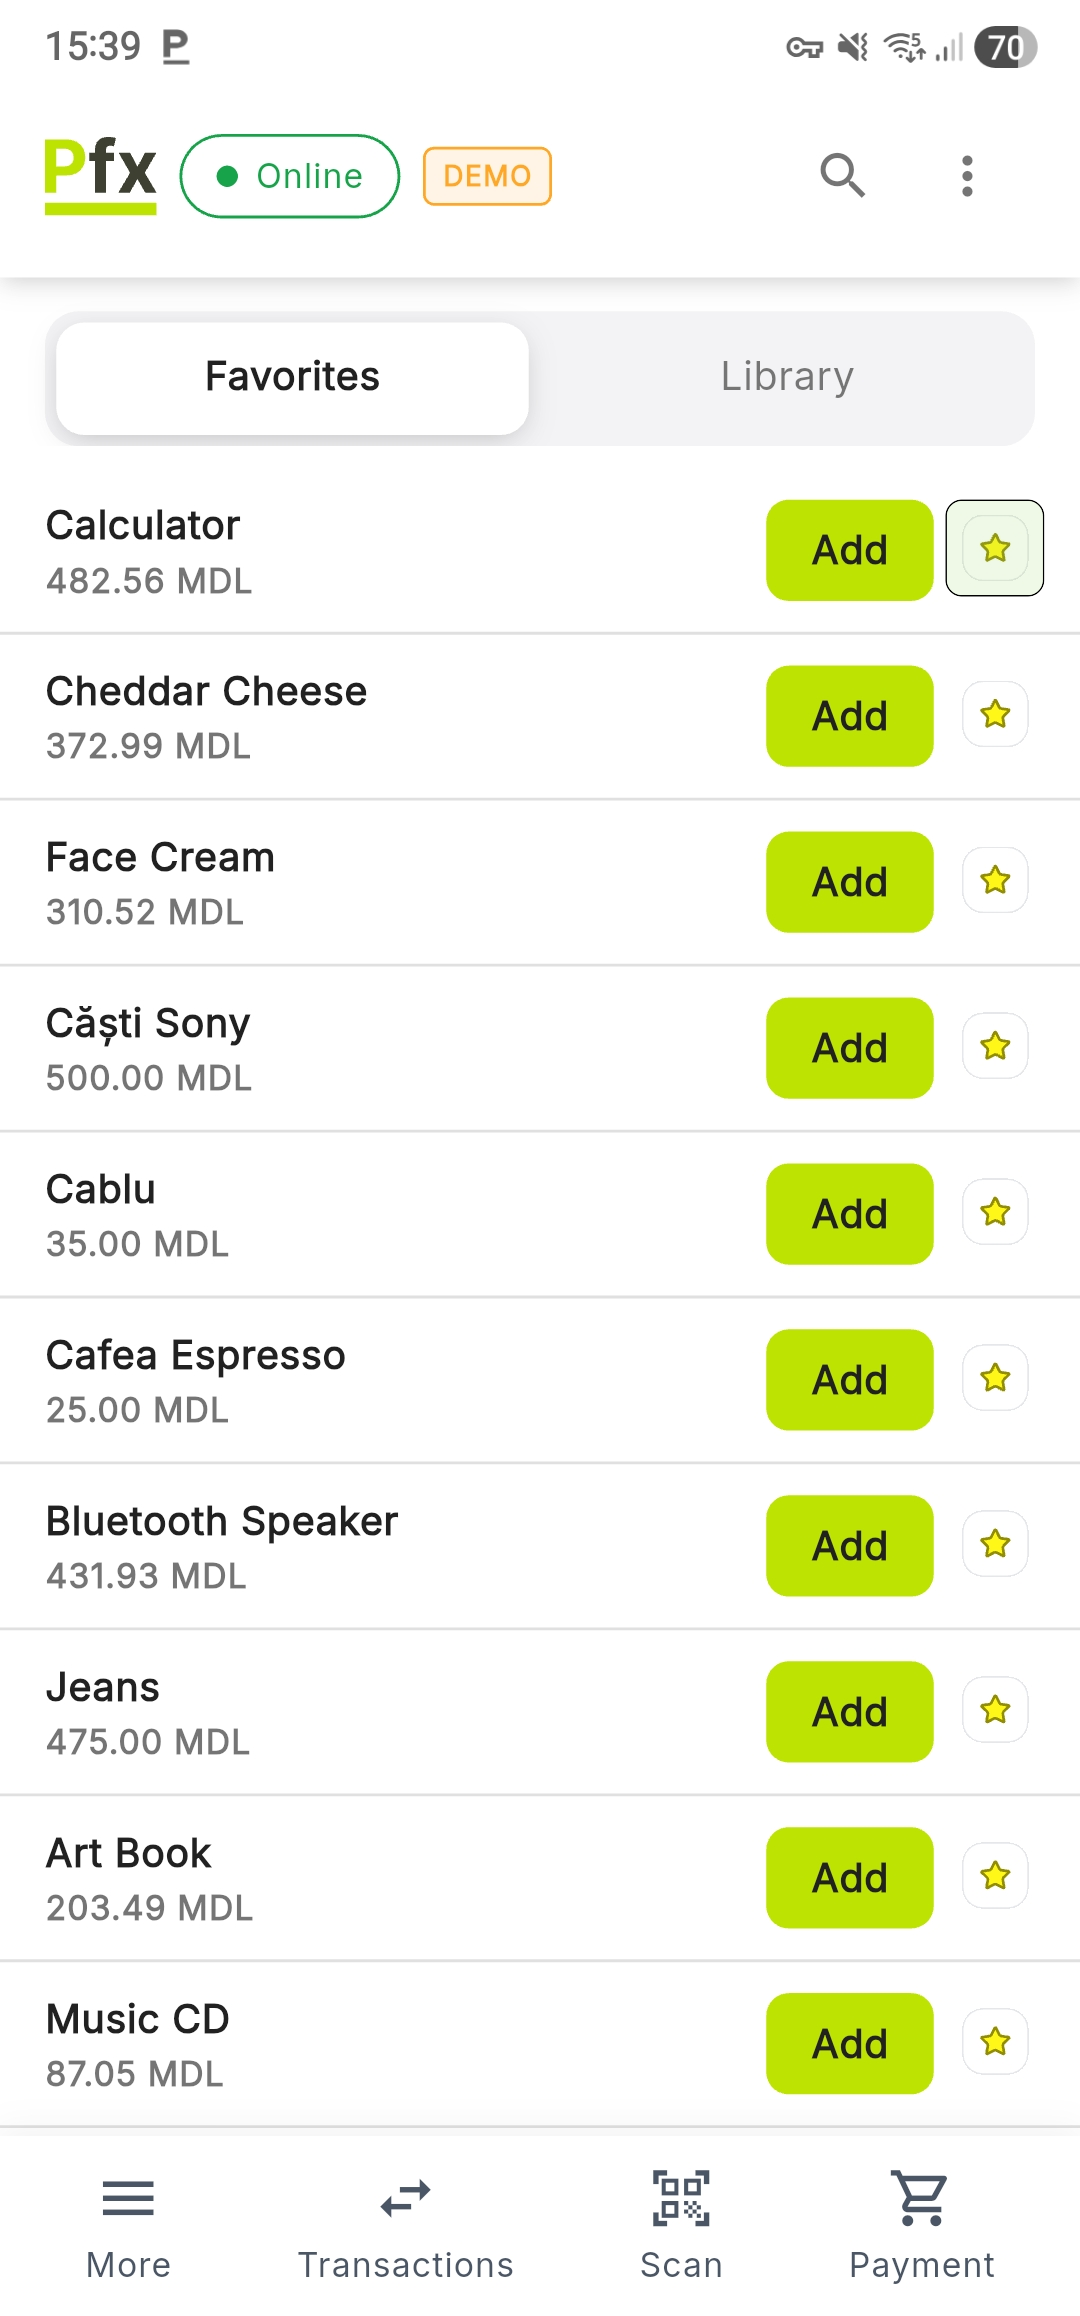
Favorites
Displays a list of manually marked products, providing instant access to frequently sold items.
Steps to add to Favorites:
Activating the status: Tap the star to mark the product as a favorite.
Once activated, the star changes color from gray (outline) to yellow (filled), confirming that the product has been saved to the Favorites tab.
Removing from Favorites: Tap the yellow star again to remove the product from the list.
The icon will return to its neutral state (gray outline).
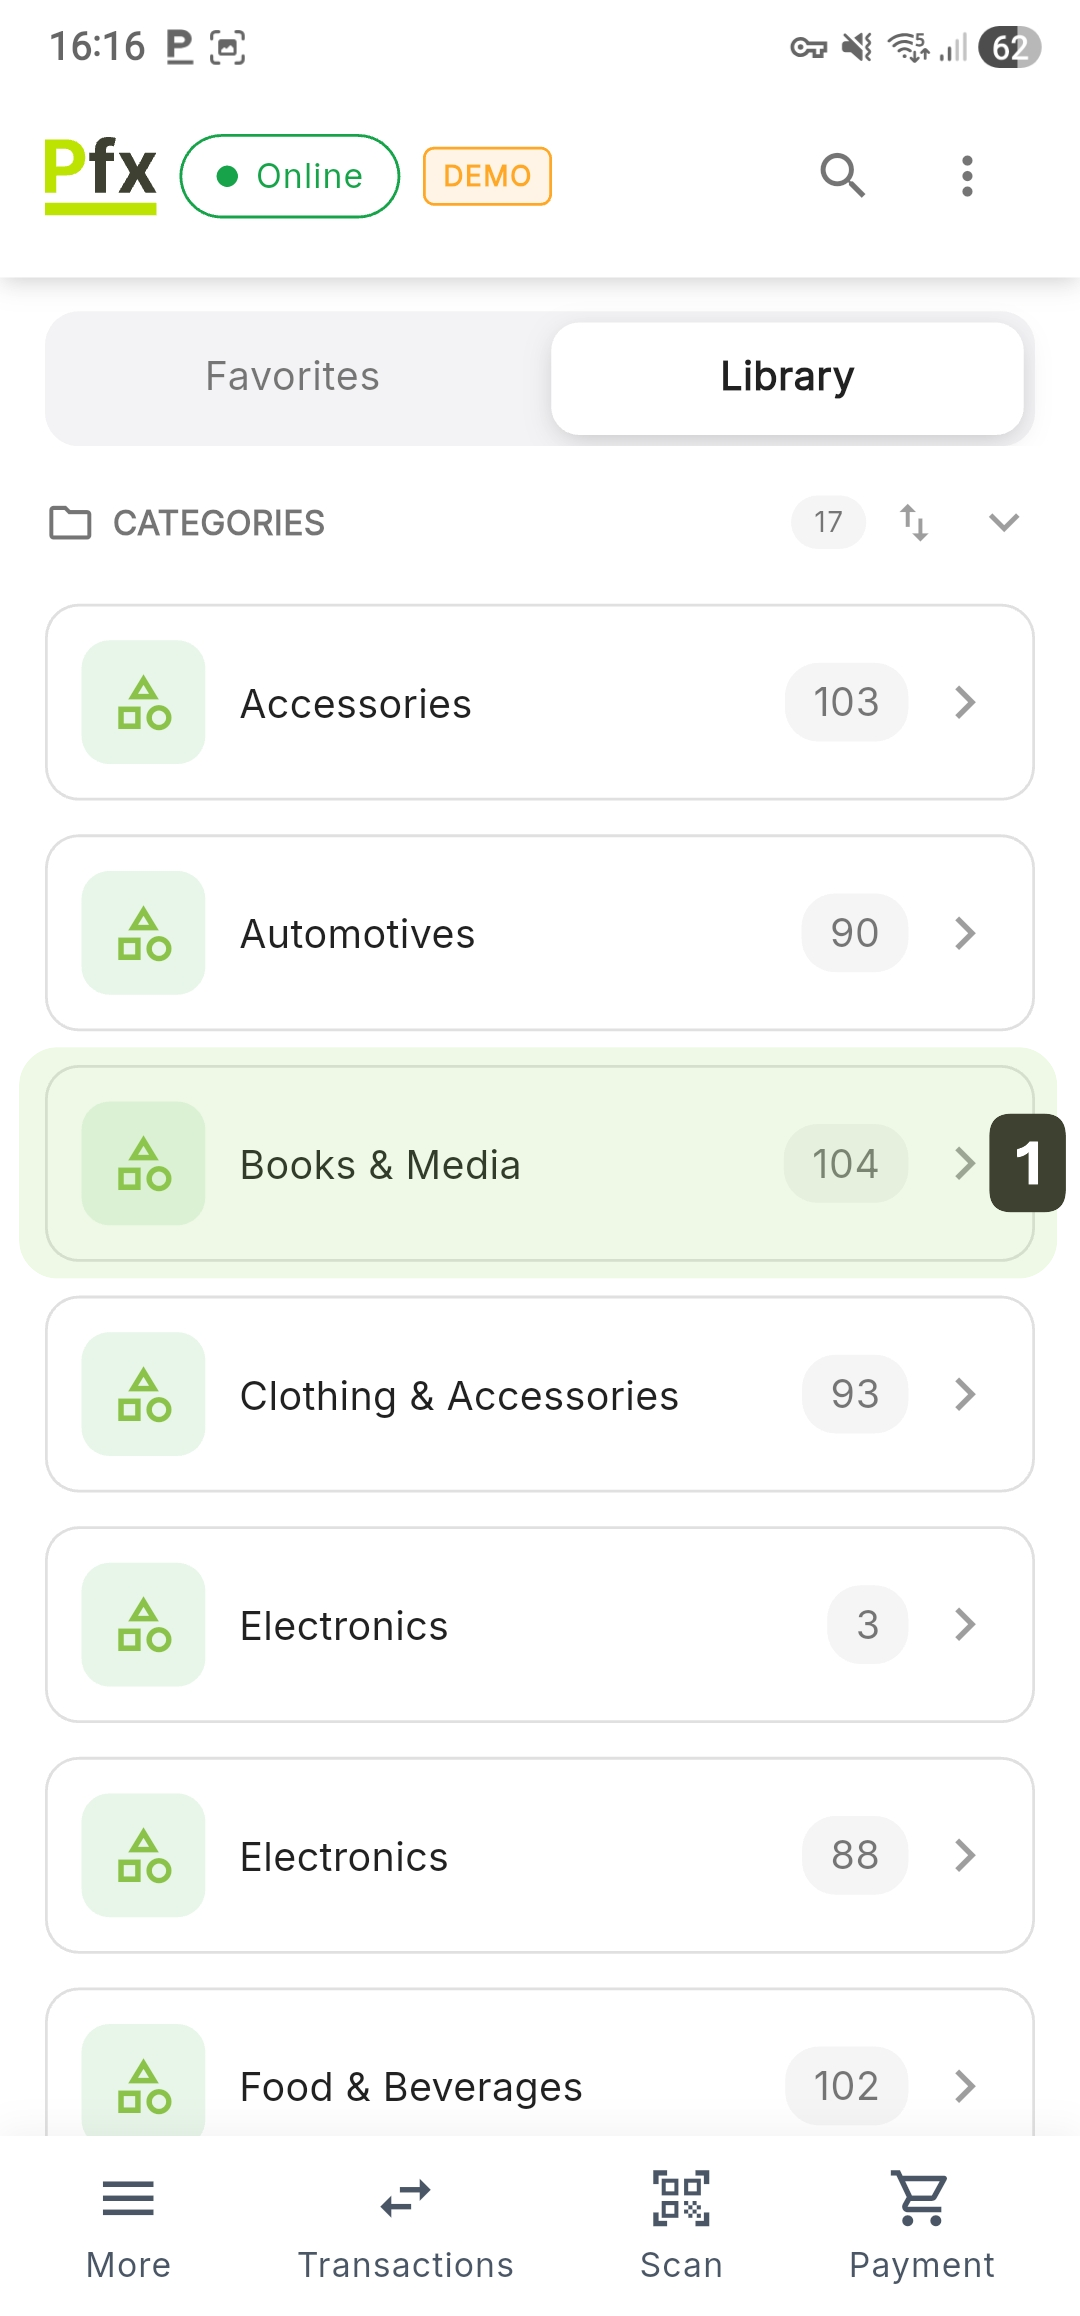
Library (Categories)
Allows structured exploration of the product catalog organized in hierarchical levels:
- Select a Category from the displayed list
- Subcategories (if any) appear as additional options
- Products belonging to the selected category or subcategory appear in a list under the Products section
- Press the Back arrow to return to the upper level

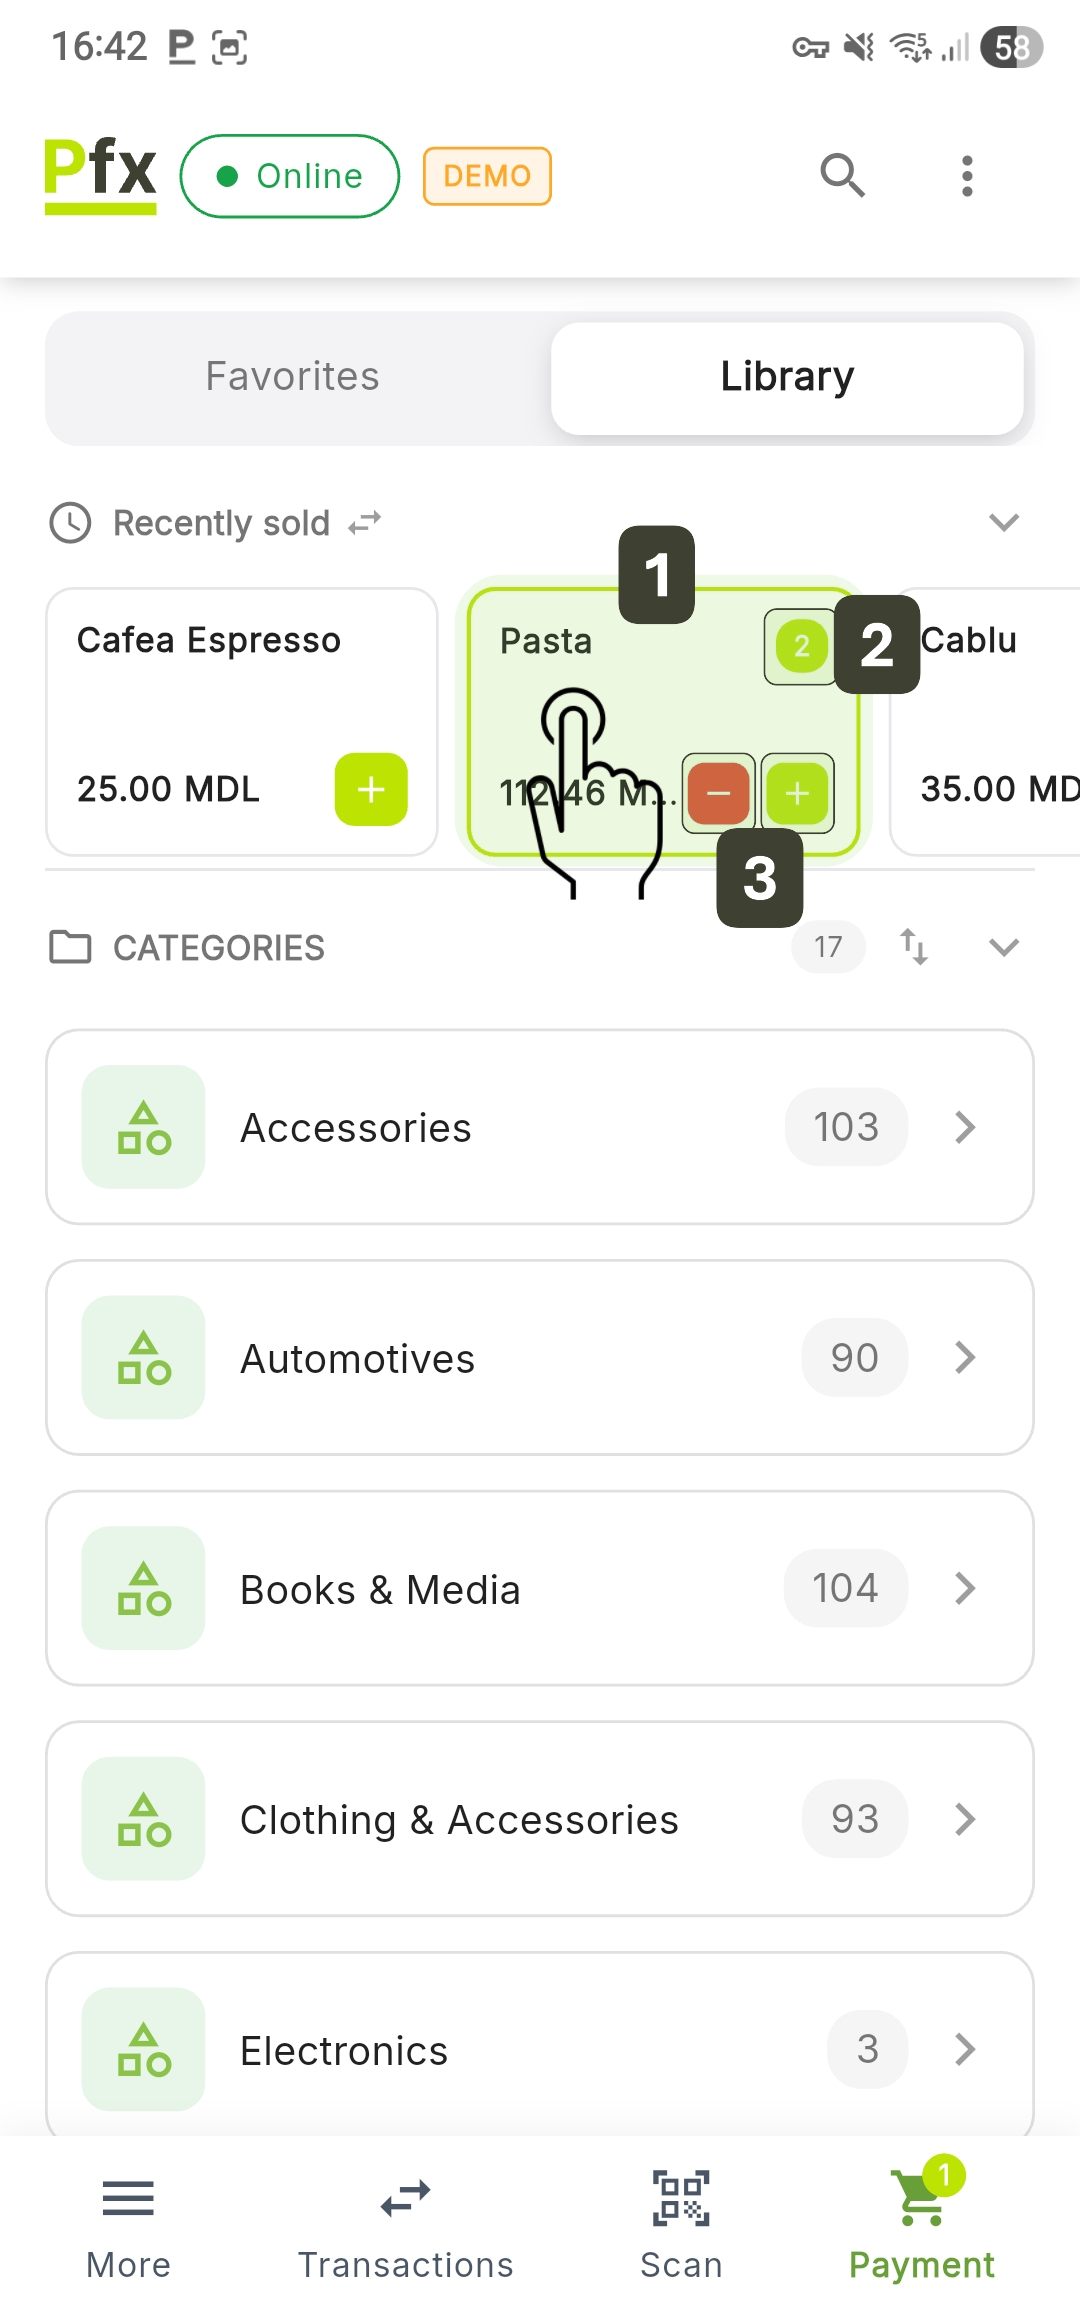
Recently Sold Products
This section allows you to quickly re-add items from the most recent completed transactions:
- Initial Addition: To add a product to the cart from this section, tap anywhere on the product card
This "tap on card" functionality for adding items is active exclusively in this section. - Viewing the Quantity: Once added, a circular indicator (badge) will appear in the upper right corner of the card displaying the current quantity
- Quick Adjustment: Use the [+] or [-] buttons to adjust the quantity
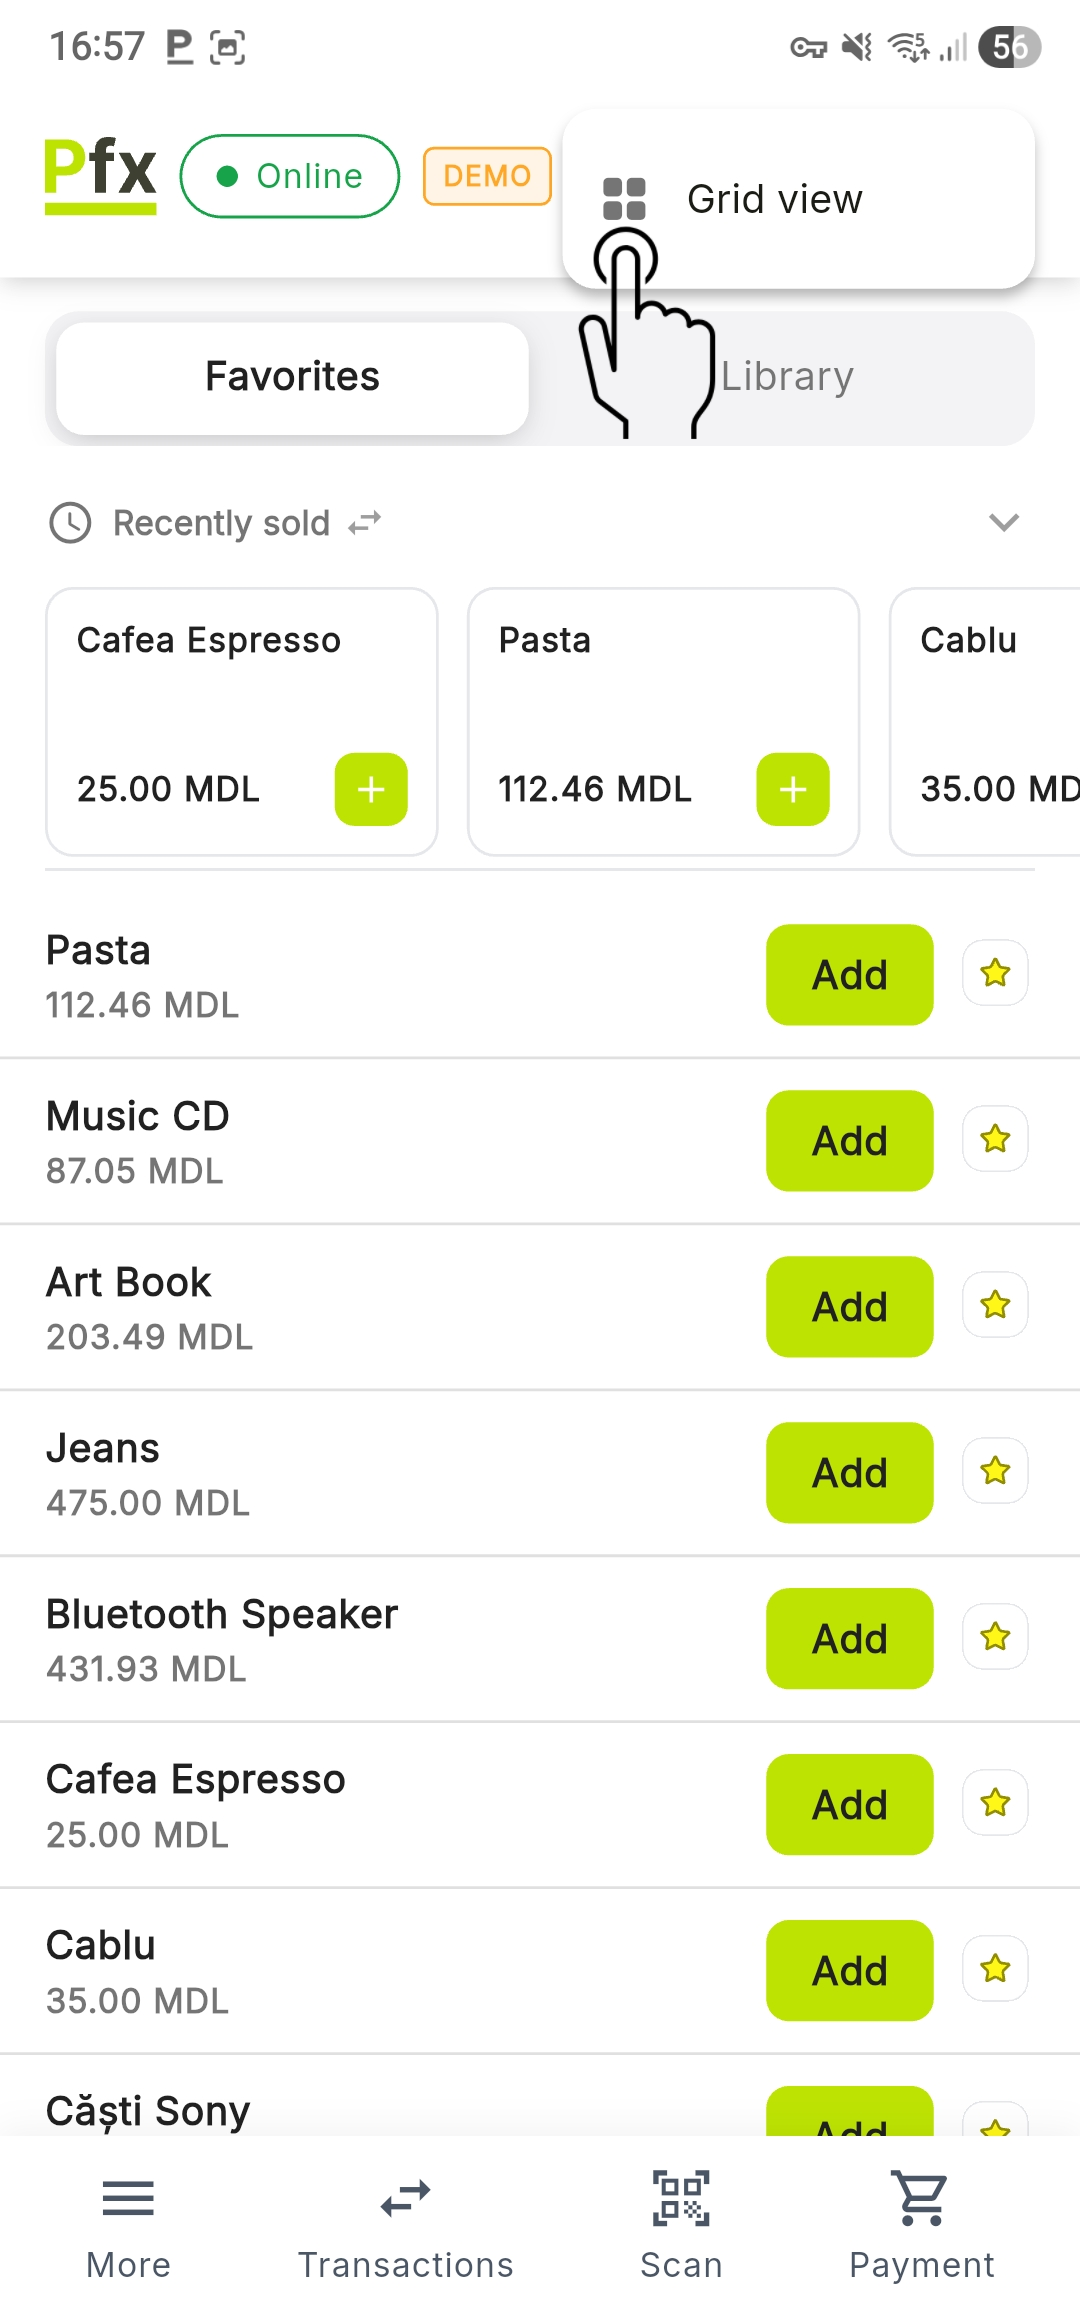
View Mode
The system allows customization of how products are presented, providing flexibility based on operator preferences and screen size. To change how products are displayed (always showing the mode opposite to the active one), tap the three vertical dots icon located in the Top Bar.
Grid View
Products are displayed as cards in a 2-column grid.

List View
Products are displayed in successive horizontal rows.
Keep in mind that changing the view mode applies to the entire application, not just the current category.
Navigation Bar (Bottom)
The navigation bar is the persistent element at the bottom of the screen that allows switching between the main functions of the application:
| Button | Function |
|---|---|
| 1. More | Settings menu, reports, catalog, cash, logout |
| 2. Transactions | Sales and transaction history |
| 3. Scan | Activate scanner or camera |
| 4. Payment (Cart) | Open shopping cart and process payment |
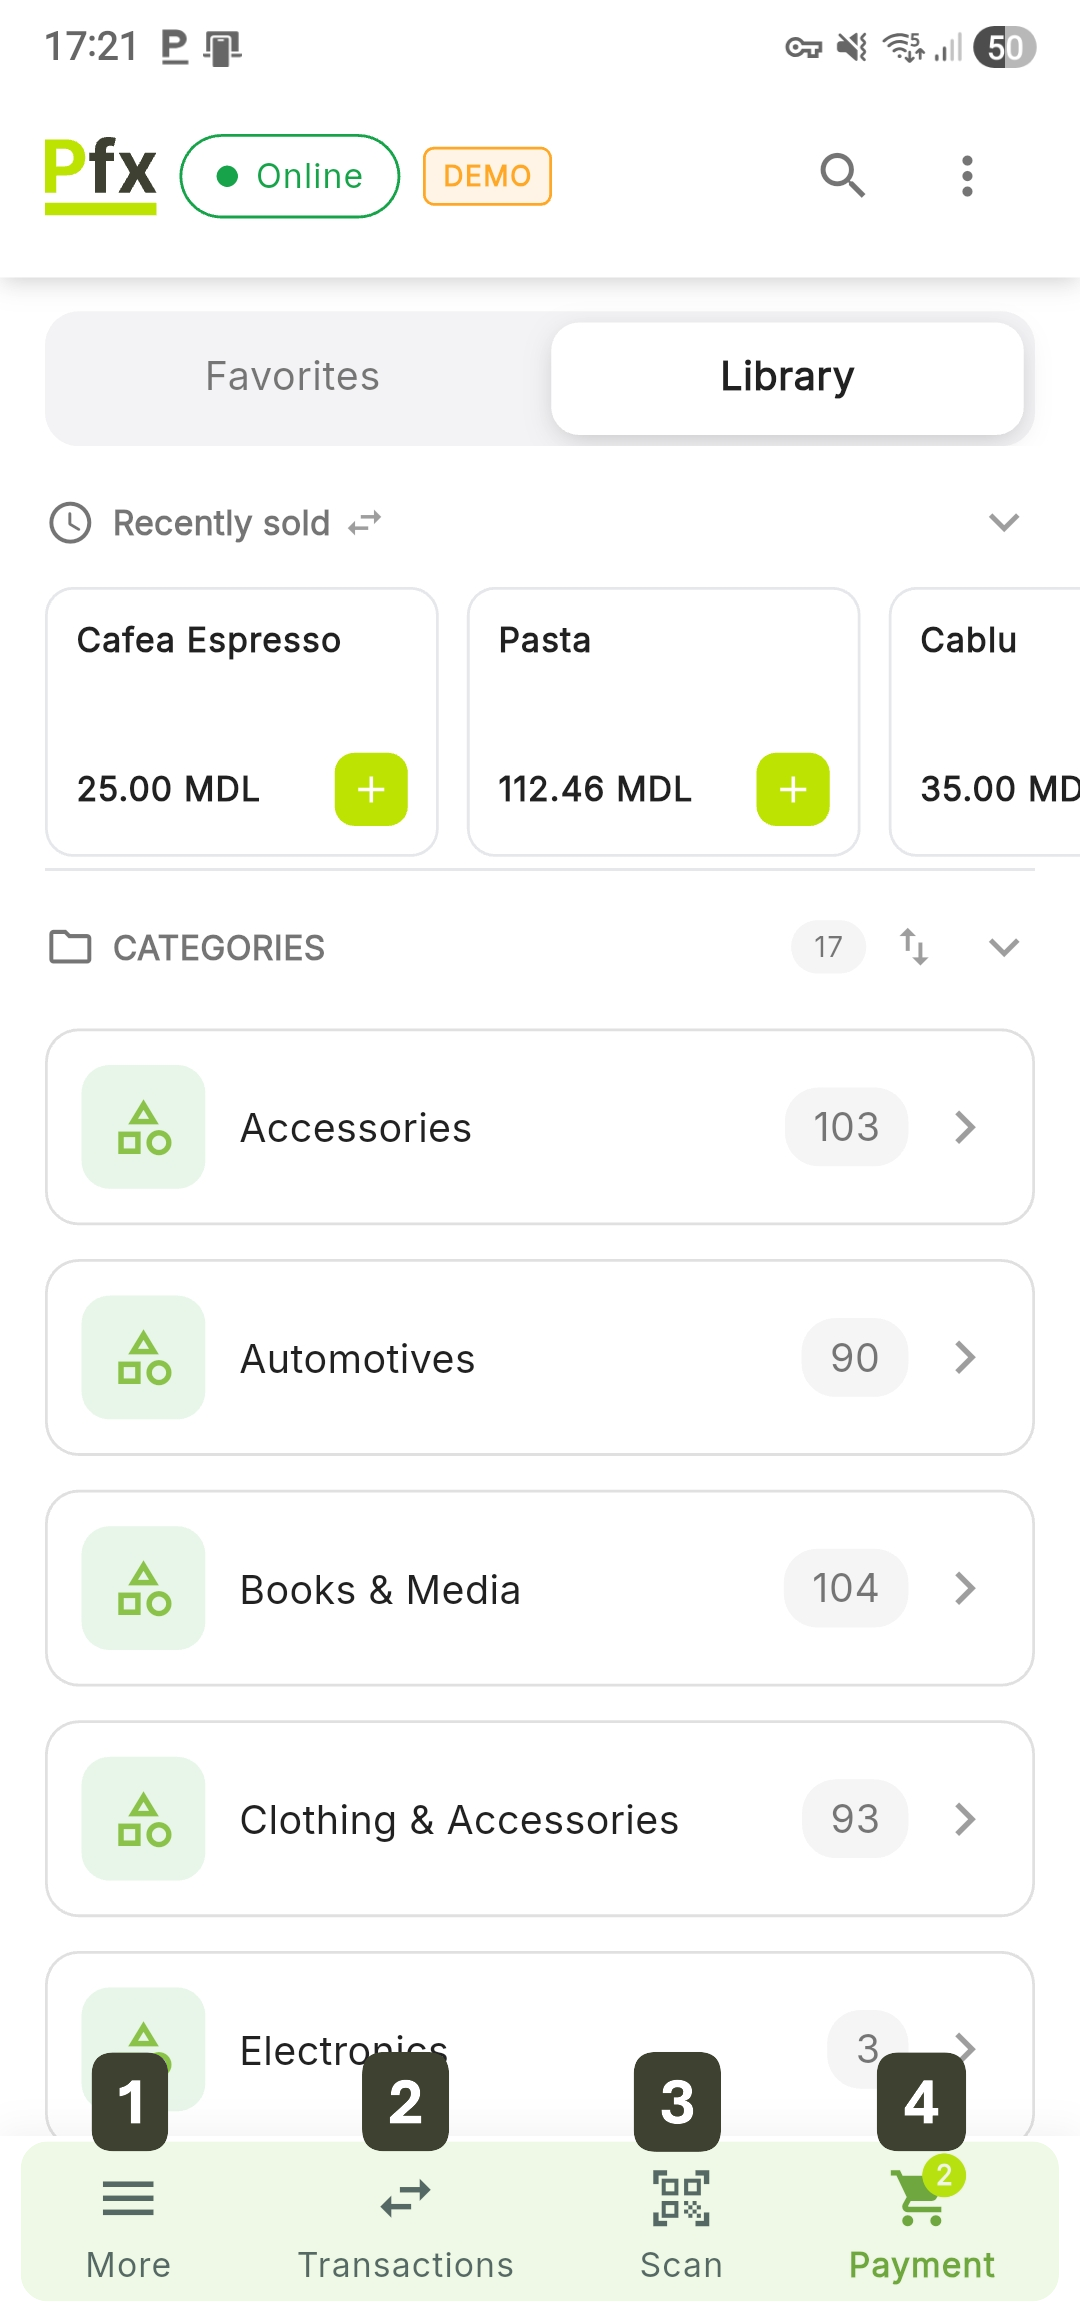
The badge on the Payment button displays the total number of items added to the current cart.