System Settings
The settings menu is the configuration hub of the terminal, allowing you to adapt the behavior of the PosFix application to the specific requirements of your point of sale.
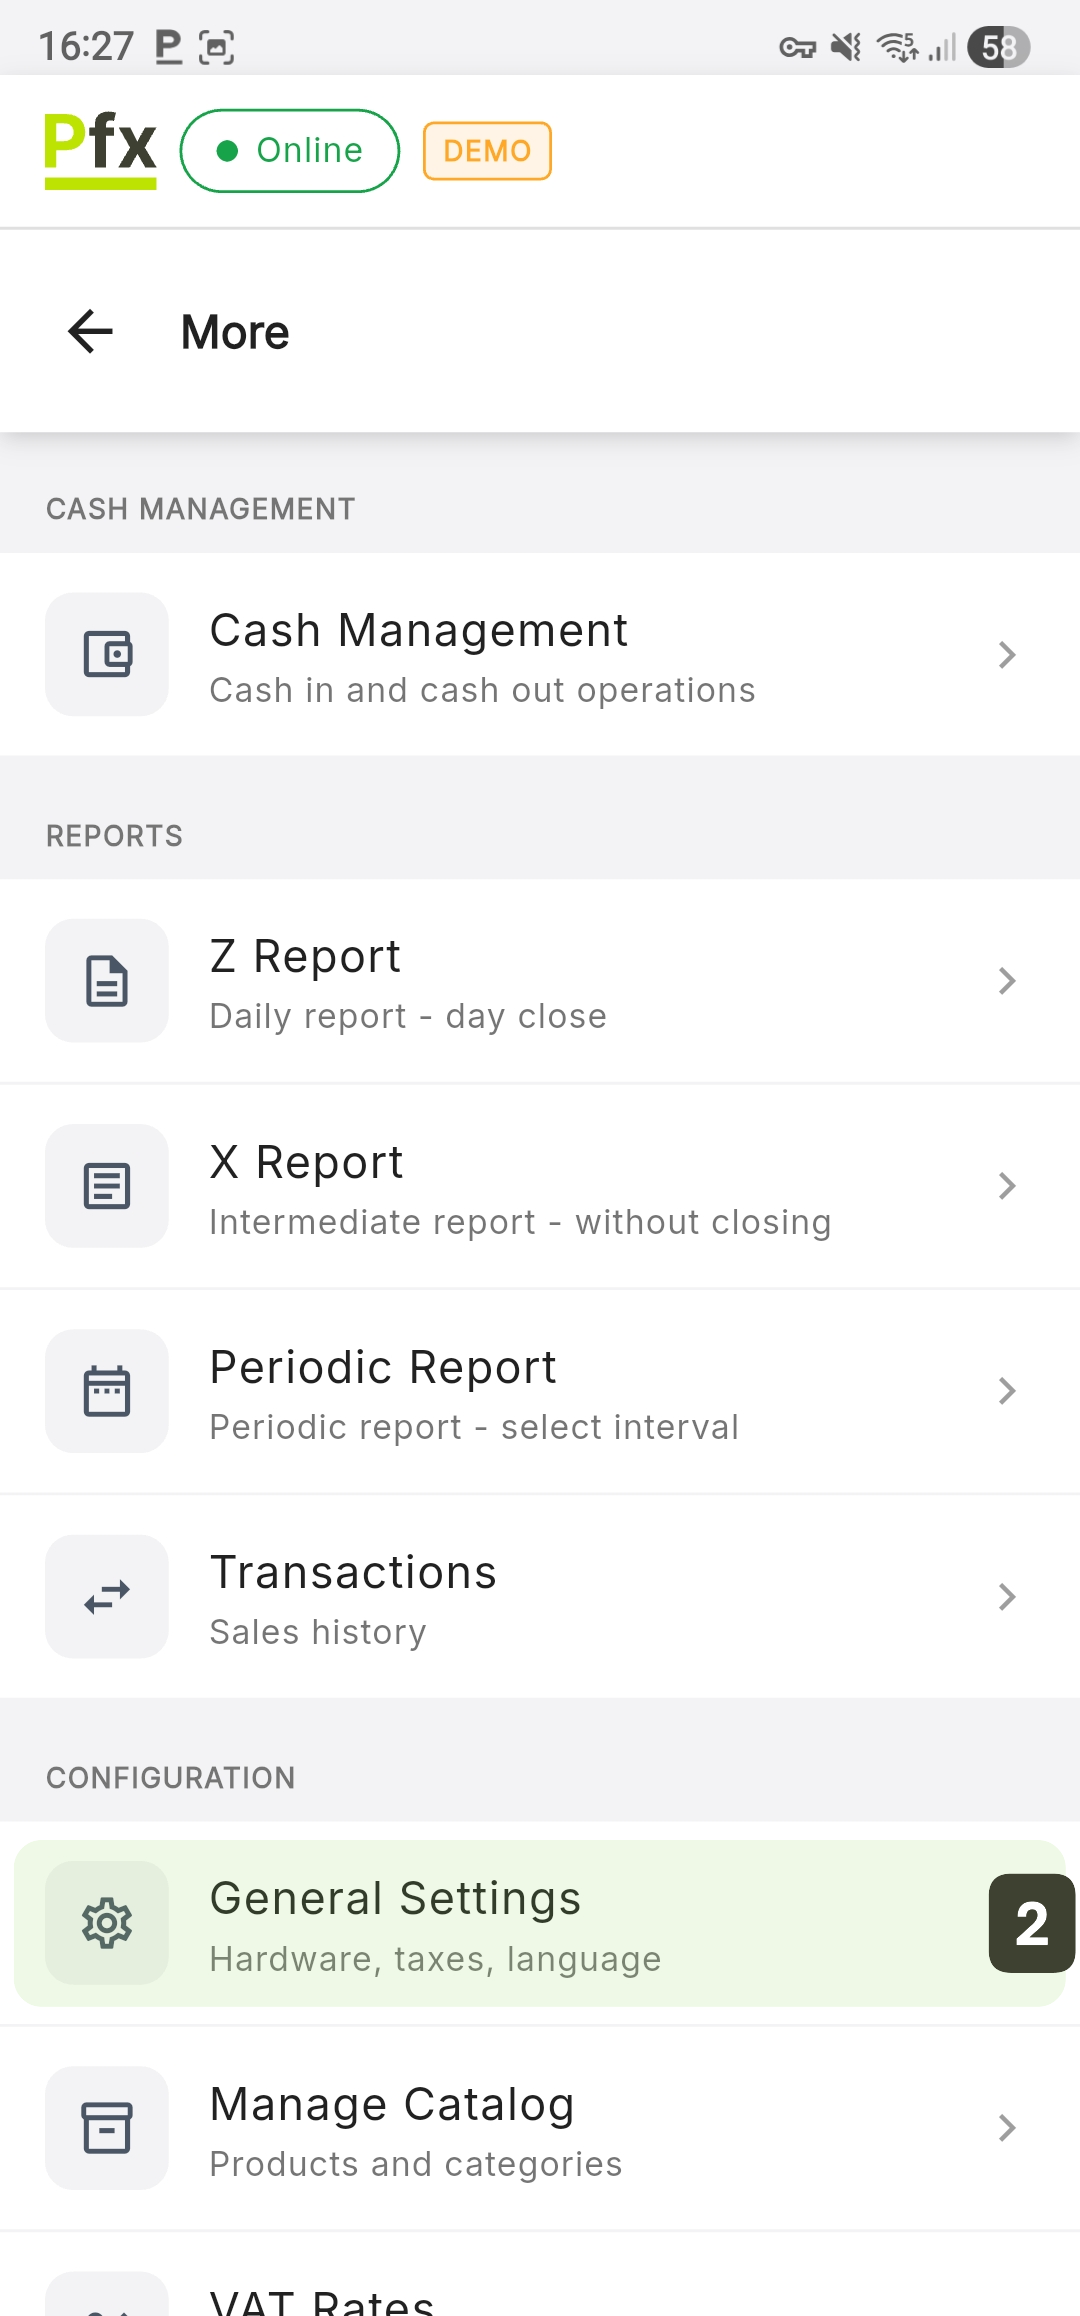
Accessing the General Settings Menu
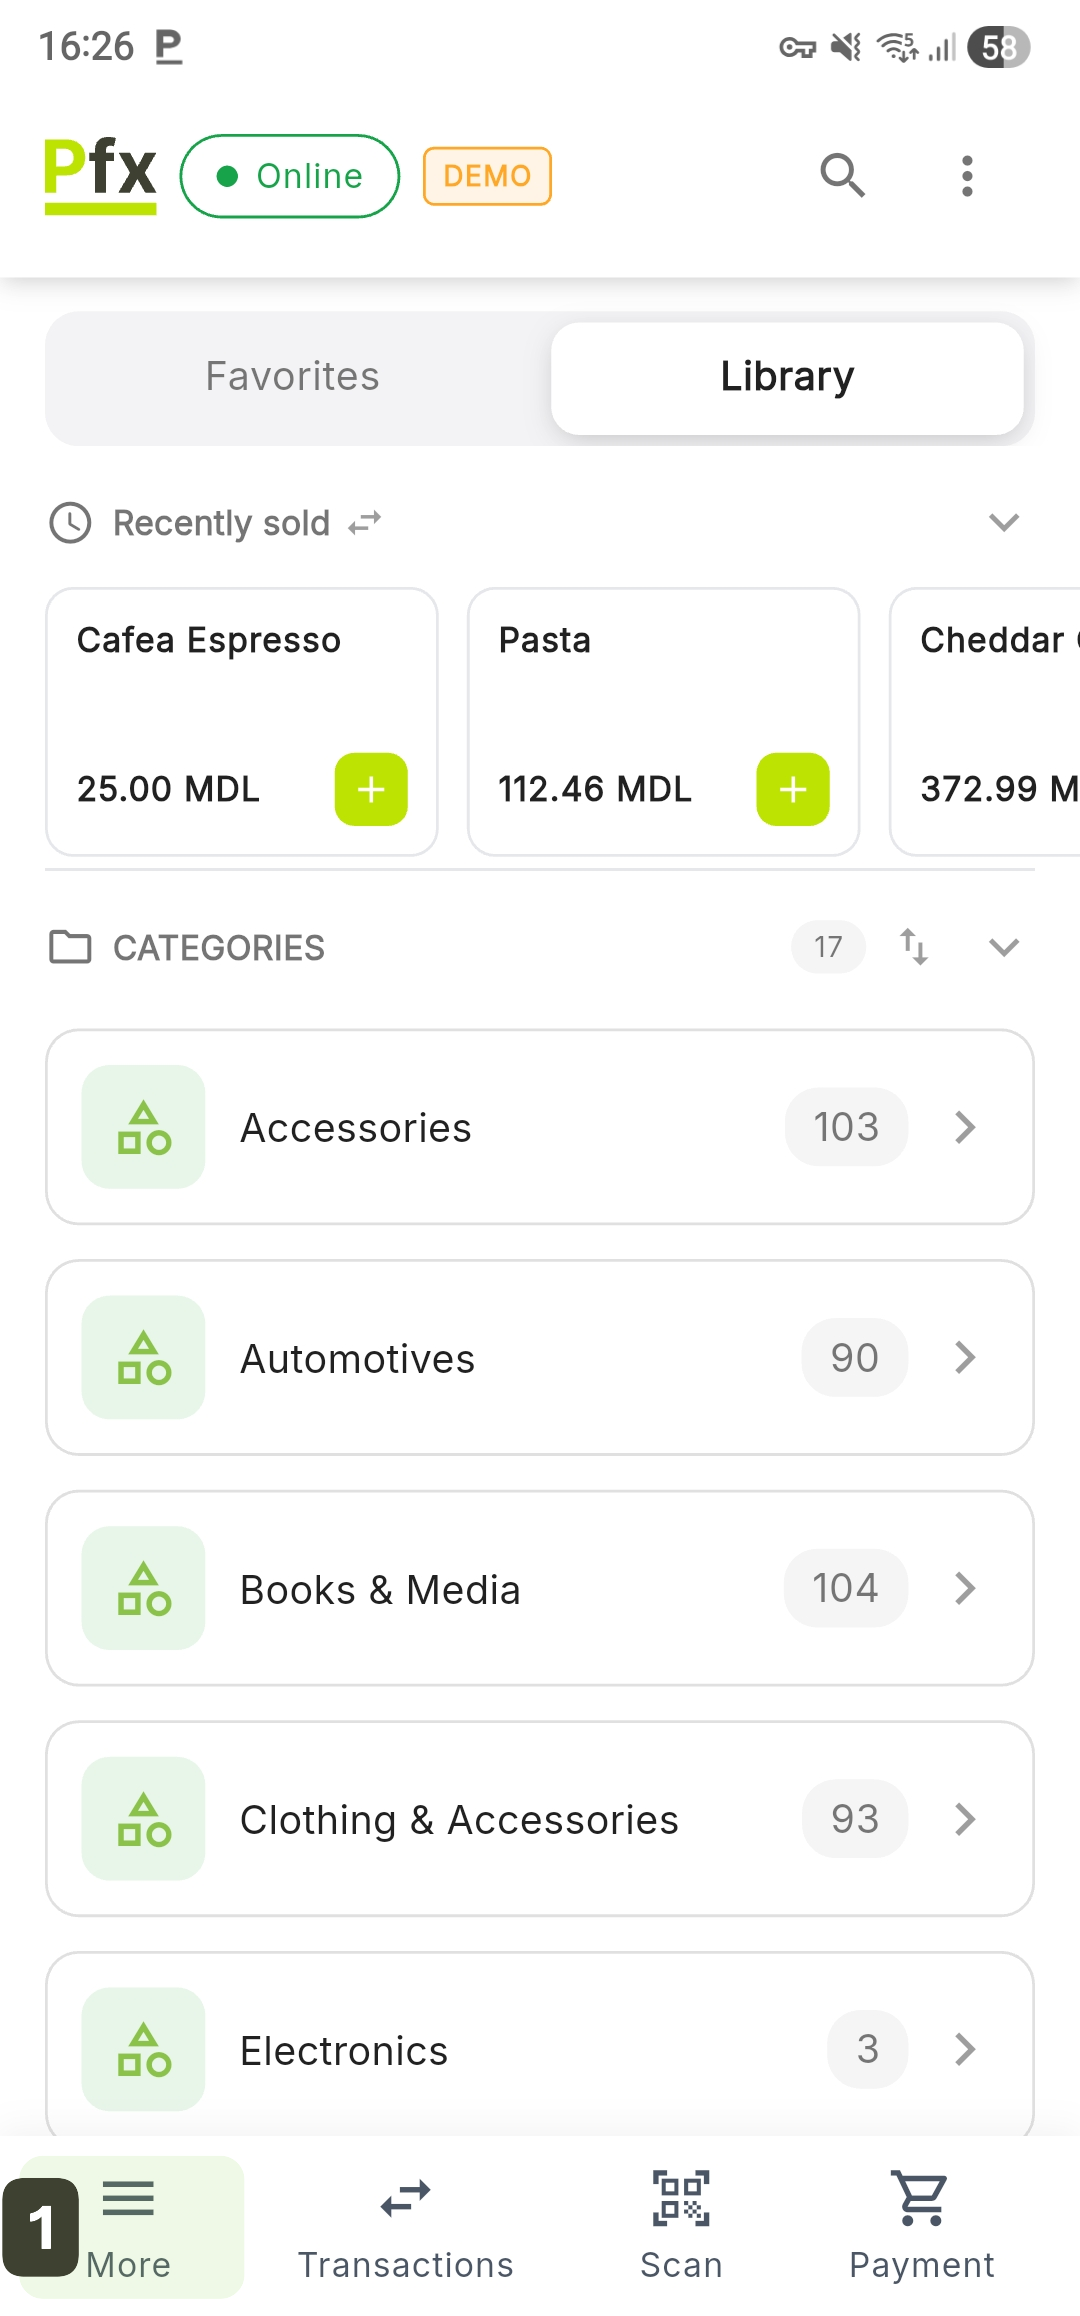
- Press the More button in the bottom navigation bar
- Select General Settings
Changes made in this menu apply only locally, to the current device. If you use multiple terminals at the same location, you will need to repeat the configuration on each device individually to ensure uniform operation.
Language Configuration
The PosFix system allows quick interface adaptation for operators speaking different languages.
| Option | Language |
|---|---|
| Română | Romanian (Default) |
| Русский | Russian |
| English | English |
From the General Settings menu, tap on the desired language. The application interface will translate automatically immediately after tapping the new option, without requiring a terminal restart.

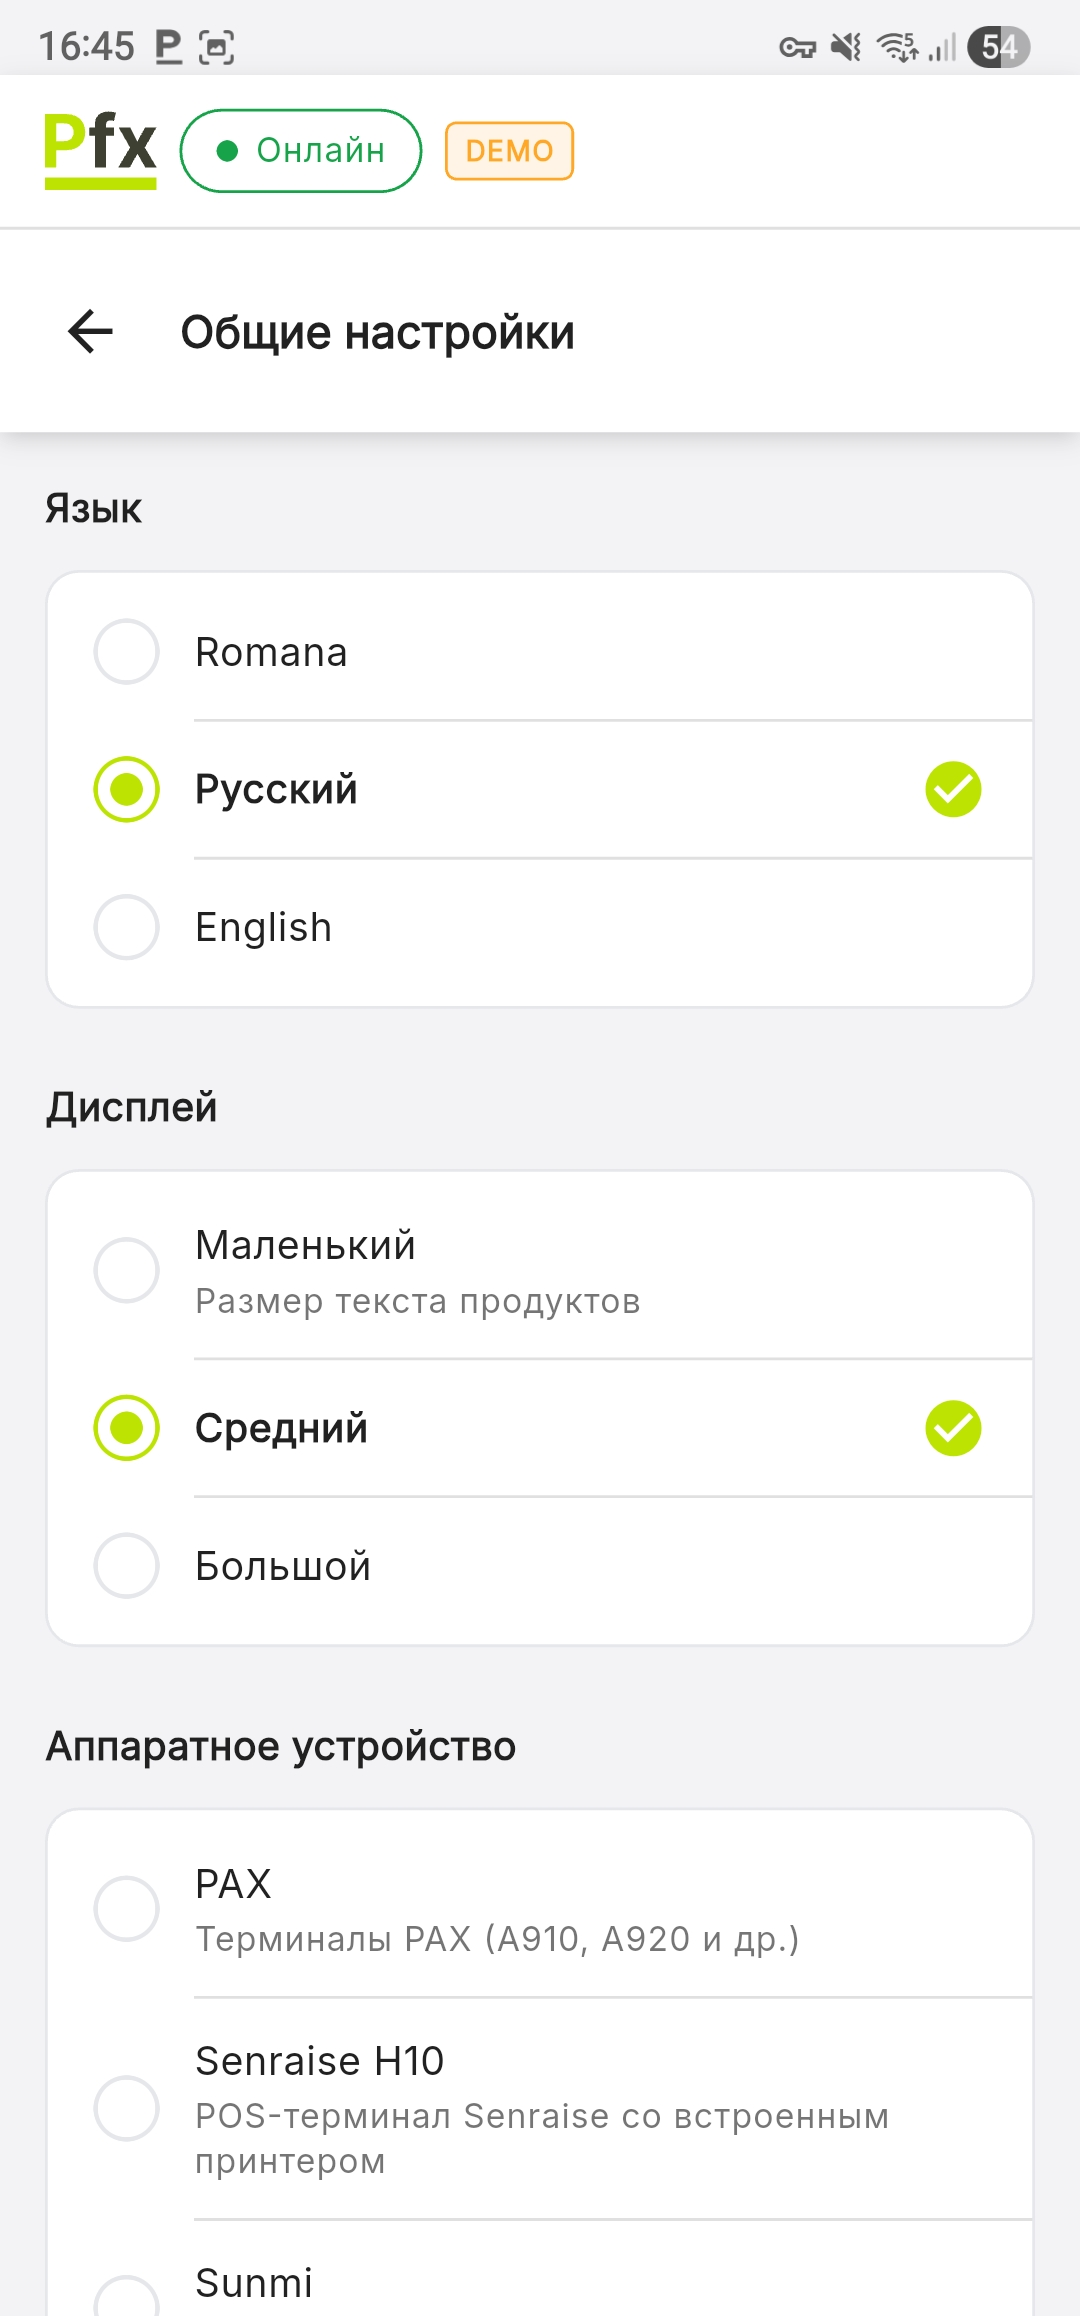
Display (Product Font Size)
This setting adjusts the text size for product names across all sales screens (grid, list, favorites, cart).
| Option | Size | Usage |
|---|---|---|
| Small | 12px | More products visible on the screen |
| Medium | 14px | Balance between visibility and space (default) |
| Large | 16px | Easy reading, ideal for small screens |
In the General Settings menu, select the desired option by tapping. The change applies instantly across all screens.
Medium Font
Large Font
Use Large if operators work on terminals with small screens (under 6 inches). Use Small to see more products simultaneously on larger screens.
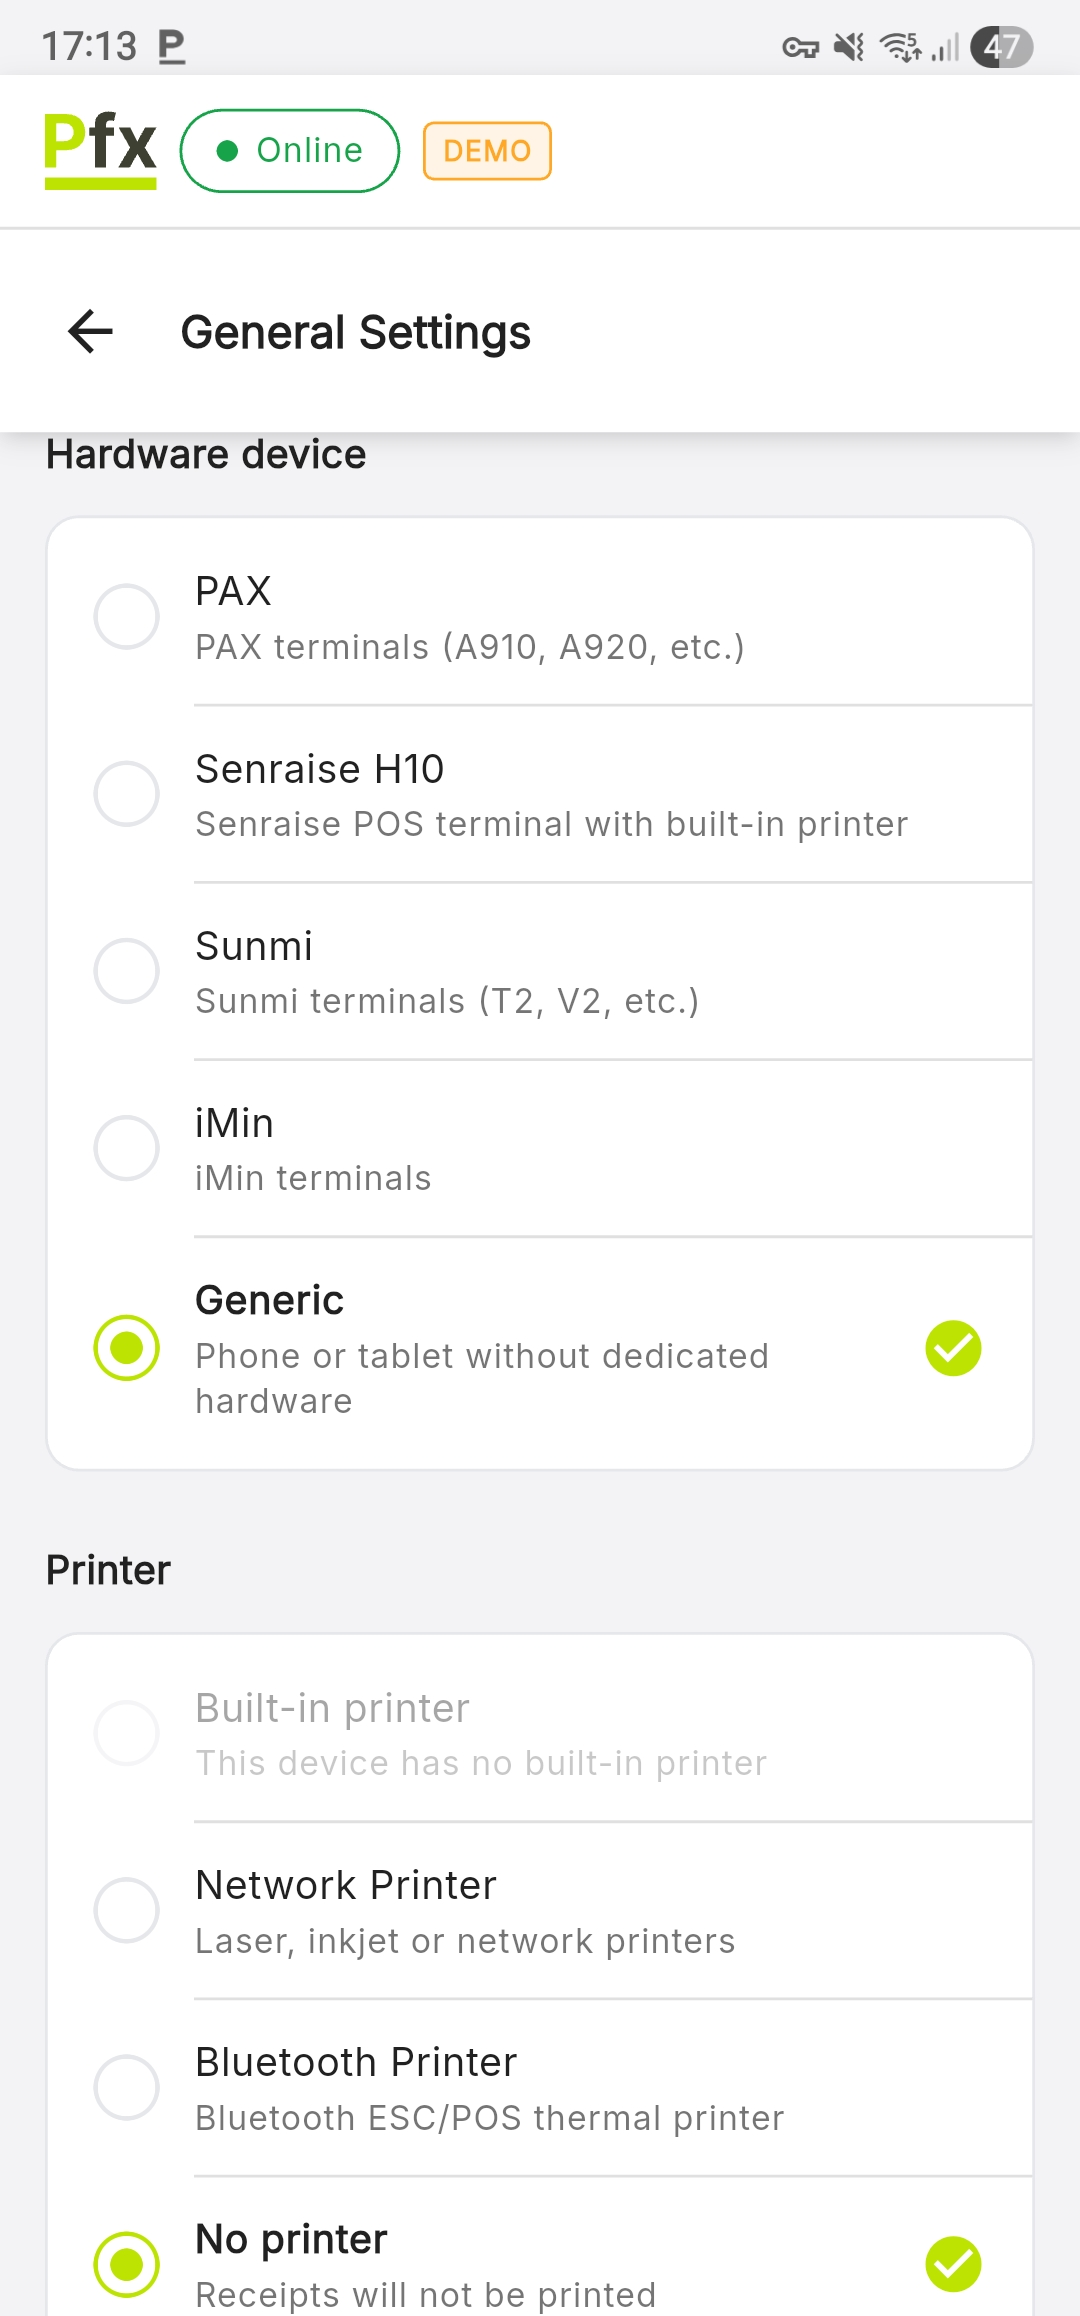
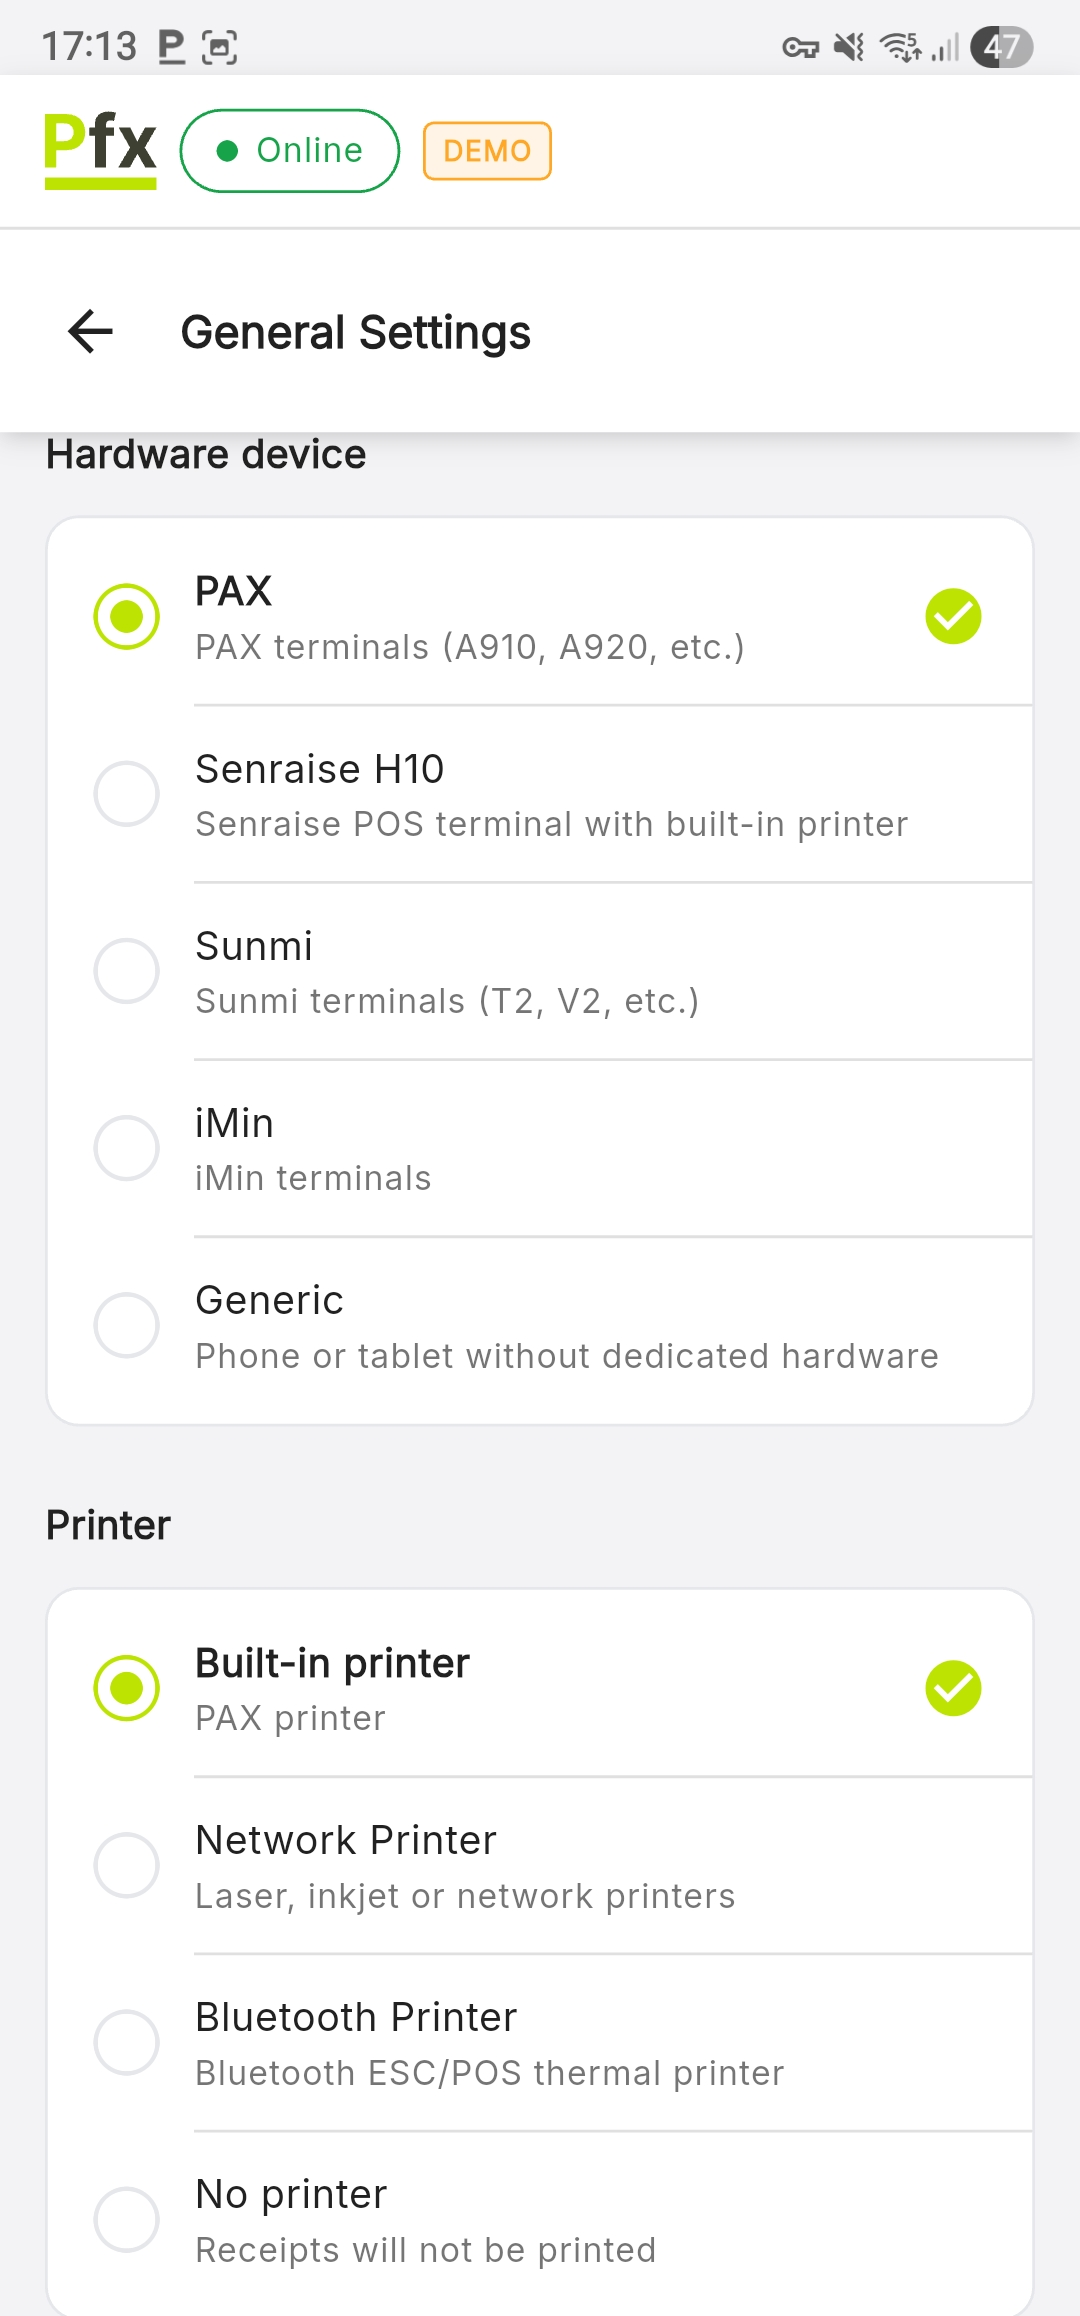
Hardware Device
Select the type of POS terminal on which the application is running. This setting automatically determines which hardware functions are available (built-in printer, built-in scanner).
Capabilities by Device:
| Device | Built-in Printer | Built-in Scanner |
|---|---|---|
| PAX | ✅ Yes | ✅ Yes |
| Senraise H10 | ✅ Yes | ✅ Yes |
| Sunmi | ✅ Yes | ✅ Yes |
| iMin | ✅ Yes | ✅ Yes |
| Generic | ❌ No | ❌ No |
When changing the hardware device, printer and scanner settings may automatically reset if the new configuration does not support the previous options.
If your terminal has a printer, but it is not printing receipts, check whether the device is accidentally set to Generic.
Printer Configuration
Select the type of printer used for issuing fiscal receipts and reports.
Built-in Printer
Available on POS terminals (PAX, Senraise, Sunmi, iMin):
- Activates automatically when selecting the corresponding hardware device
- No additional configuration required
Network Printer (Wi-Fi / LAN)
For thermal printers connected via Wi-Fi or LAN:
- Select Network Printer as the printer type
- The system will automatically open the Select Printer window and begin the automatic search
Wait for the application to scan the network. If the printer is detected, it will appear in the list with its name or IP address - Manual Entry: If the printer is not automatically detected:
- Press Manual Entry
- Enter the IP Address of the printer
- Enter the Port (default: 9100)
- Press the Confirm button to save the settings
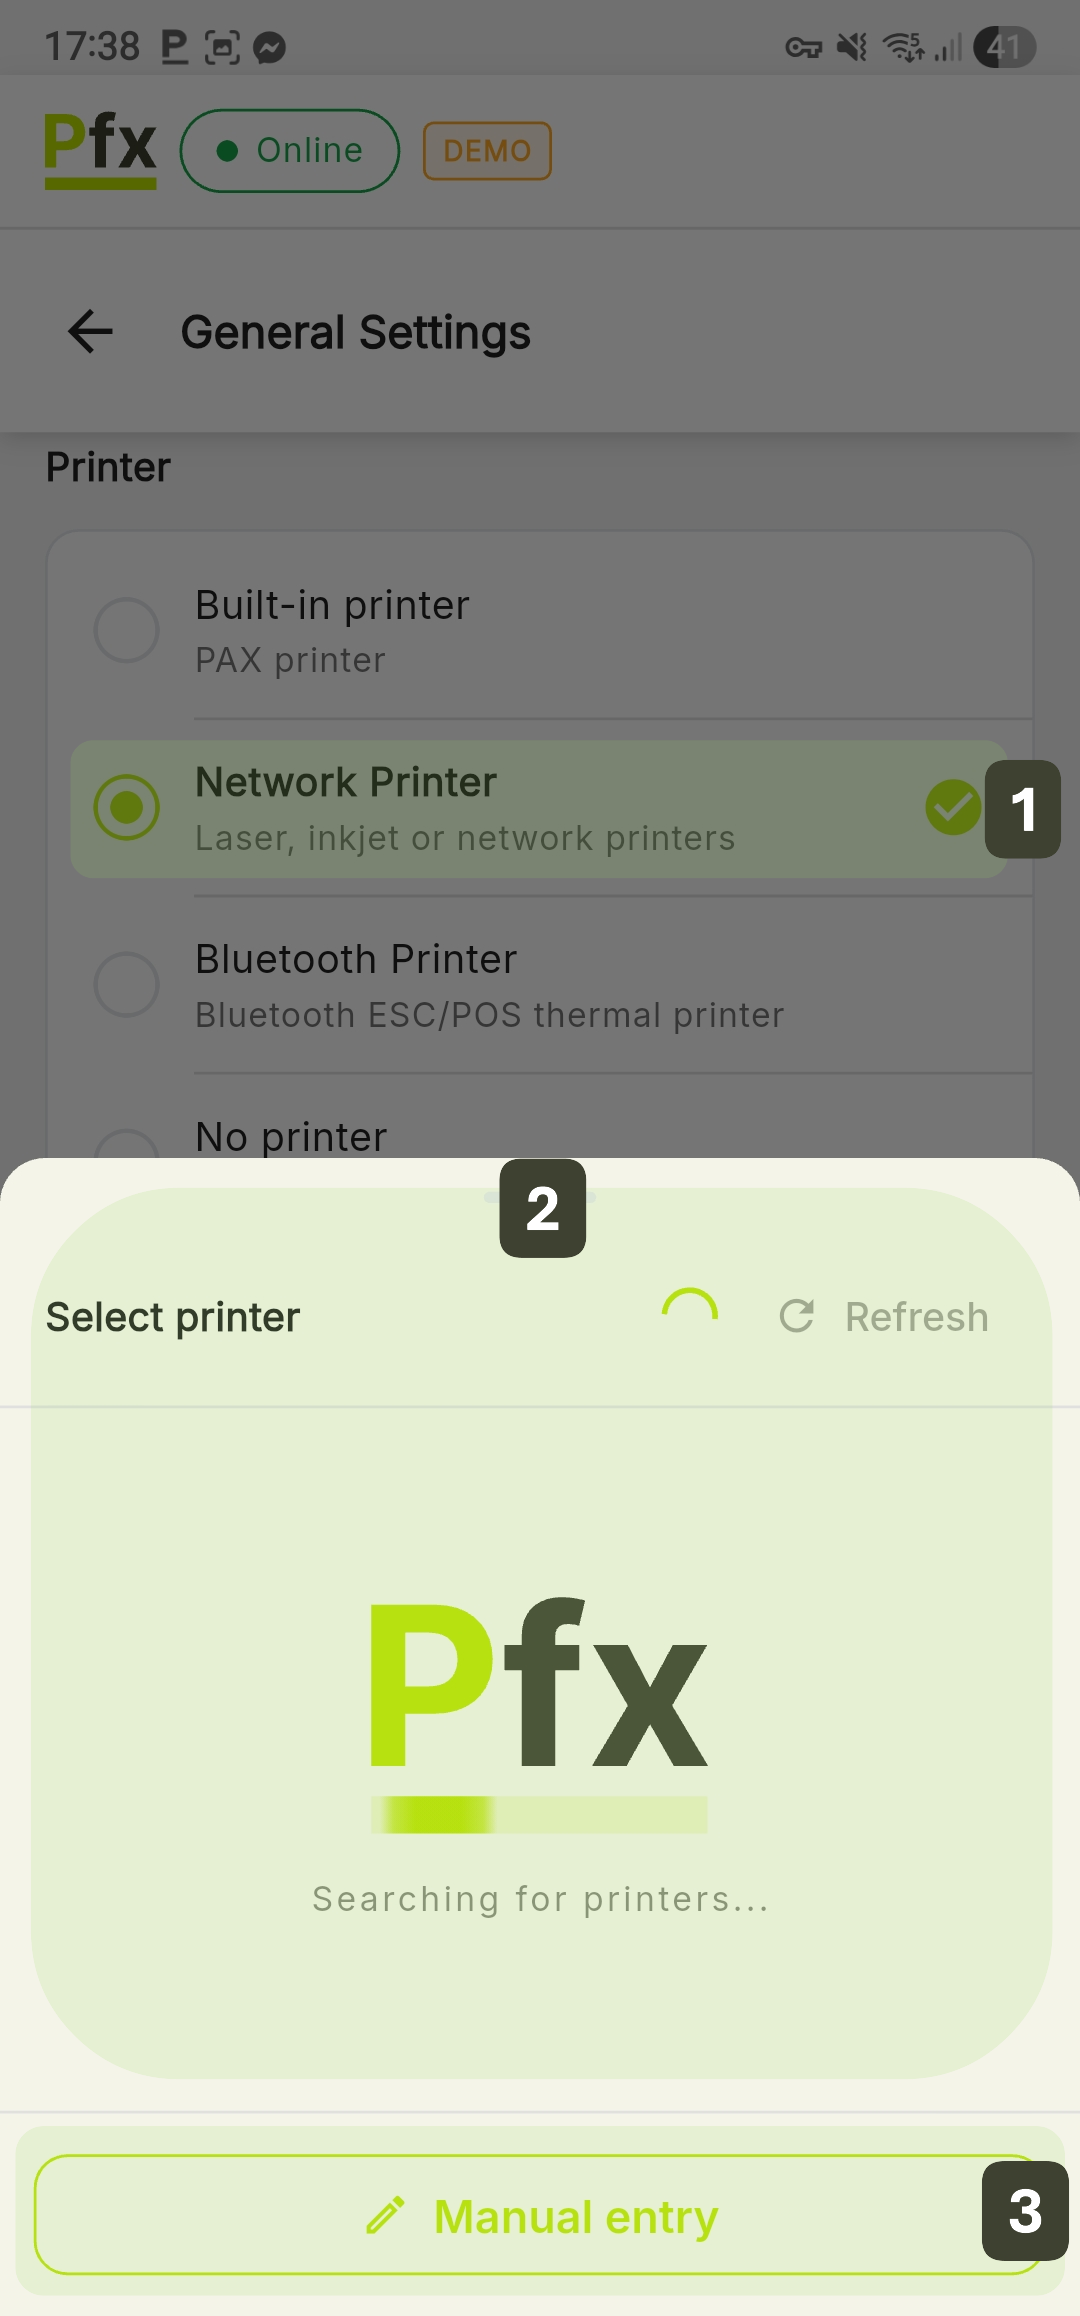
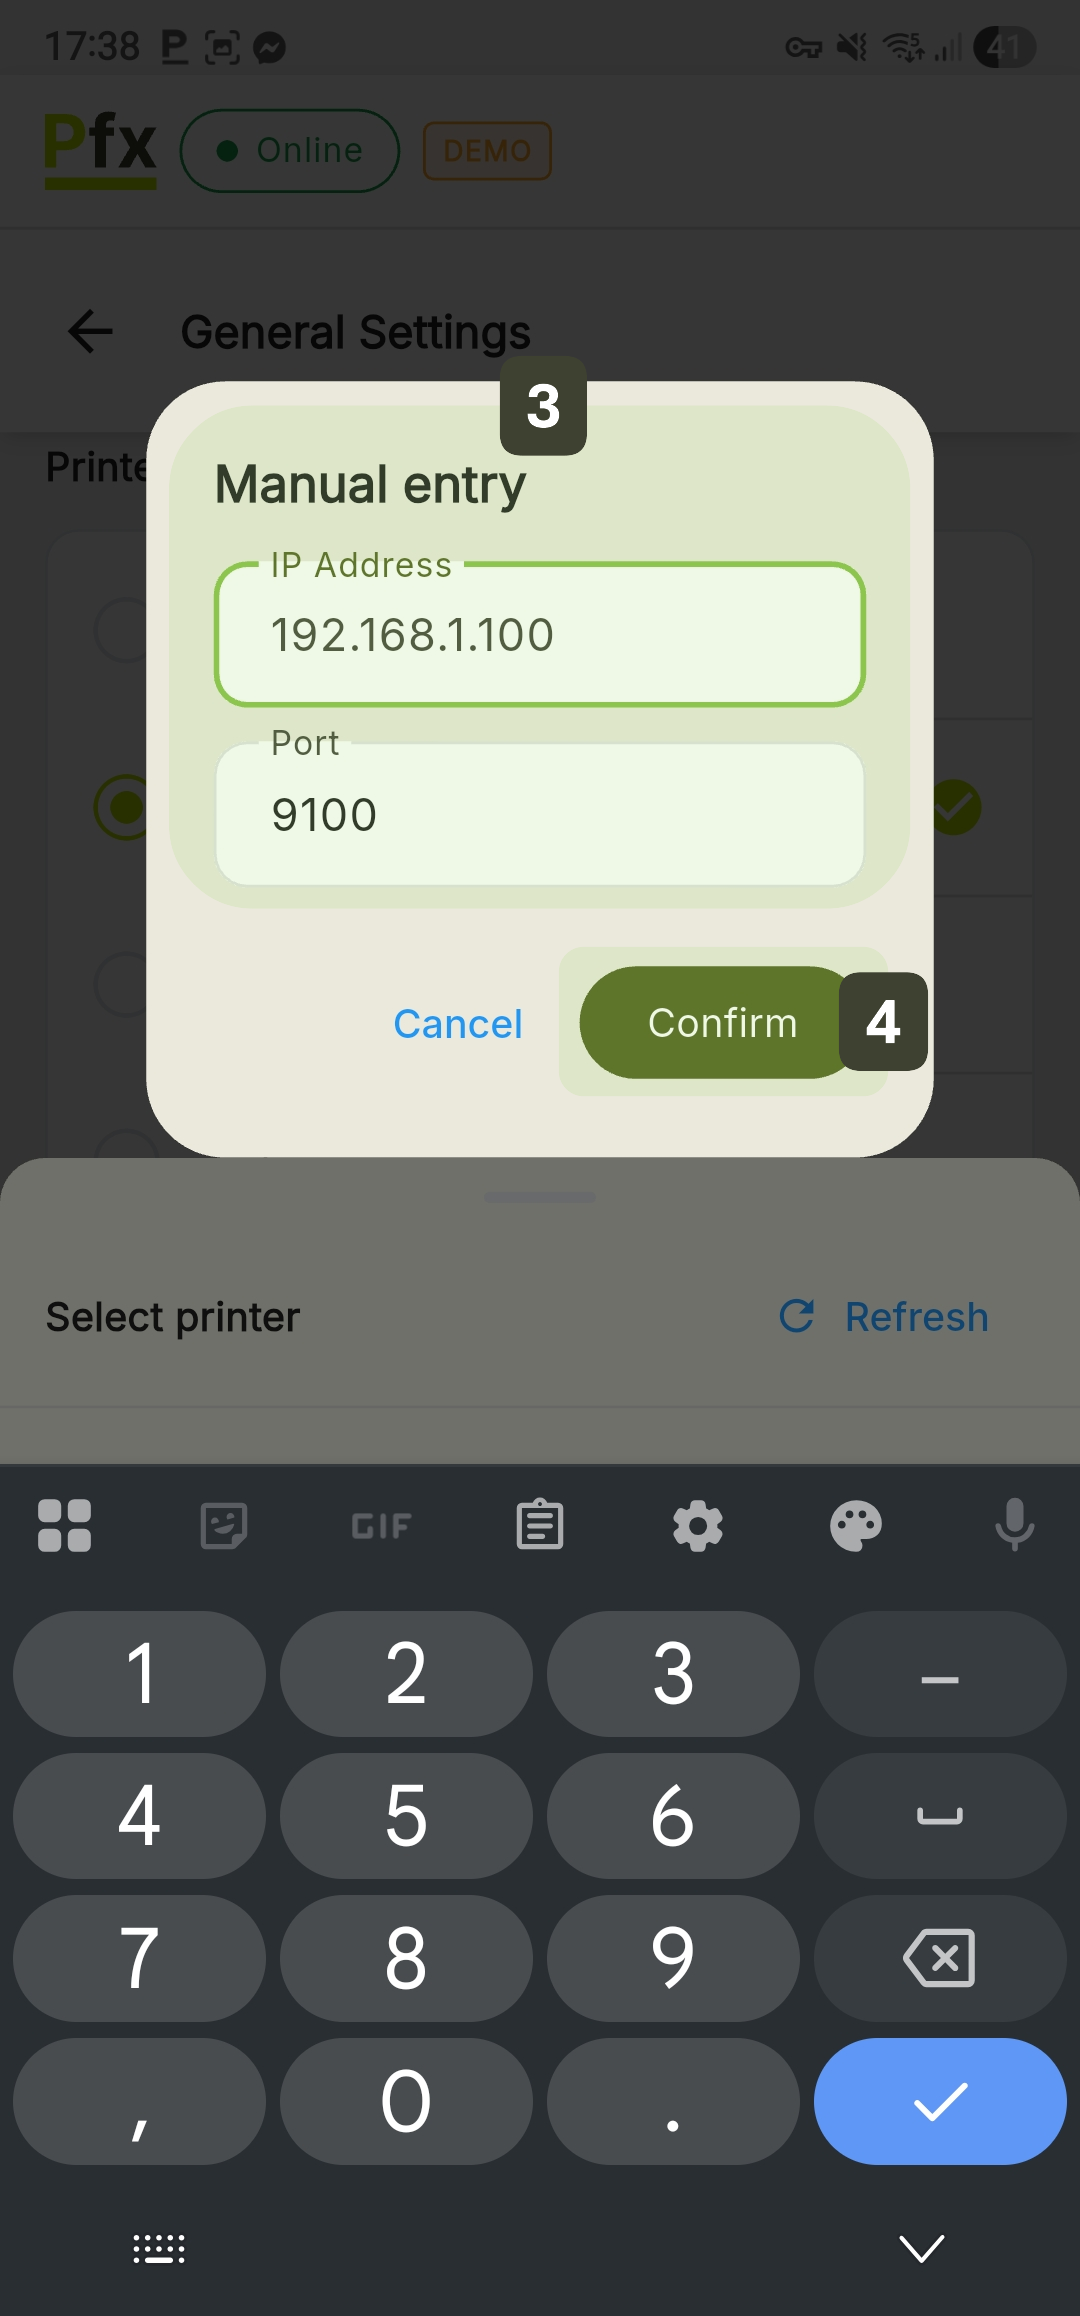
Make sure the POS terminal and the printer are connected to the same Wi-Fi or LAN network.
Bluetooth Printer
For portable thermal printers:
- Select Bluetooth Printer as the printer type
- The system displays:
- Paired devices: Printers previously connected
- Discovered devices: New printers detected nearby
- Select the printer from the list
Once selected, it will appear displayed under the "Bluetooth Printer" title.
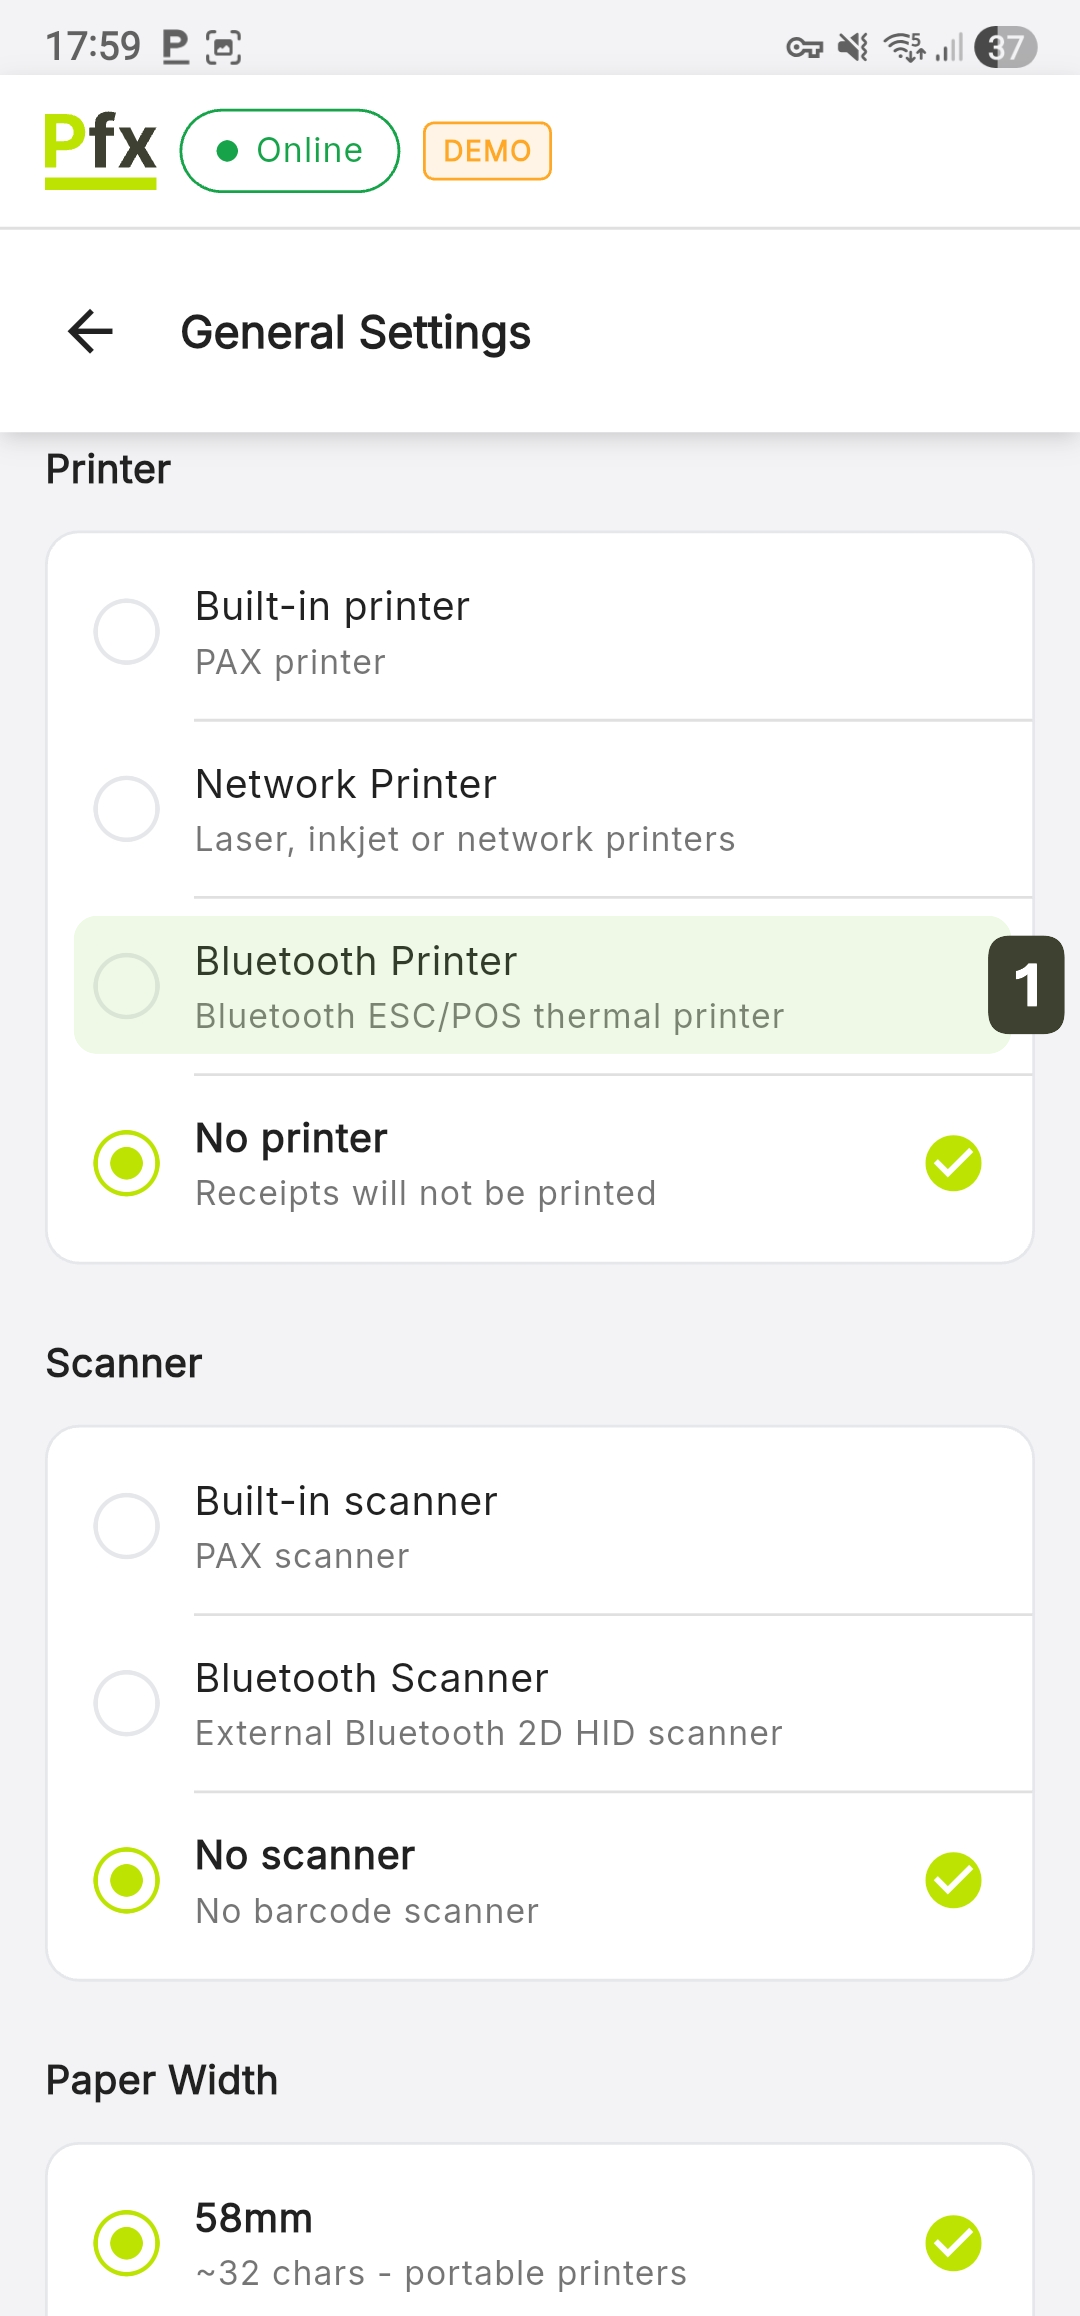
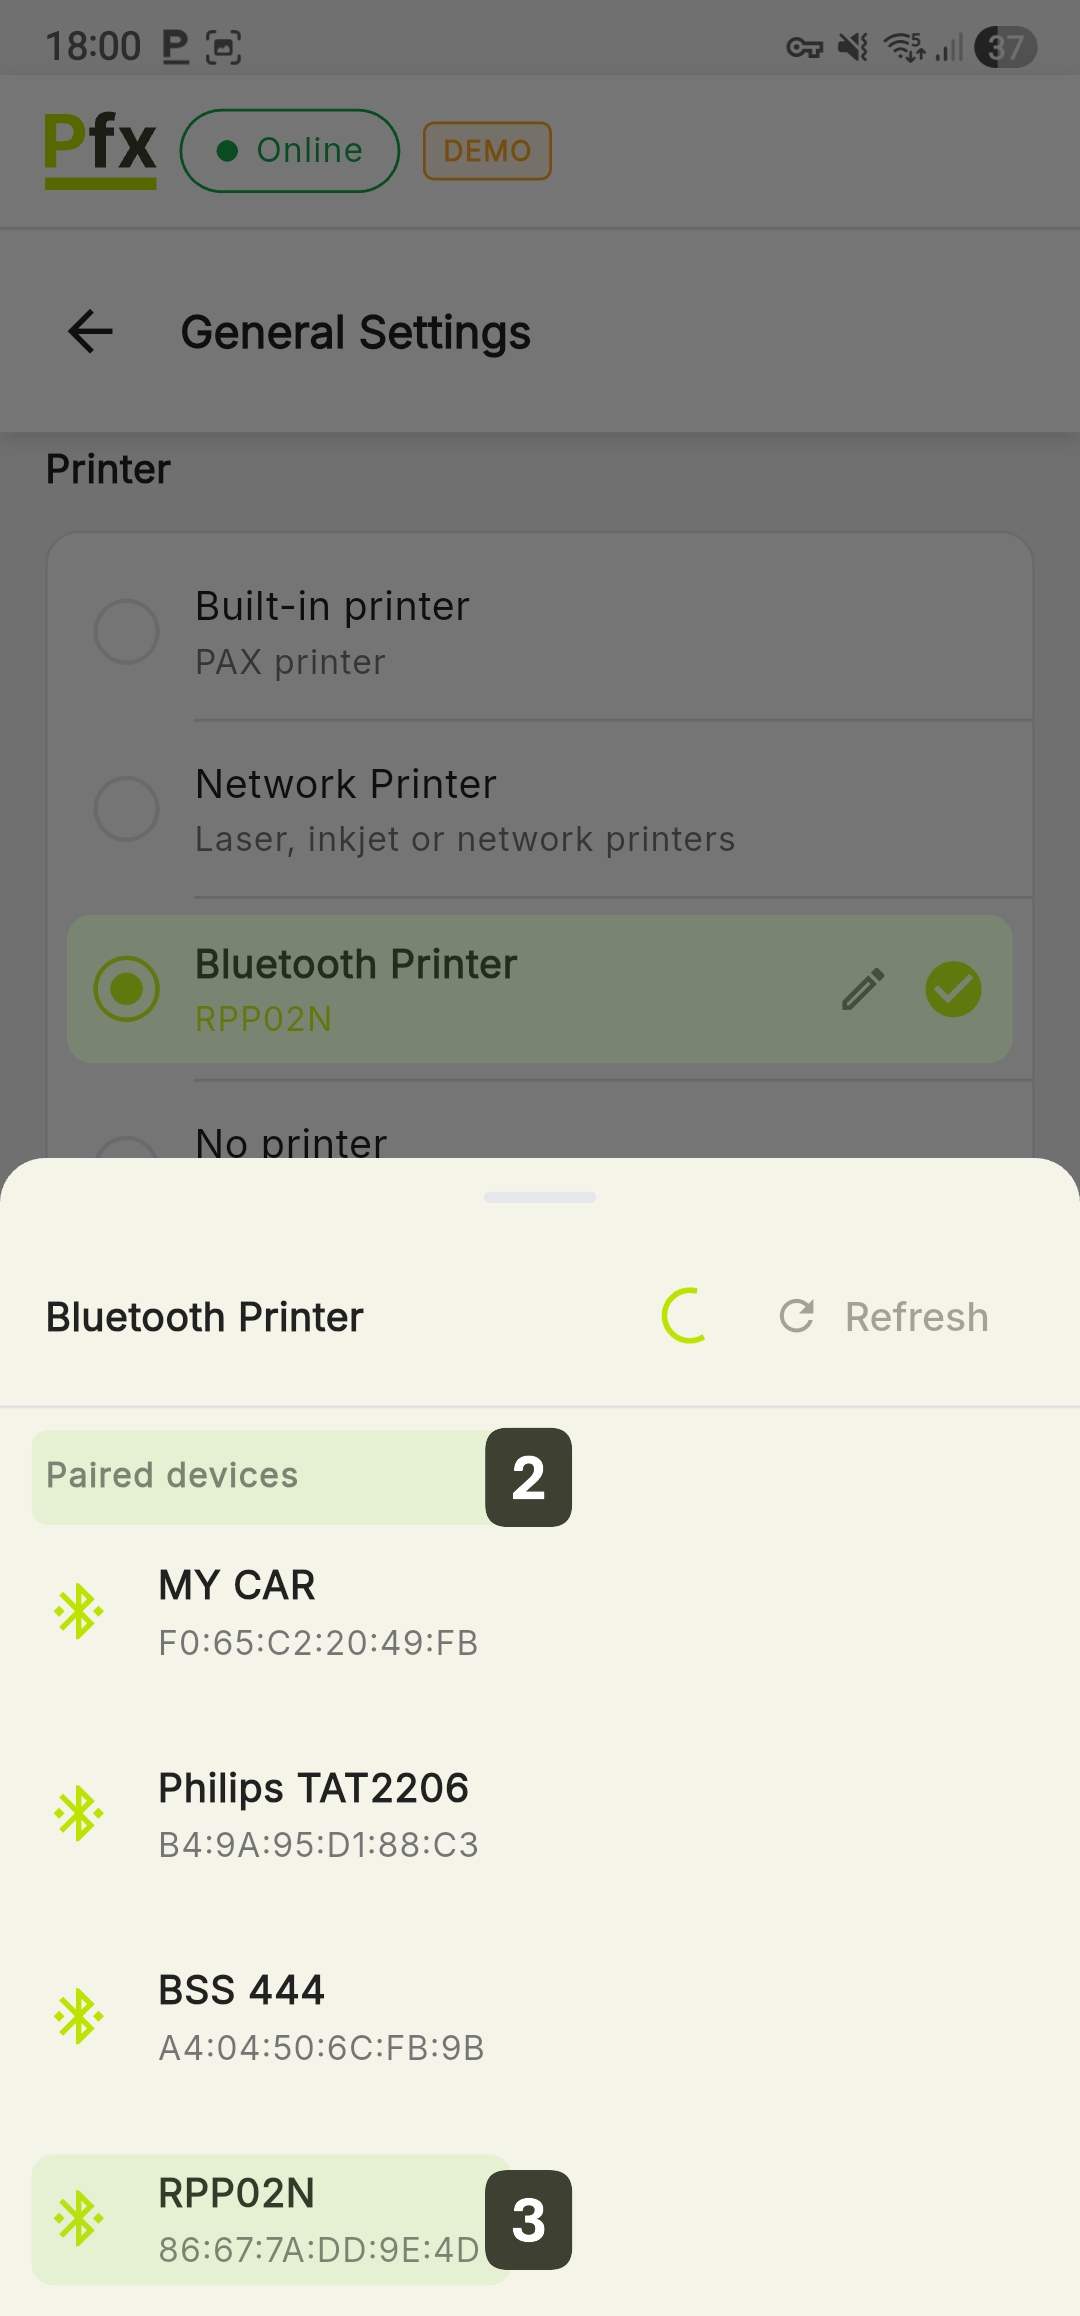
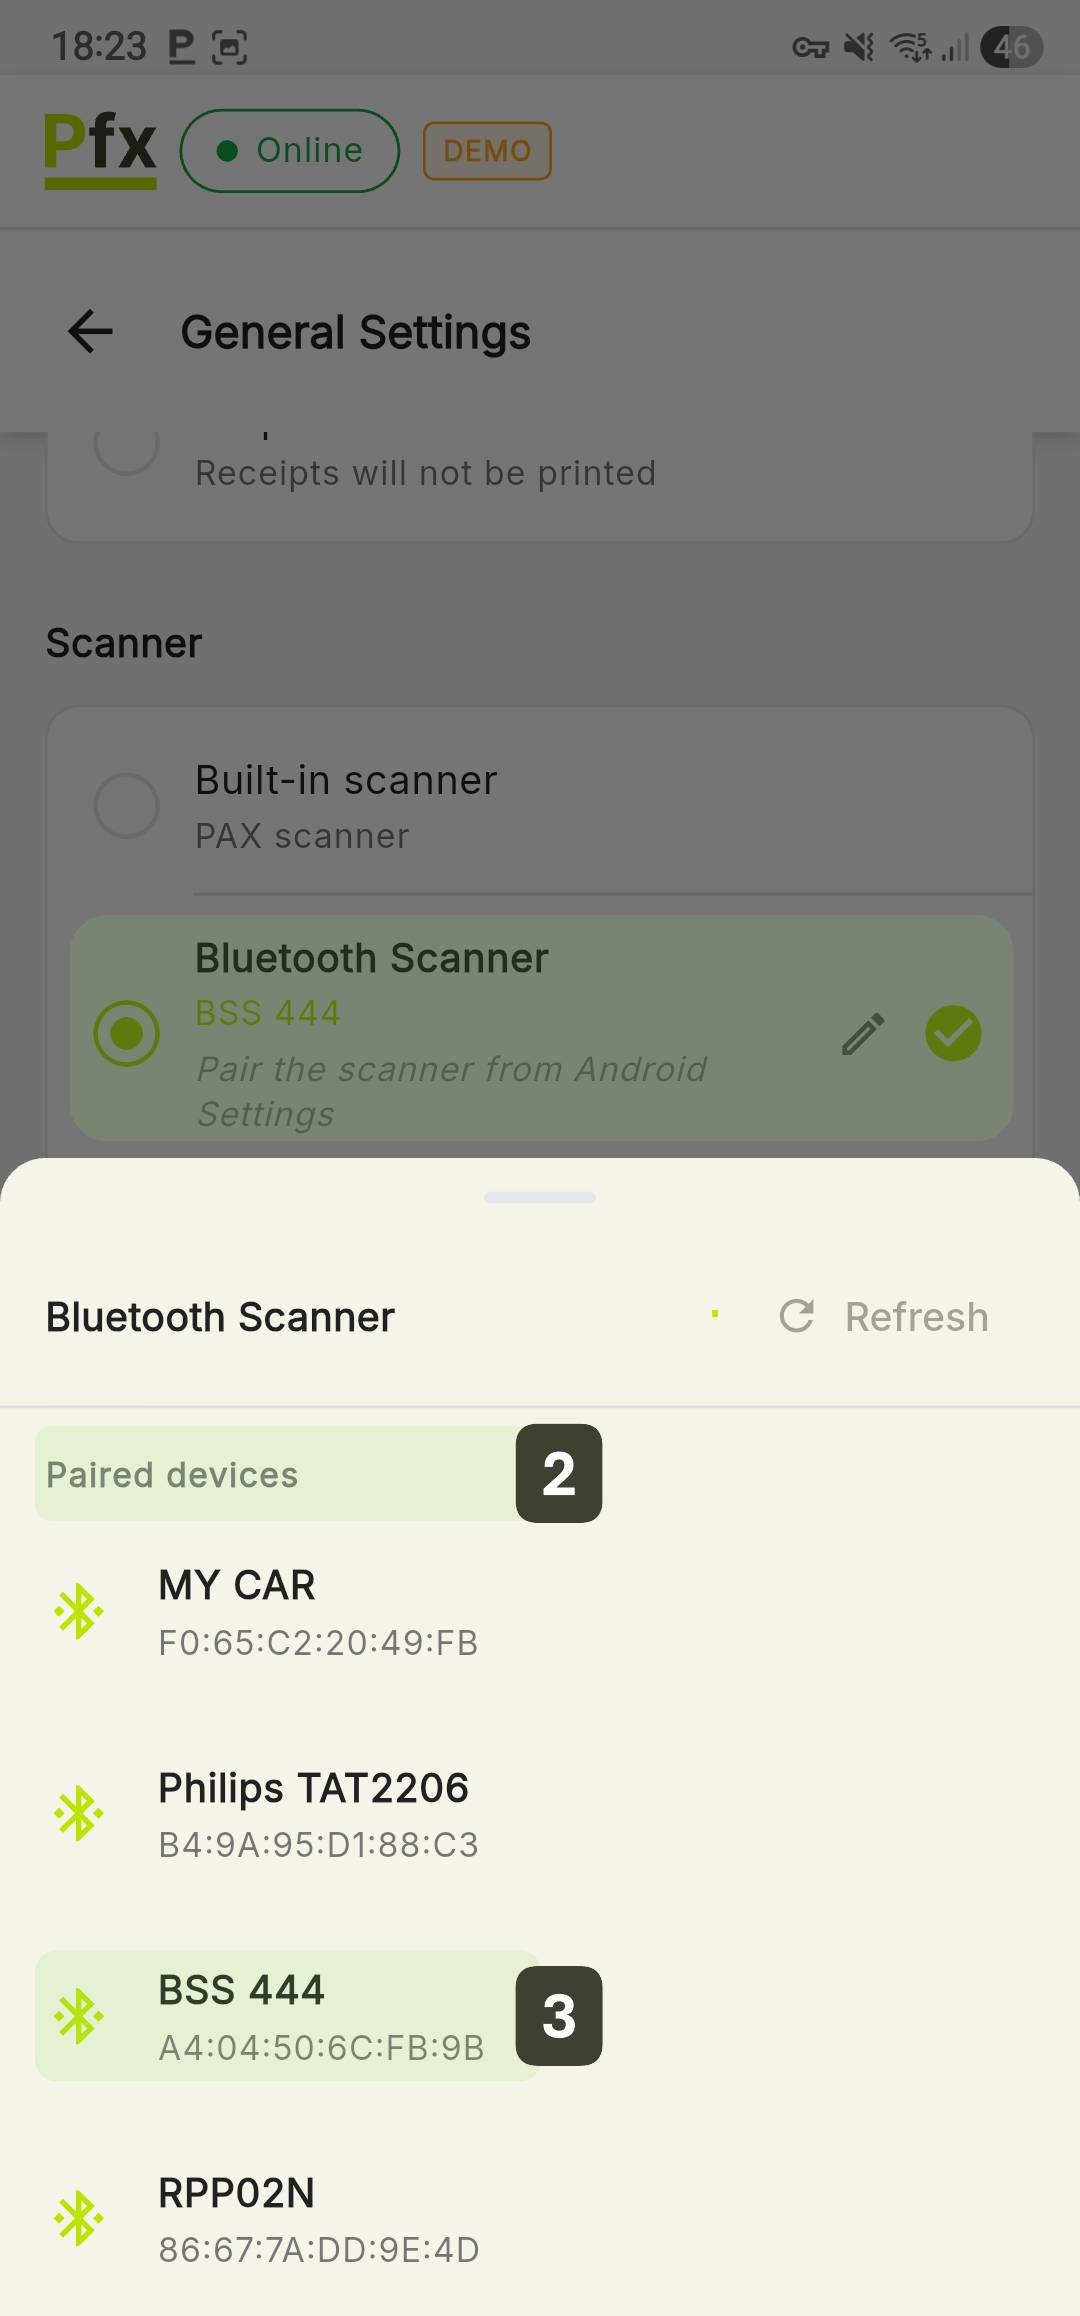
Before using a Bluetooth printer, you need to pair it from Android Settings → Bluetooth.
Scanner Configuration
The PosFix system allows quick product addition by scanning barcodes, using either the terminal's built-in hardware or external peripherals.
Built-in Scanner (Integrated)
This option is usually activated automatically once you have selected the correct hardware profile for the terminal.
Available on POS terminals (PAX, Senraise, Sunmi, iMin):
- Activates automatically when selecting the hardware device
- Scanning is performed using the physical side buttons located on the terminal
Bluetooth Scanner (External)
To use a wireless barcode reader, follow these steps:
- Select Bluetooth Scanner as the scanner type
- The system displays:
- Paired Devices: Scanners previously connected
- Discovered Devices: New scanners detected nearby
- Select the scanner from the list
Once selected, it will appear displayed under the "Bluetooth Scanner" title.
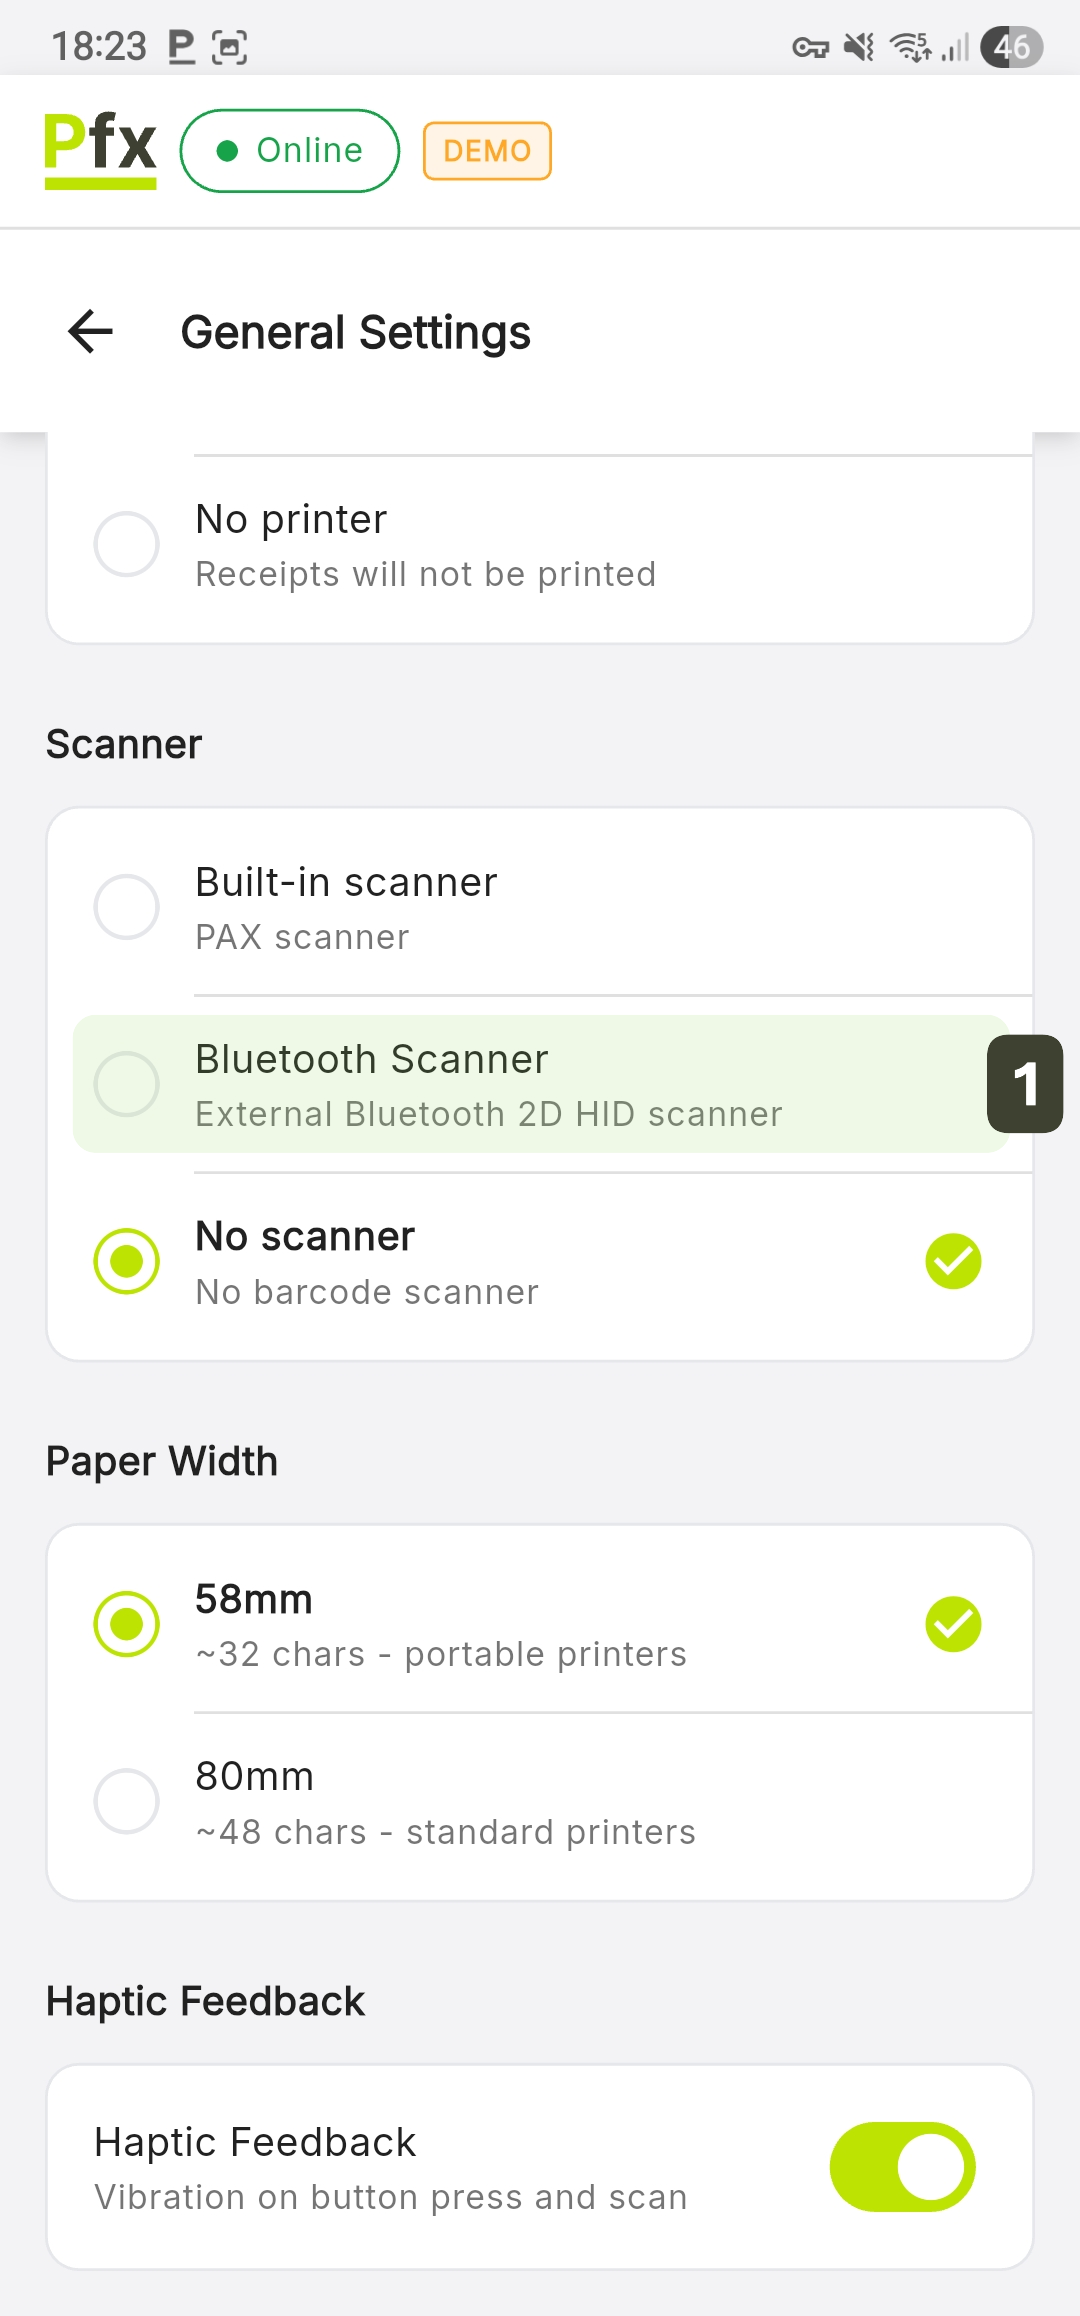
Paper Width
This setting defines how text is formatted and aligned on the fiscal receipt, ensuring that no information is cut off at the edges. Selecting the wrong width can lead to an unprofessional appearance of the document or the inability to read the QR code.
| Option | Technical Description | Description |
|---|---|---|
| 58mm | Approximately 32 characters per line | Specific for mobile, portable printers and compact POS terminals |
| 80mm | Approximately 48 characters per line | Standard for printers usually used at counters with high volume of sales |
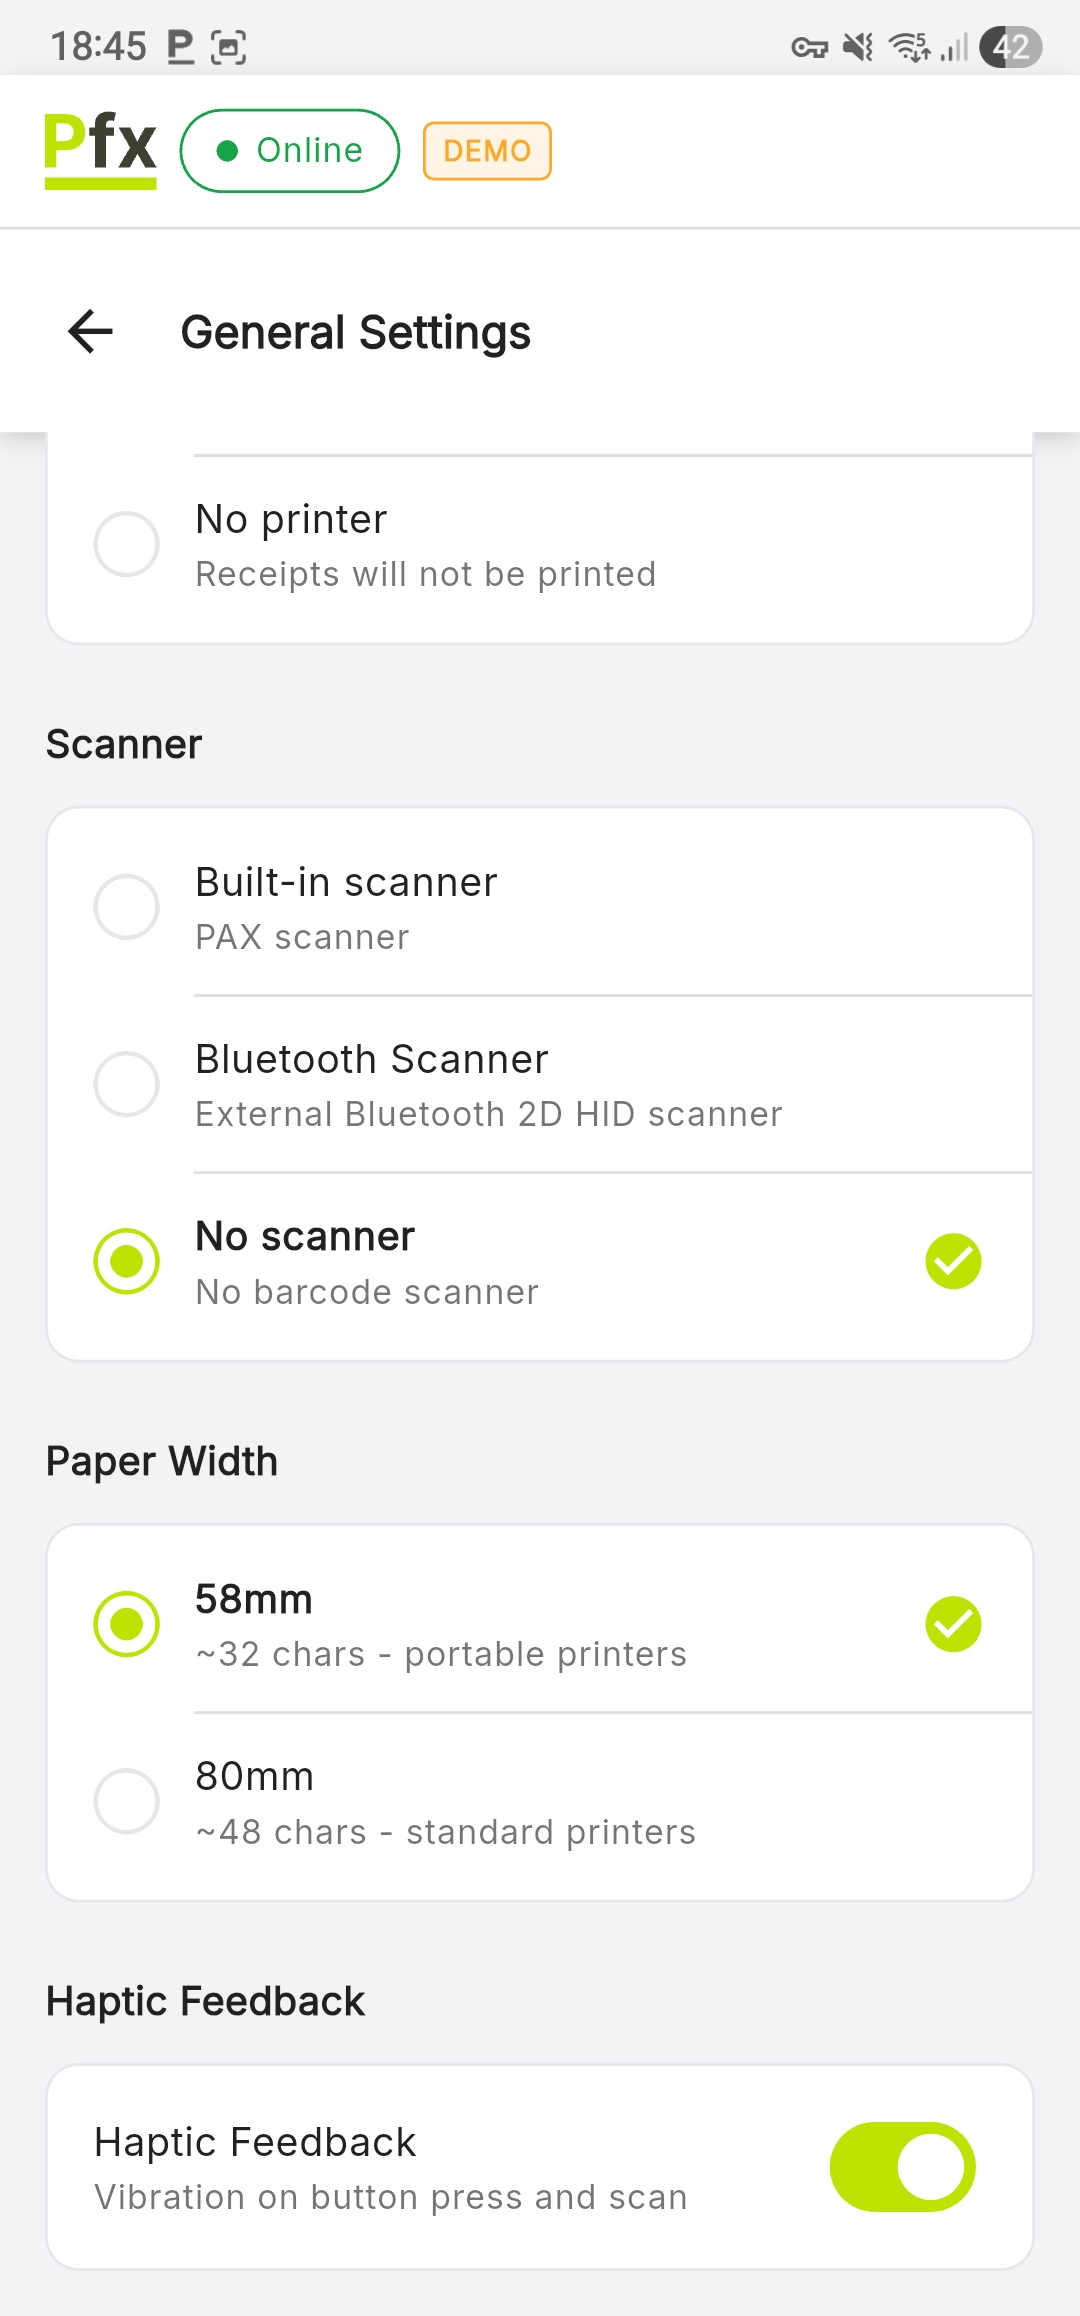
Haptic Feedback
This feature provides physical confirmation to ensure the operator that their action has been registered by the system, being extremely useful in noisy or dynamic work environments.
Enable or disable vibration during interface interactions:
| State | Description |
|---|---|
| Enabled | Short vibration when pressing buttons |
| Disabled | No tactile feedback |
Enable haptic feedback in noisy environments to tactically confirm performed actions.
